1.
Open the Outlook (classic) Application on your computer
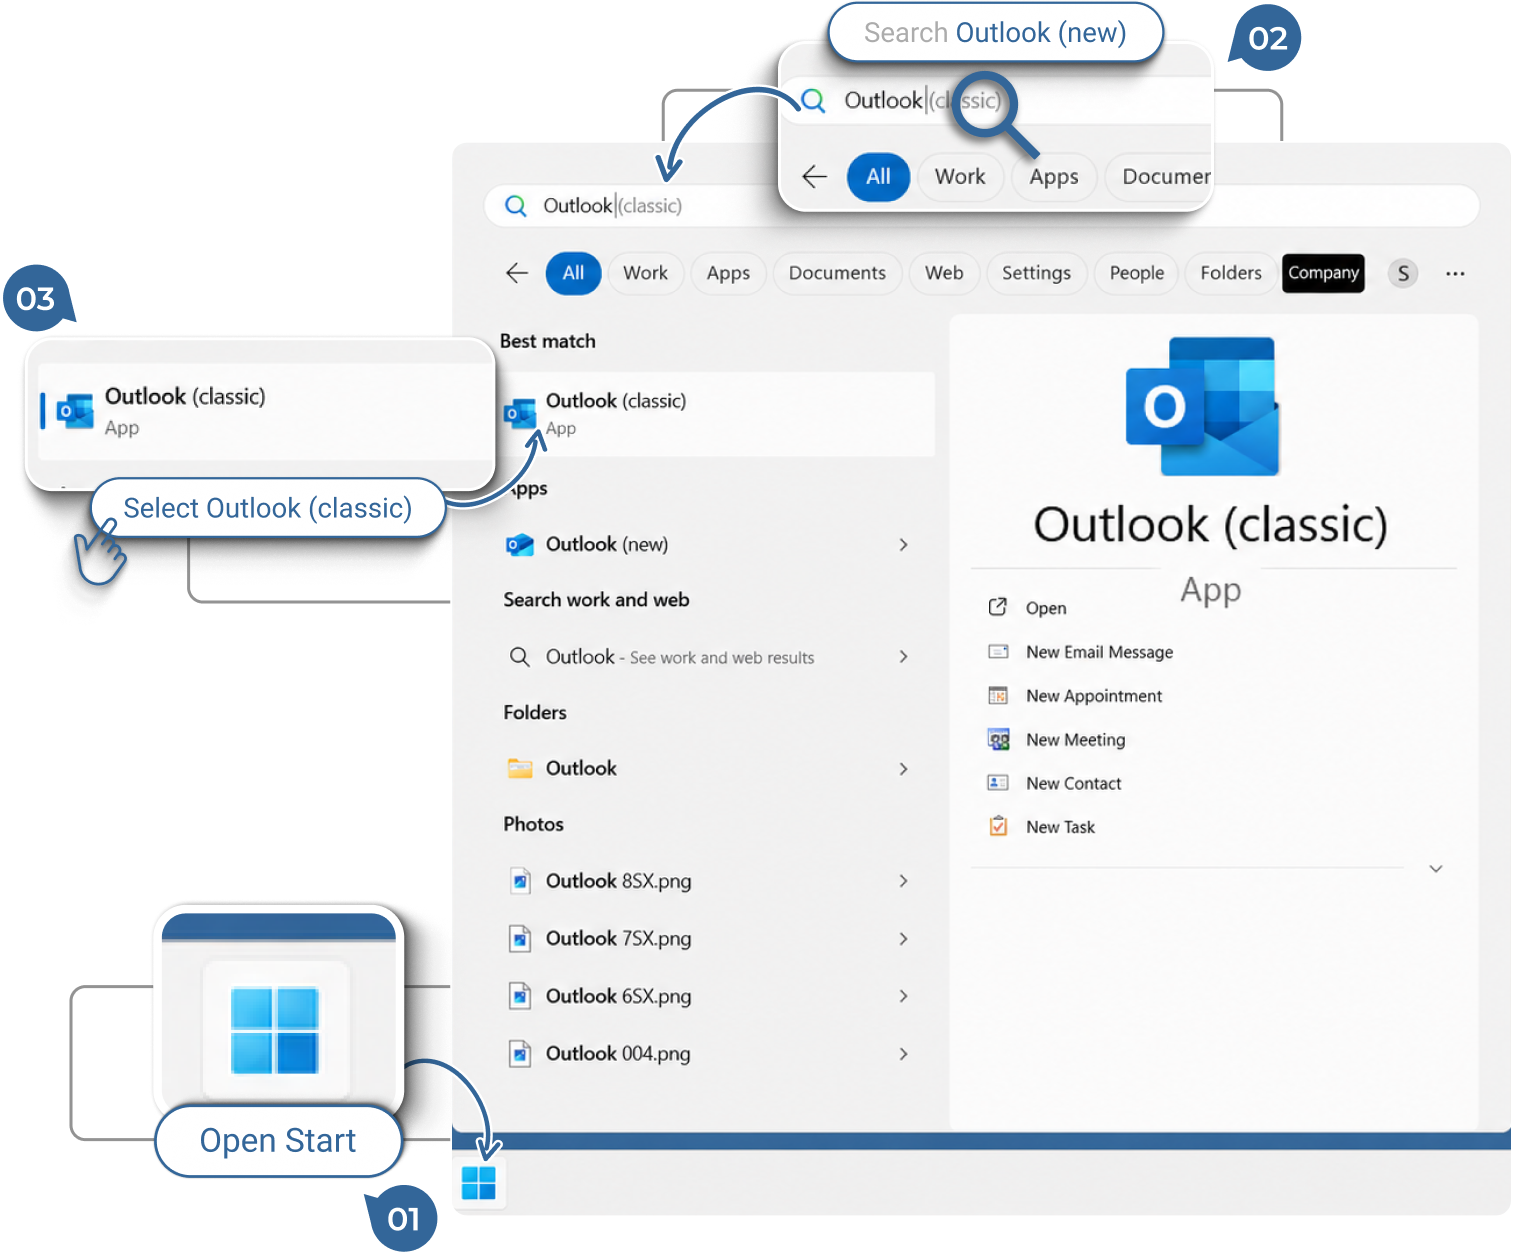
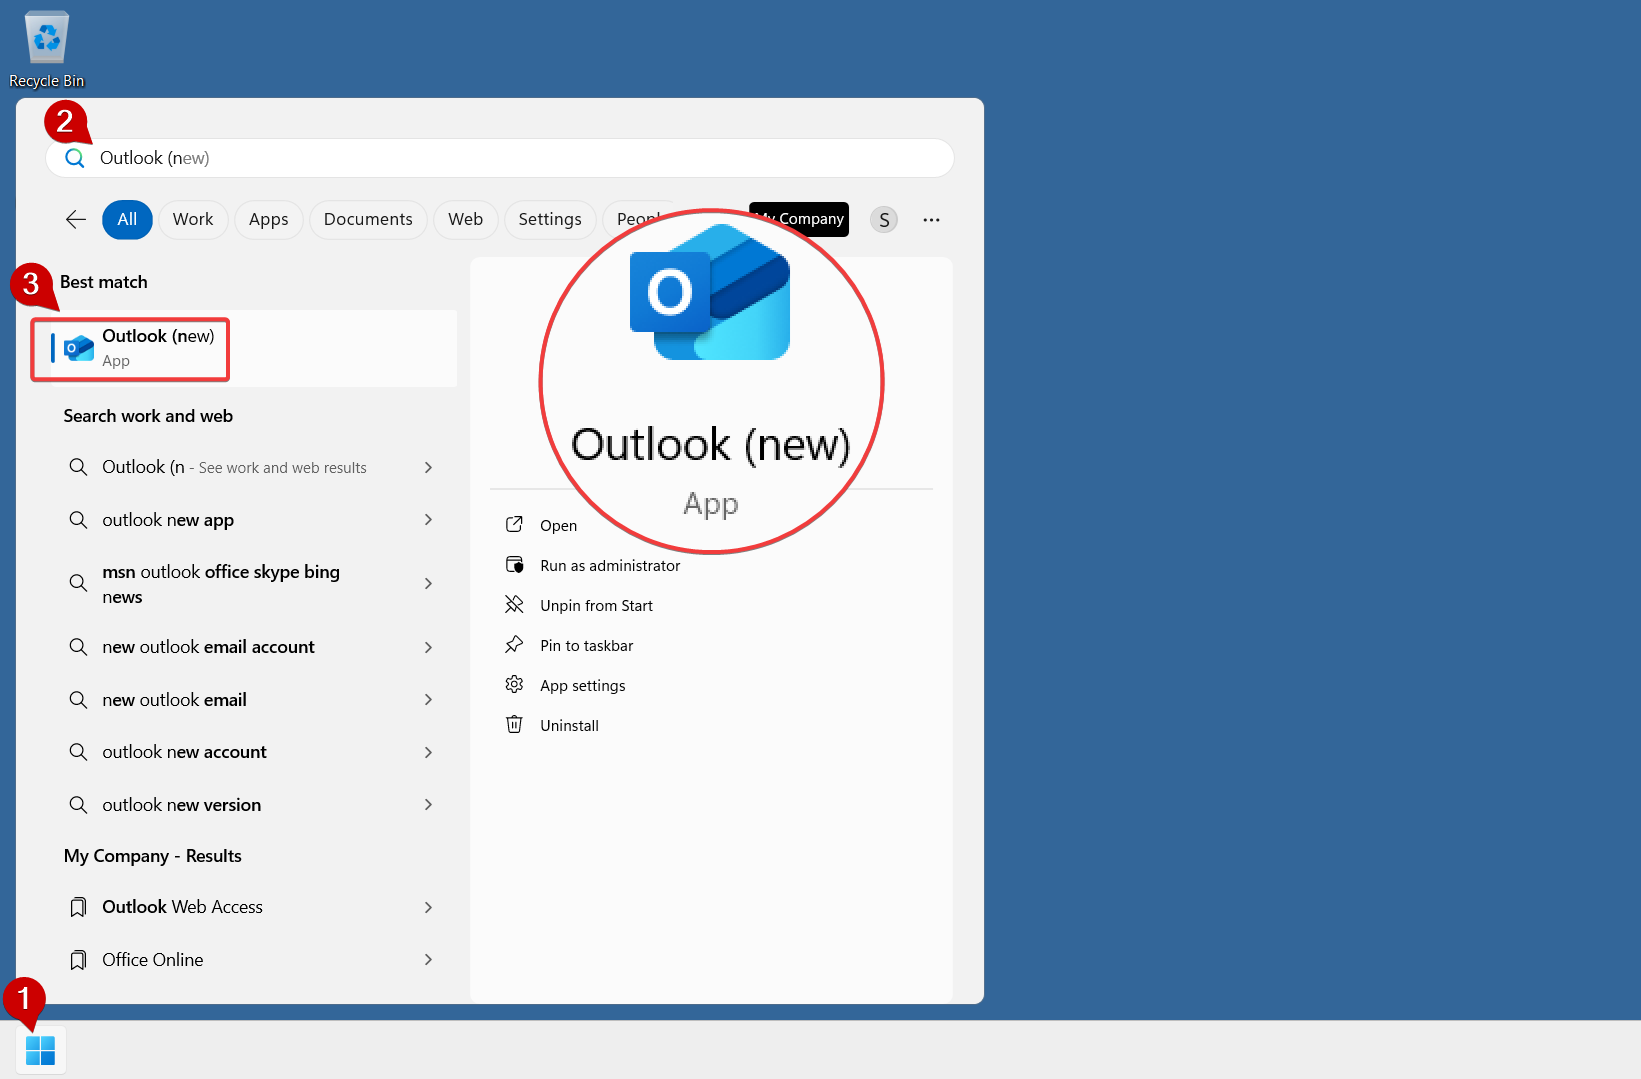
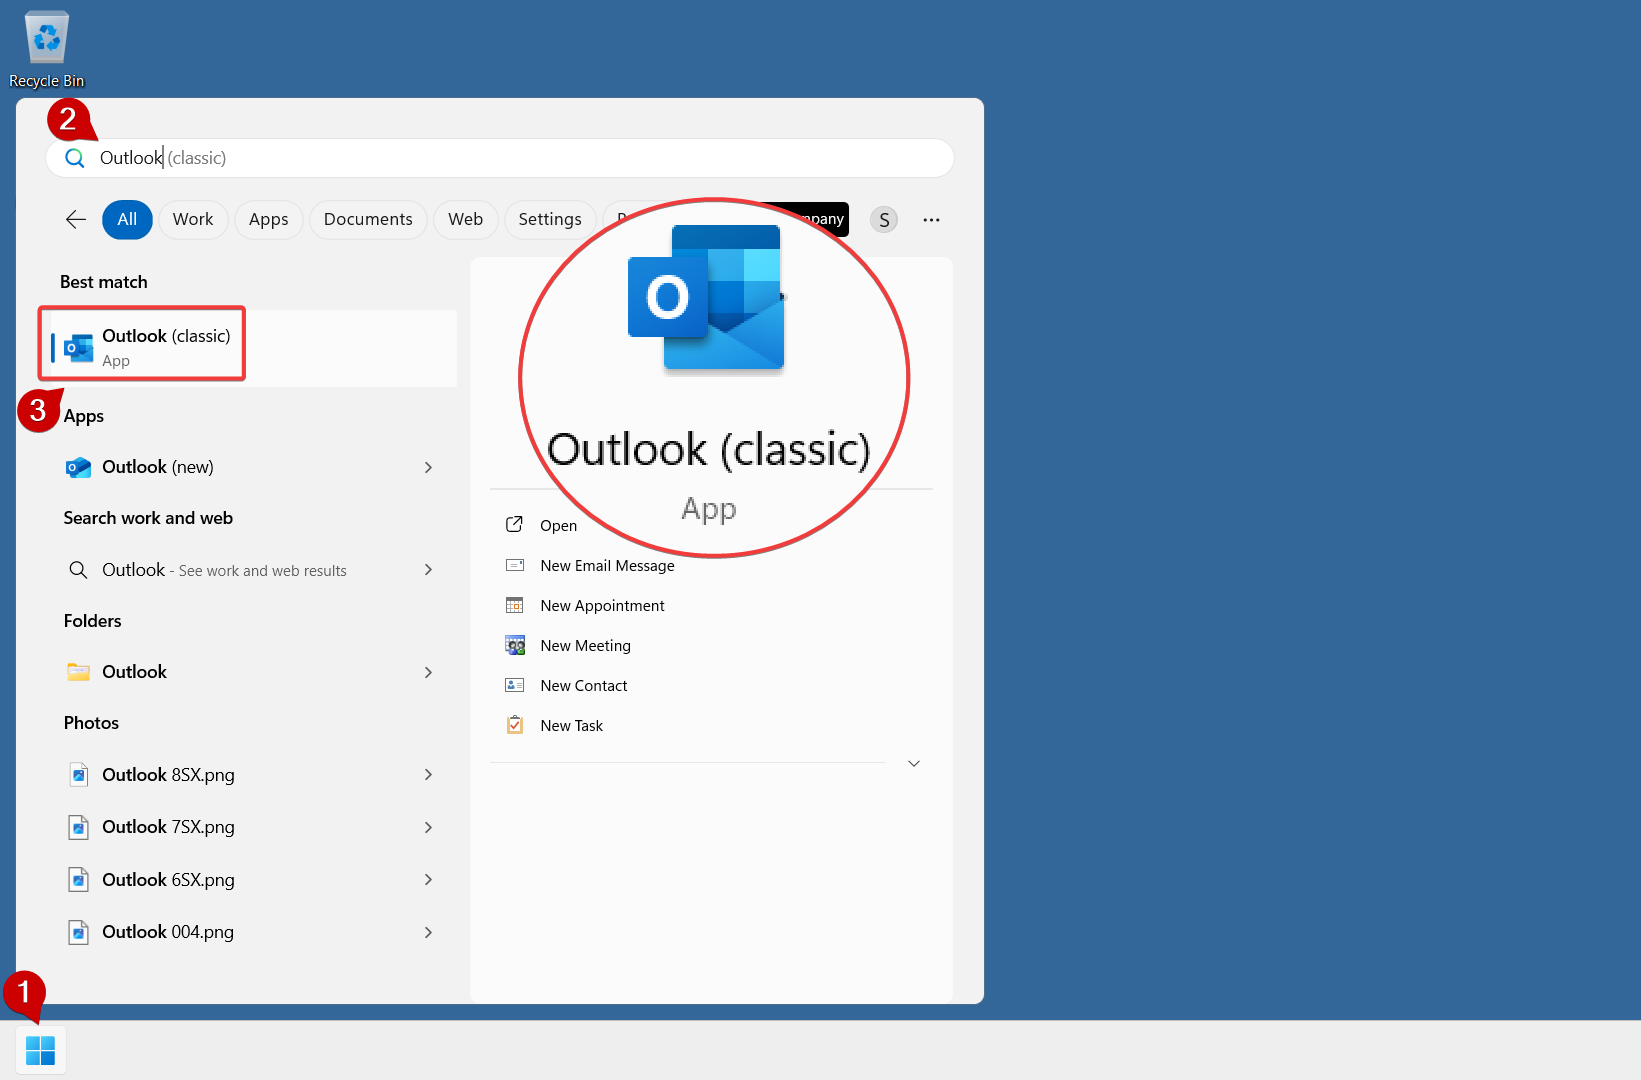
Open Outlook by clicking on the “Start” button or press the Windows Key on your keyboard.
-
Click the Start Menu (Windows icon) in the bottom-left corner of your screen.
-
Type Outlook (classic) in the search bar.
-
Click on Outlook (classic) App from the search results to open it.
Outlook will launch and your mailbox appears.
2.
Locate your Shared Mailbox
Once Outlook (classic) is open, you can find the shared mailbox in the left-hand Folder Pane below your primary email account. You may need to expand the mailbox to see its folders.
-
In the left Folder Pane, locate the shared mailbox. Click the expand arrow (>) next to the shared mailbox name to reveal its folders.
-
Click on Inbox or any other folder you need to access.
3.
Enable Send From Field
When responding to a message addresssed to the shared mailbox it is not necessary to specify the From address. When composing a new email you must select the shared mailbox as the “From” address otherwise your account will be the sender.
-
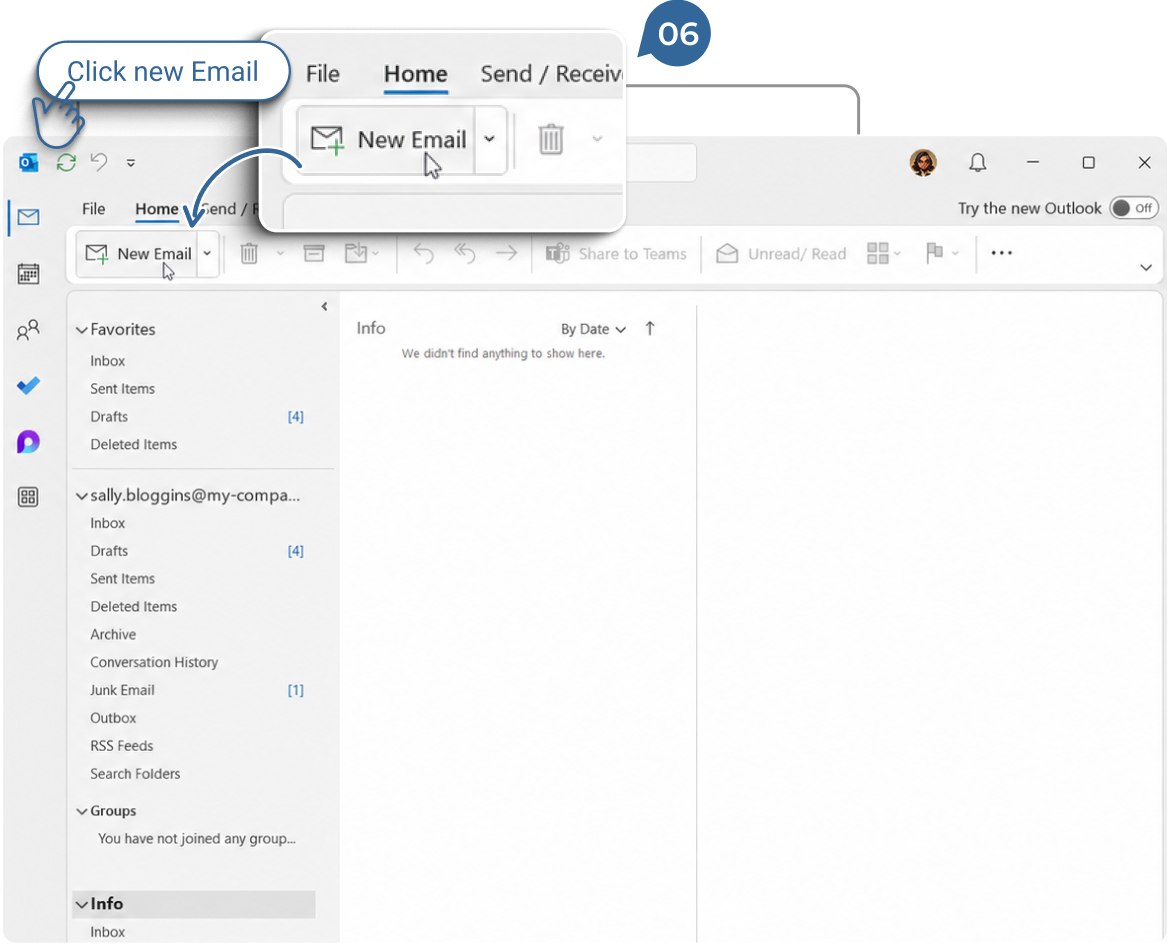
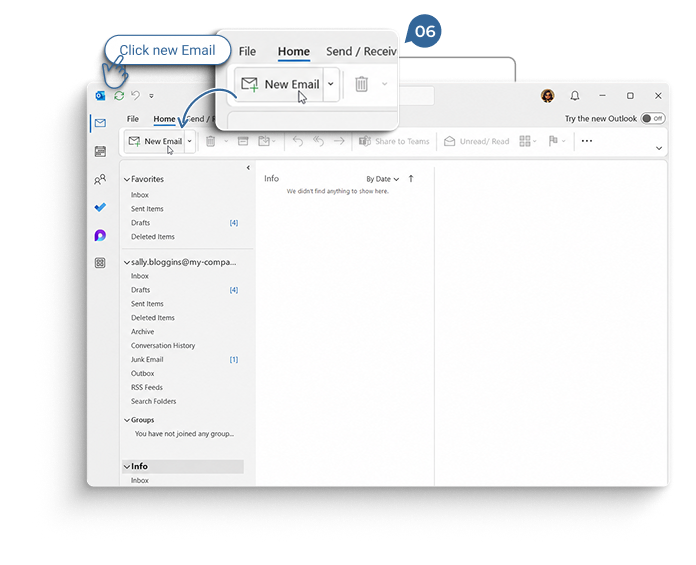
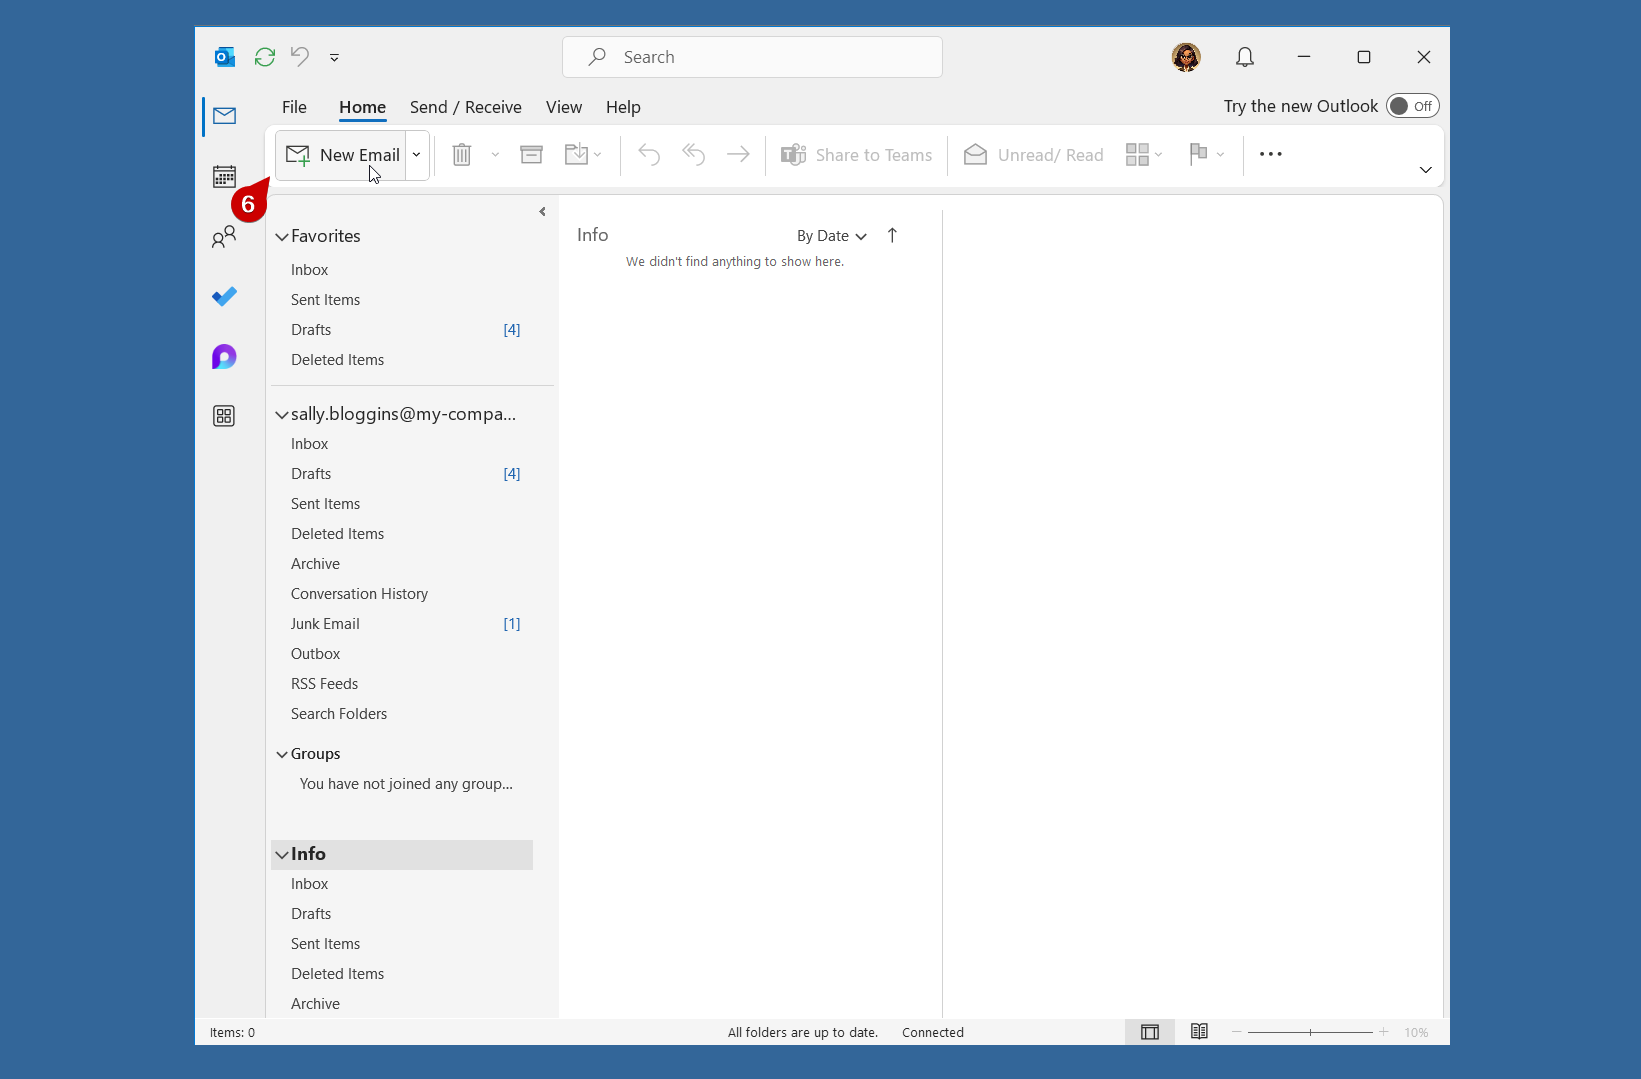
Click “New Email” to start a new message.
-
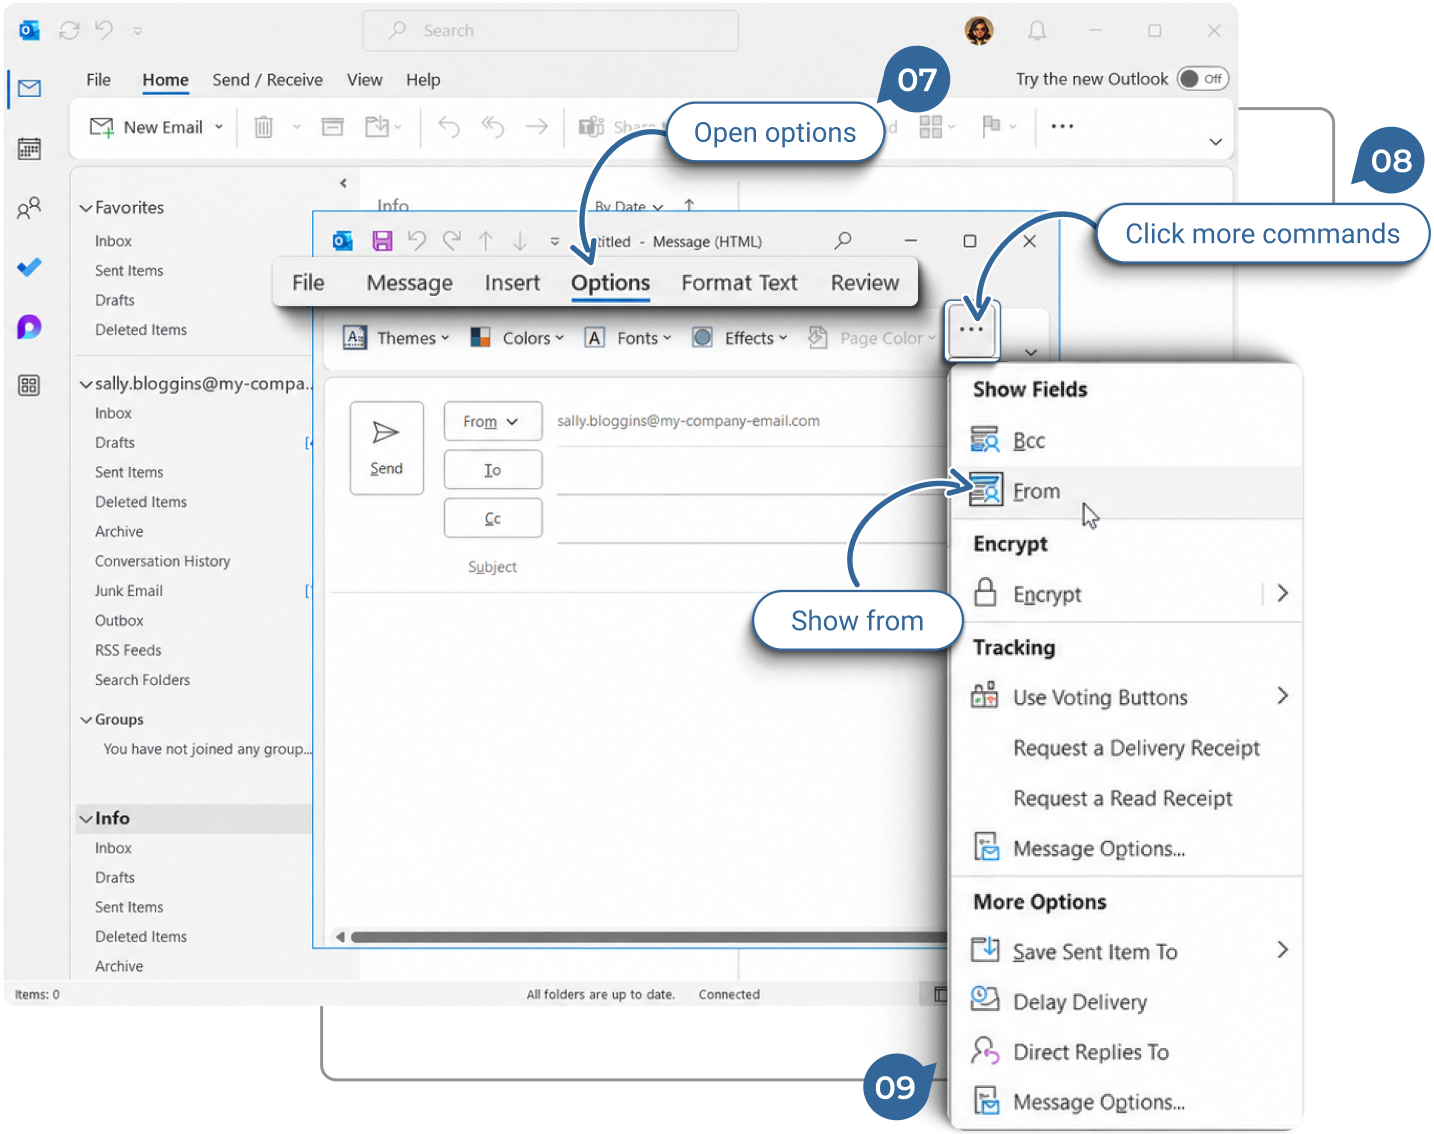
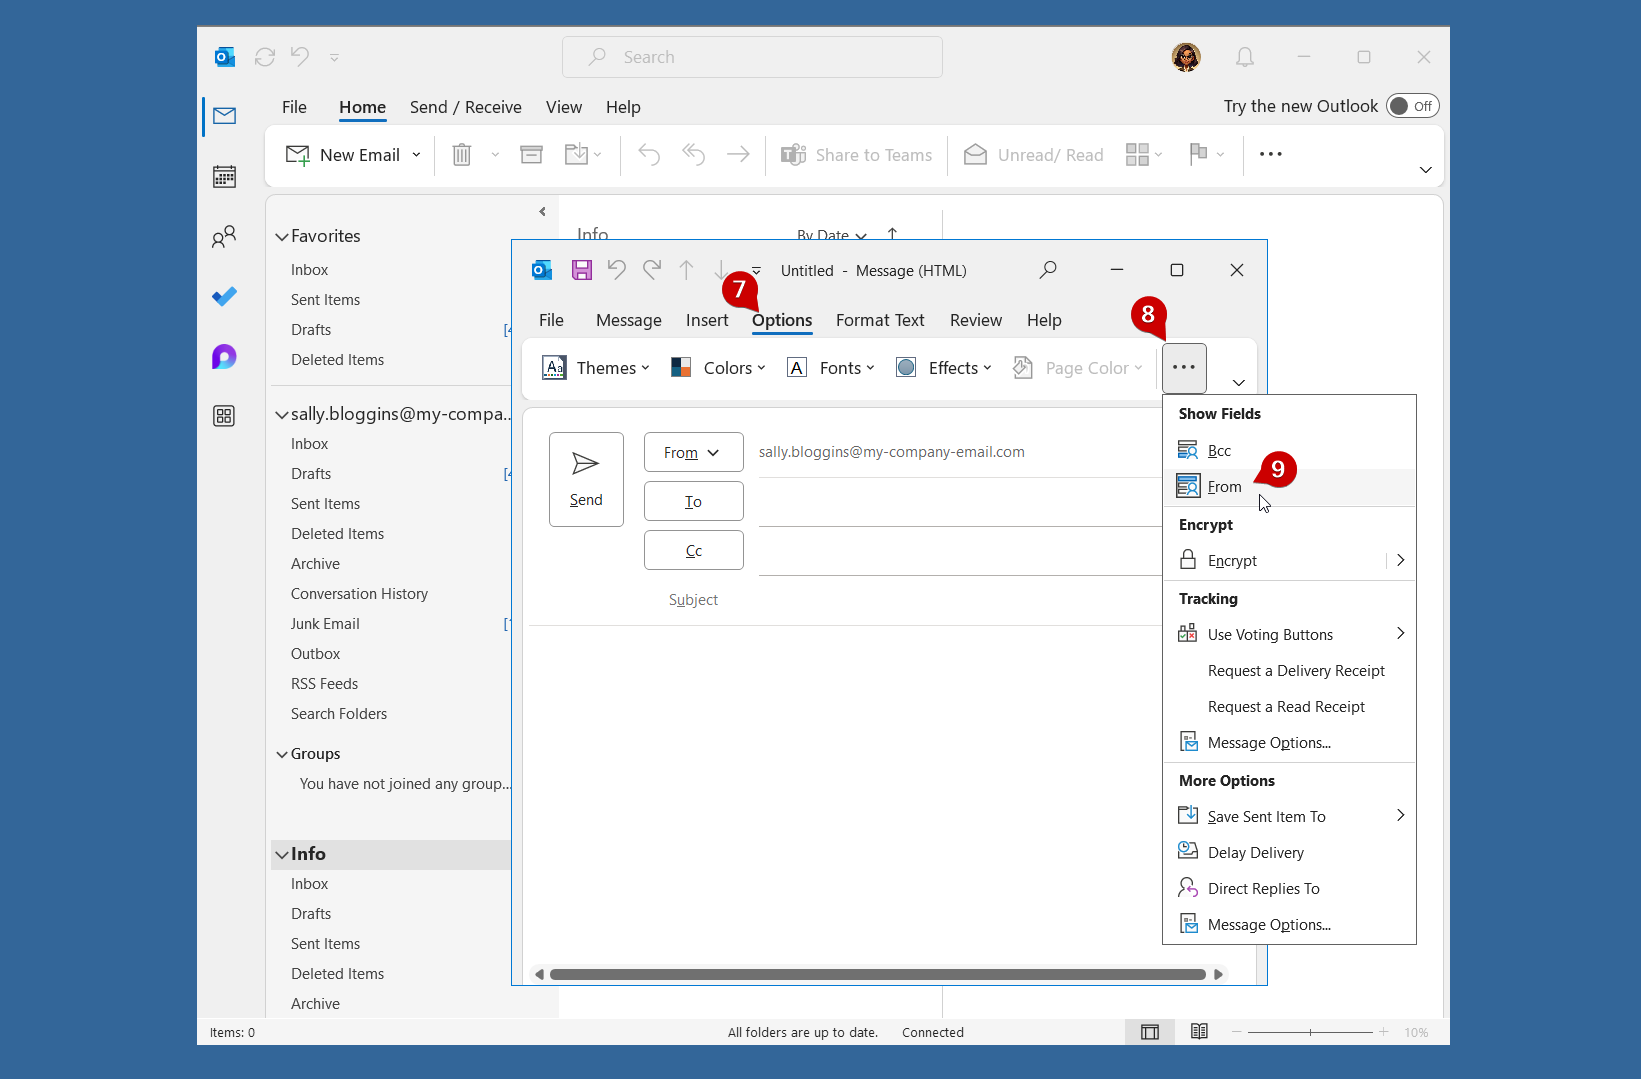
Select “Options” from the menu bar.
-
Then click on the “More commands” icon (three dots …) on the far right of the sub menu.
-
Select “From” under “Show Fields”.
4.
Send an email from the Shared mailbox
Once the From field is enabled you can choose the email address to send messages from the Shared mailbox.
-
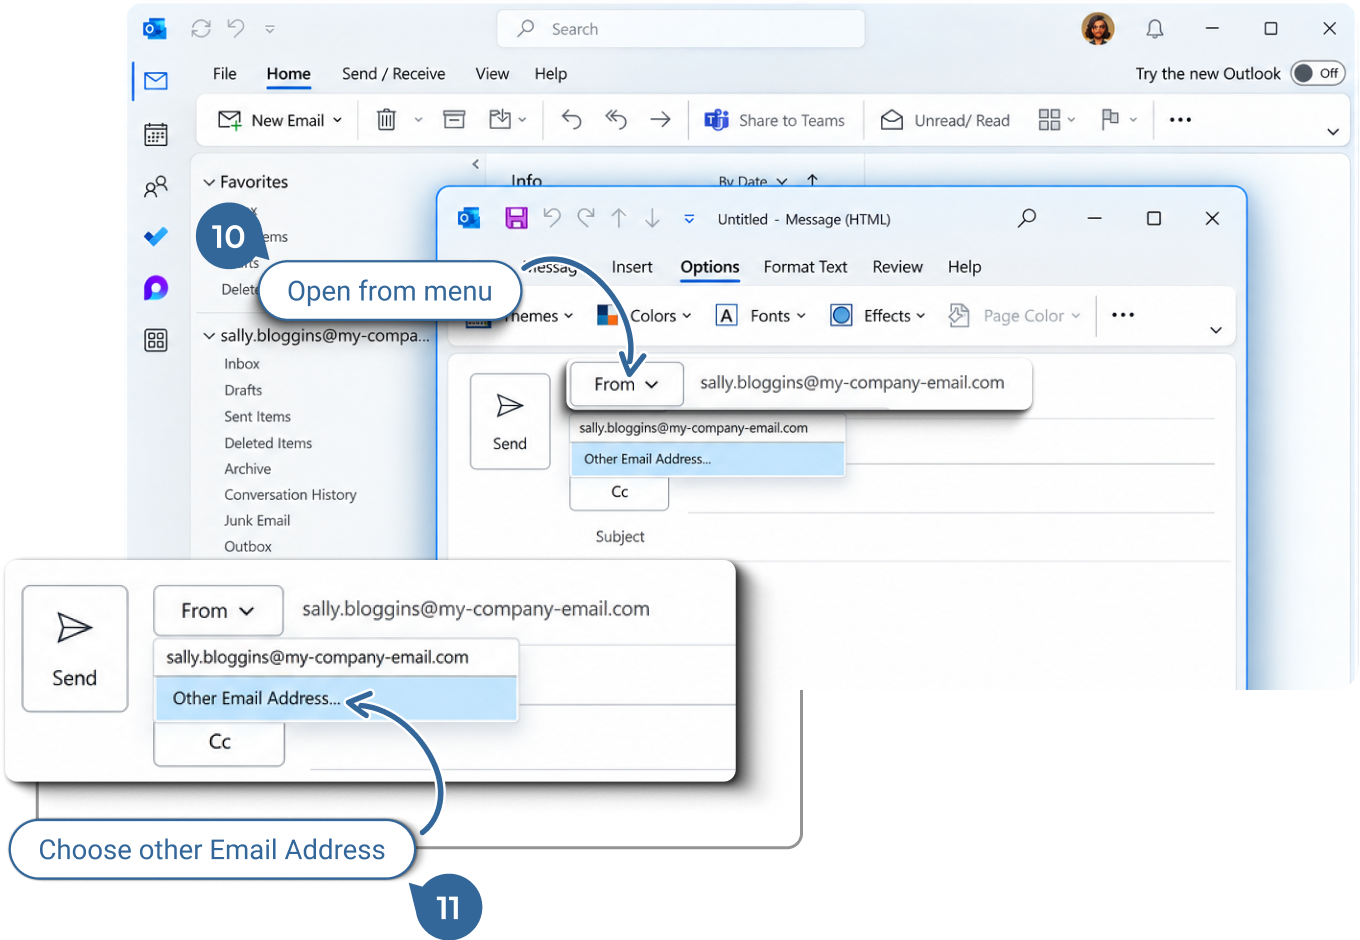
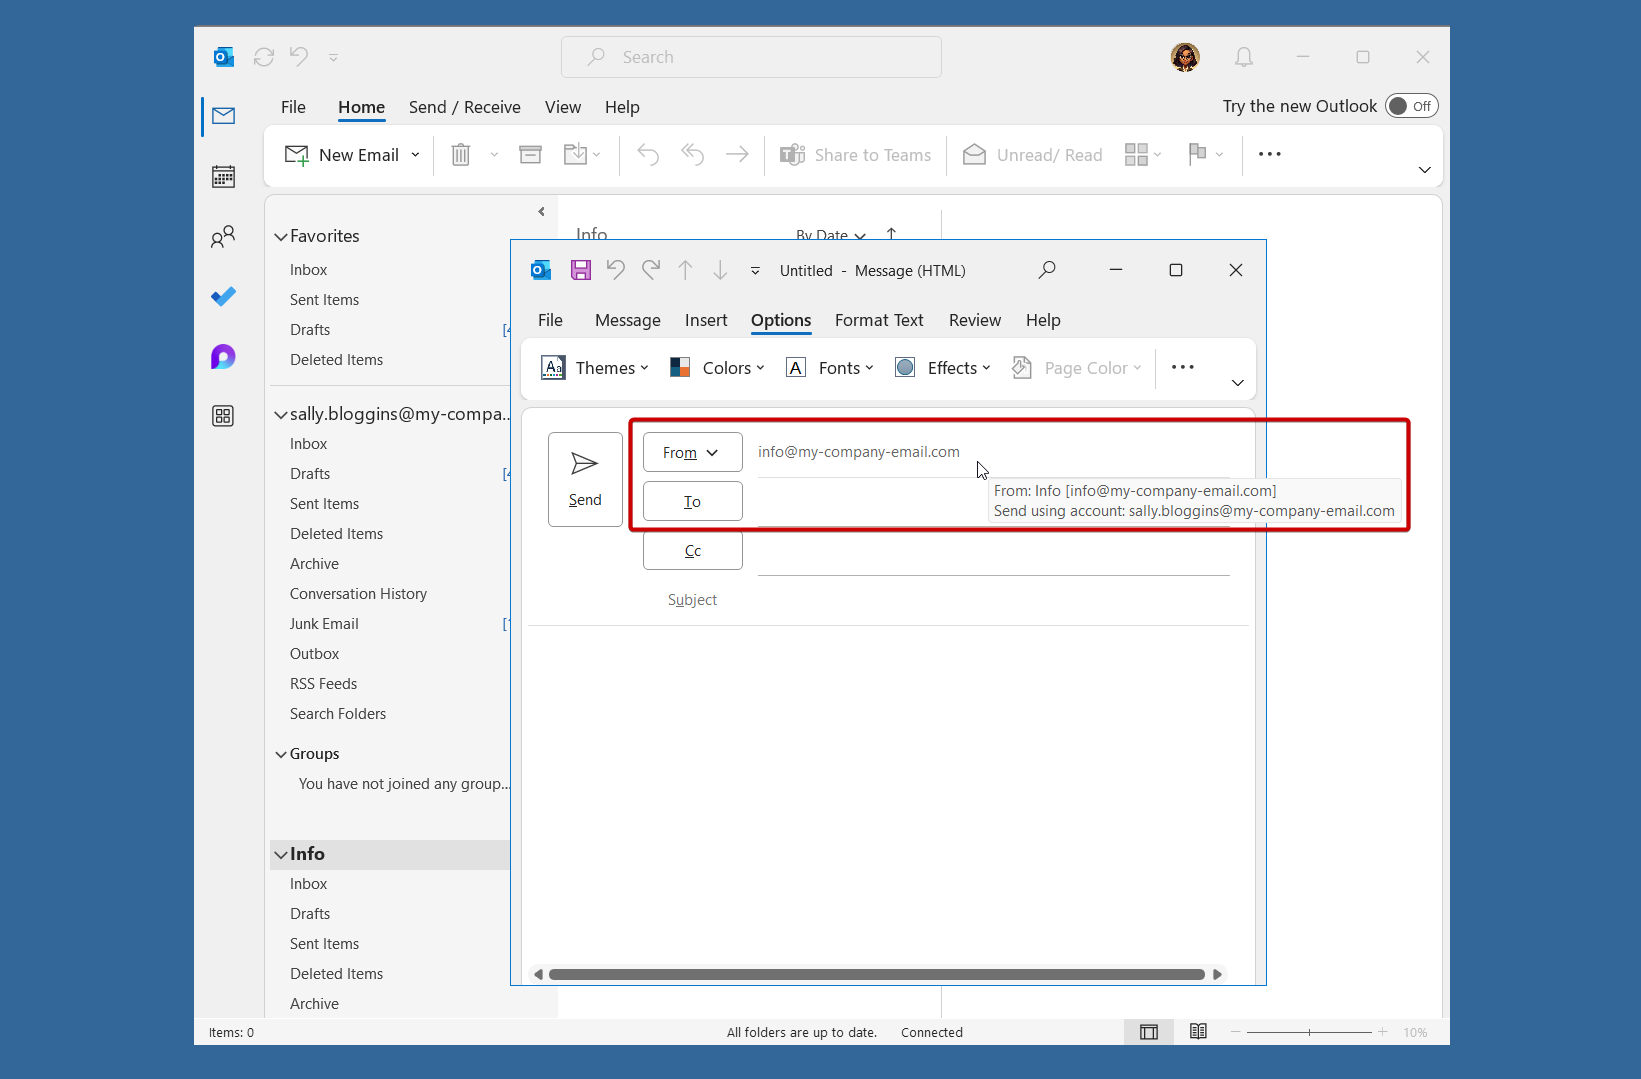
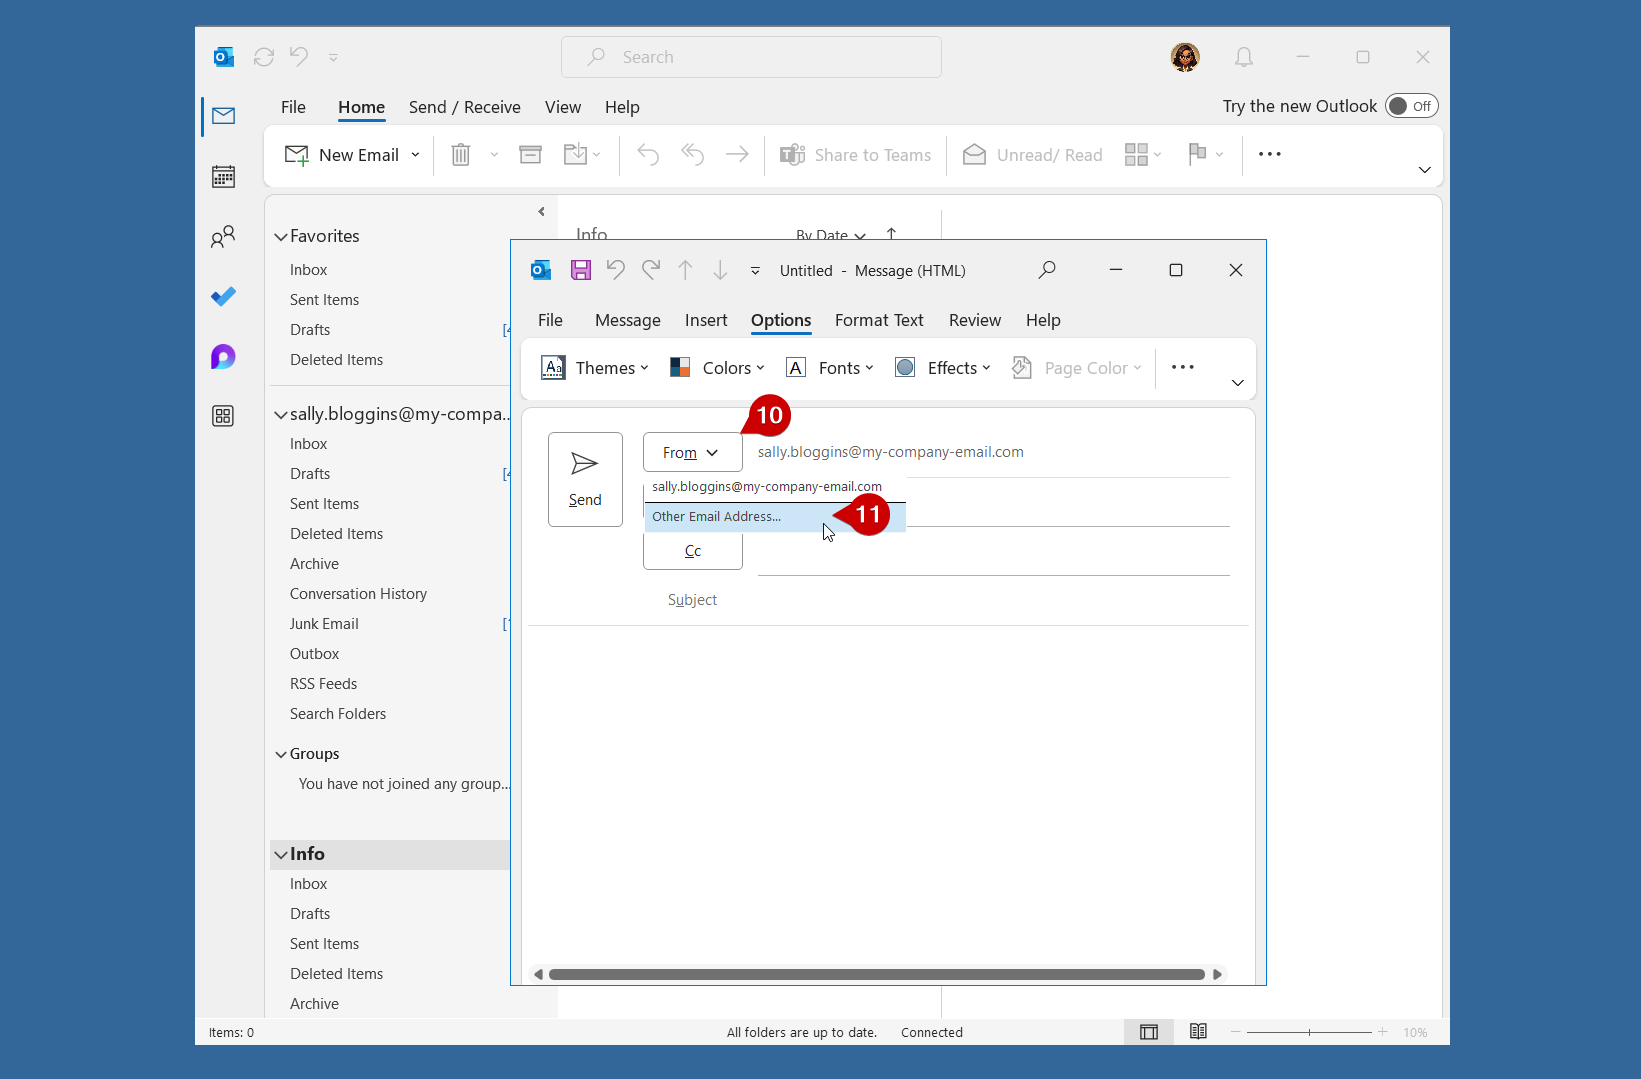
Click on the “From” dropdown to see the stored email addresses that you can send from.
-
You will need to enter the correct full email address by selecting “Other Email Address…” if this is the first time sending from the Shared mailbox.
-
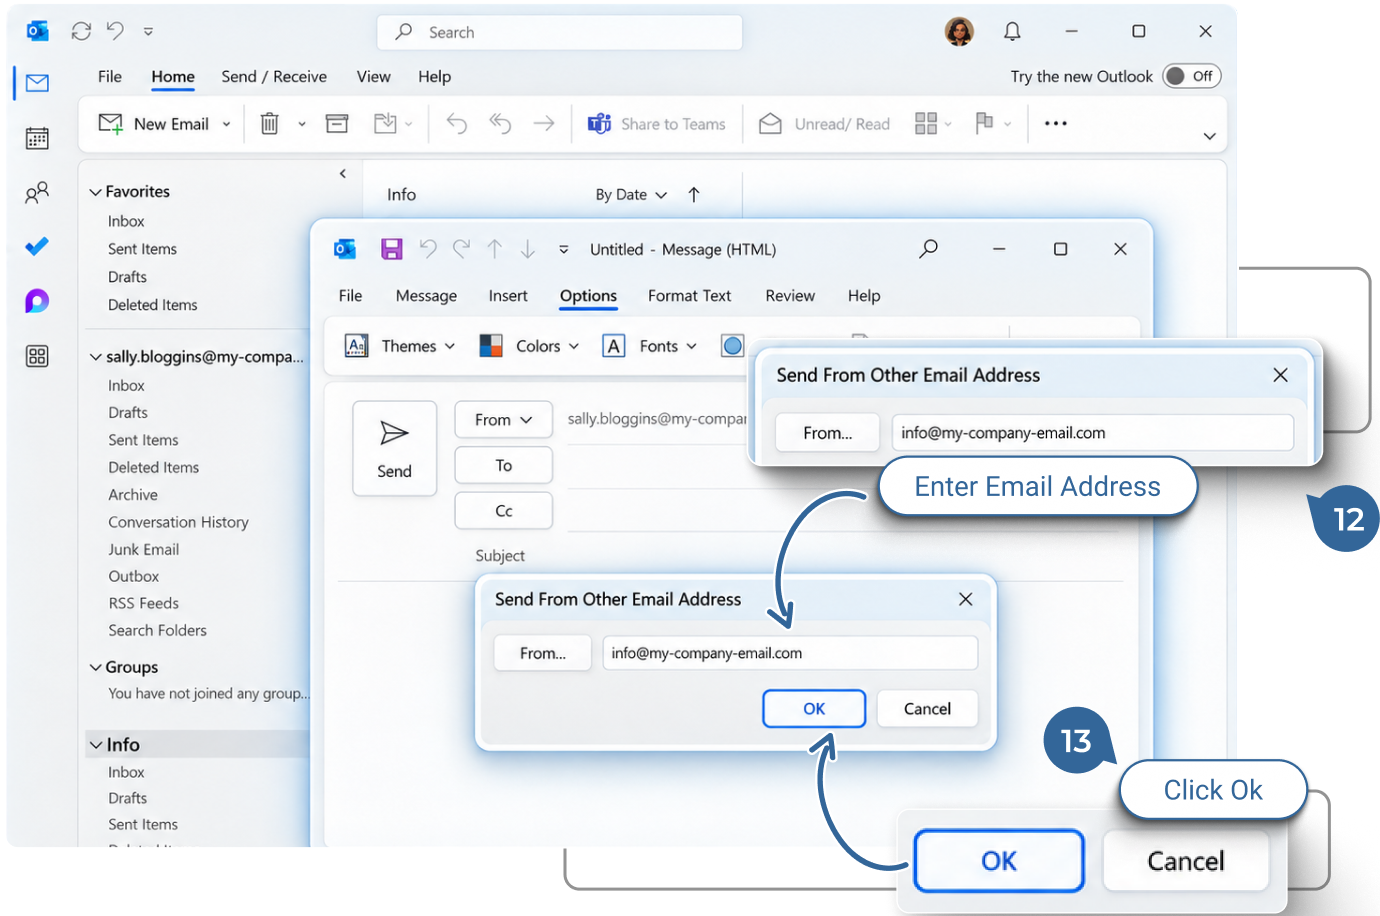
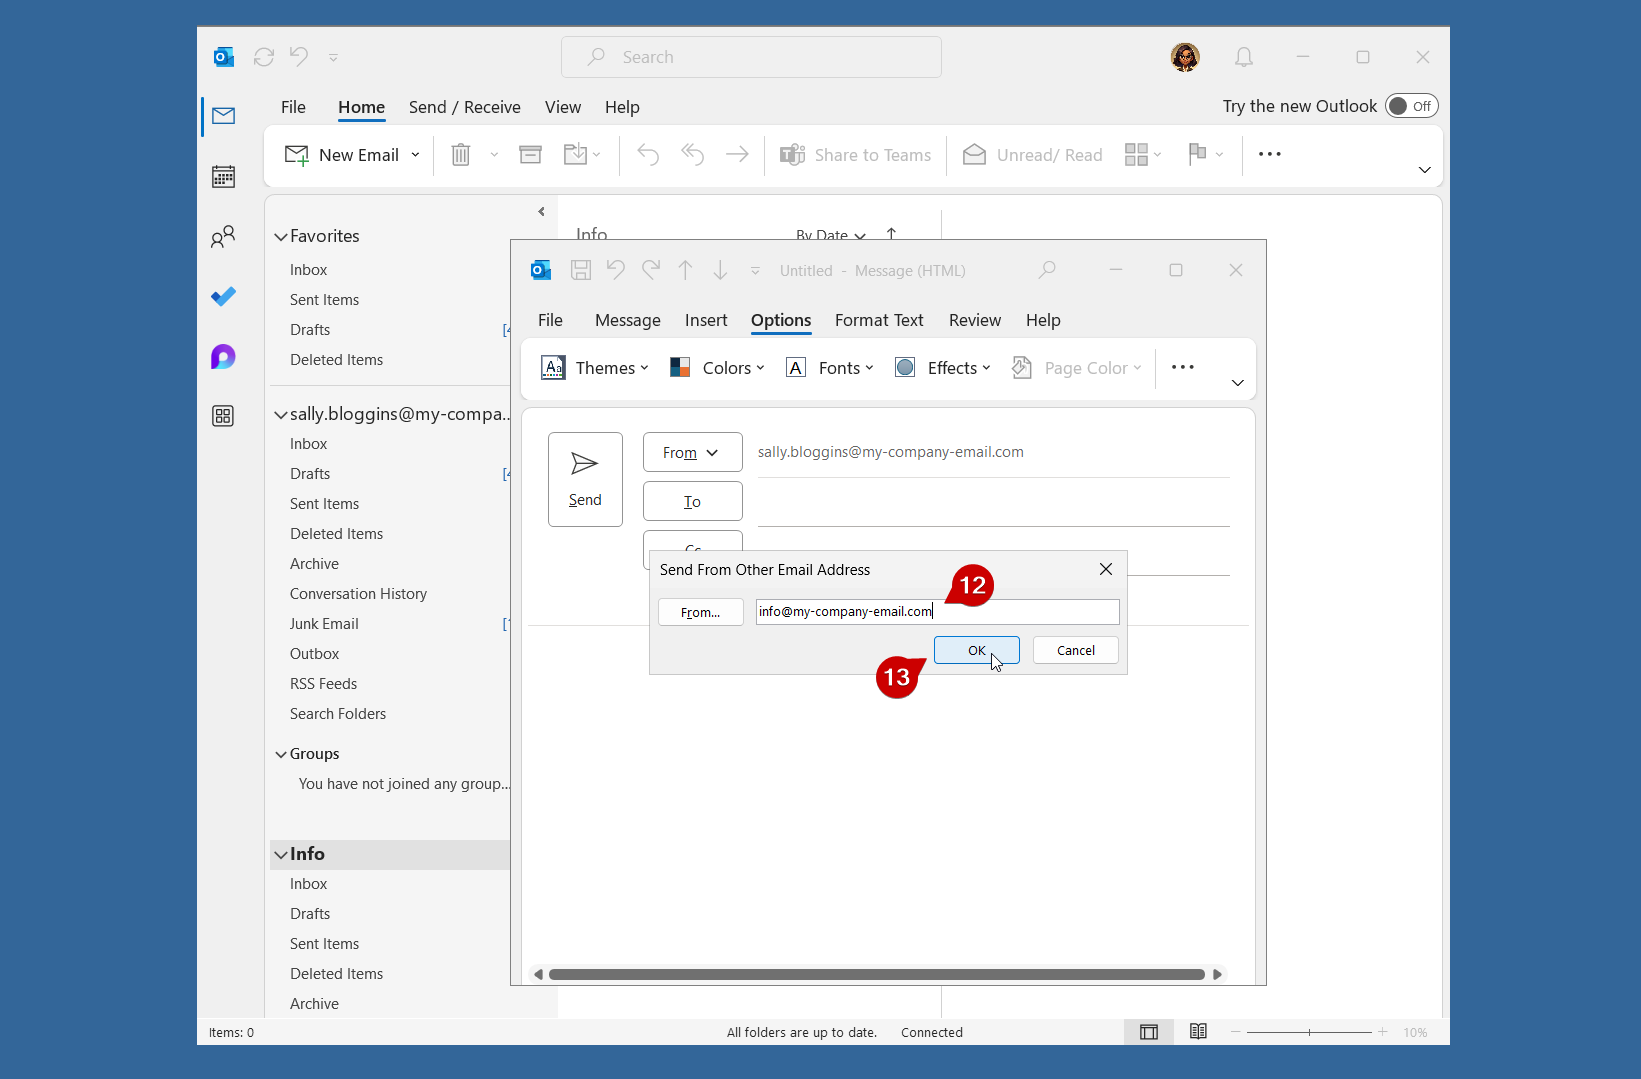
Enter the Shared mailbox address into the “Send From Other Email Address” textbox.
-
Click OK to add the entered email address into the “From field”.
It is only necessary to enter the send from address once for Outlook to rember it, the address will remain in the dropdown allowing you to simply select it in the future.