1.
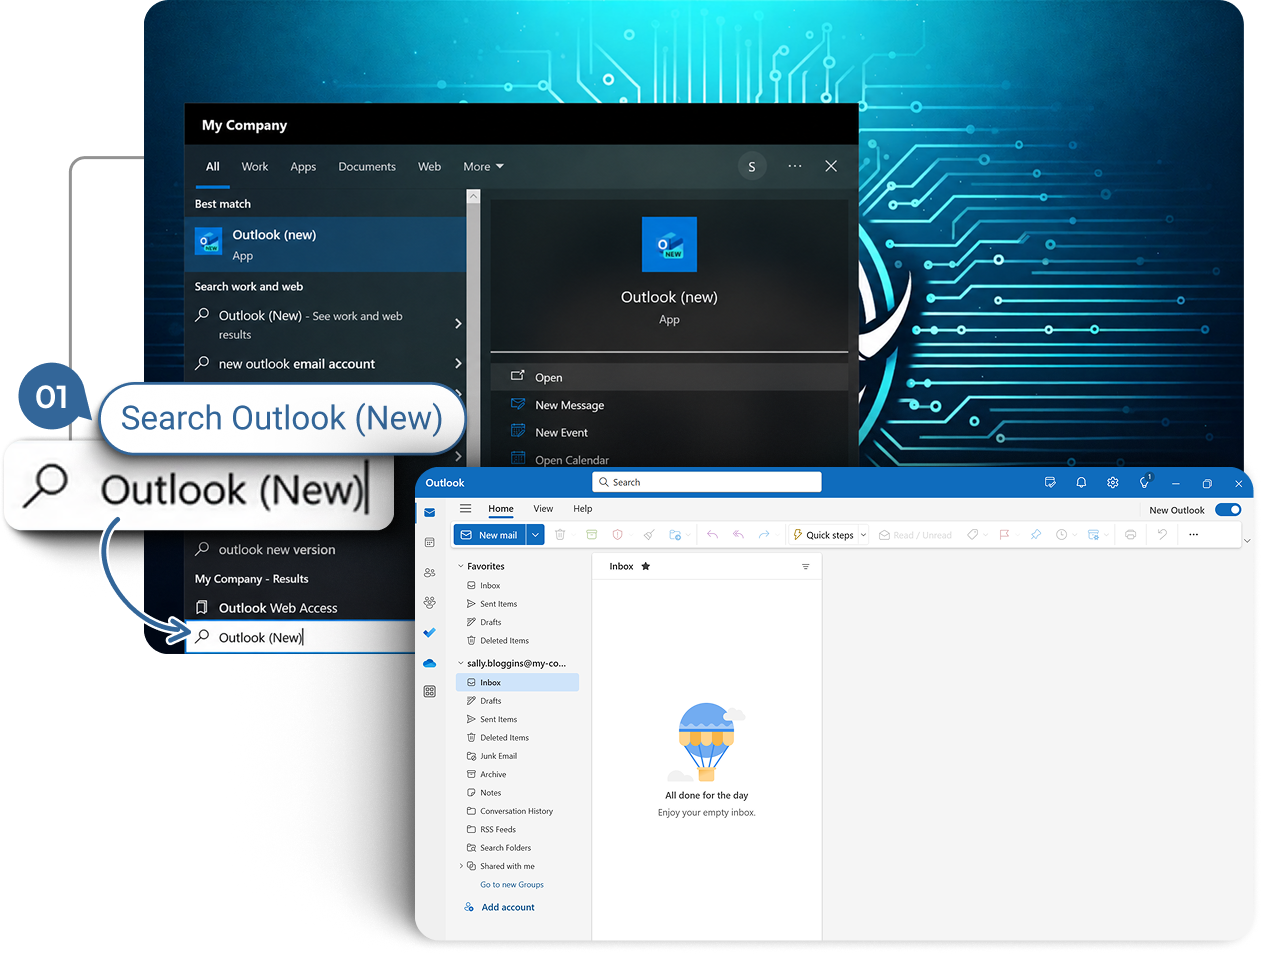
Open the Outlook (new) Desktop application on your computer
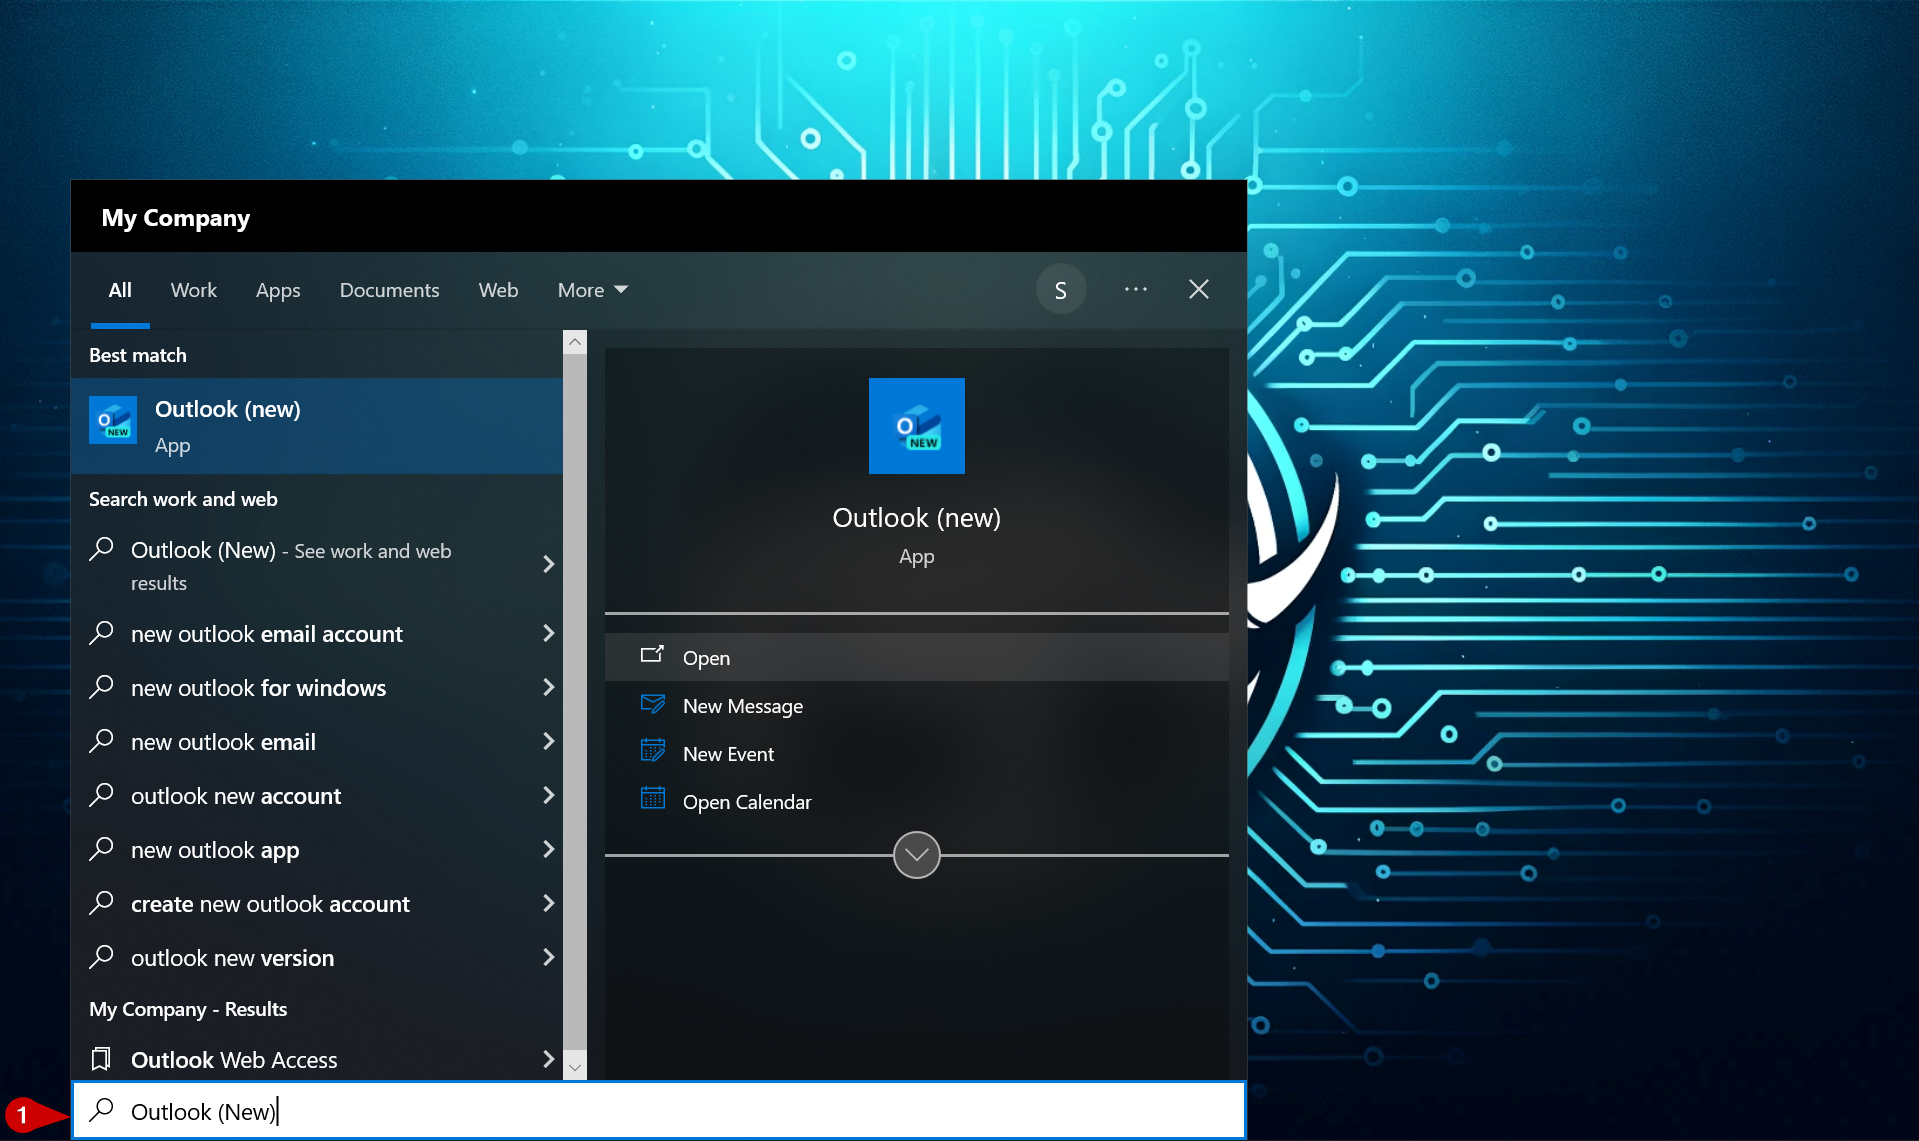
Open the Outlook (new) application using the shortcut on your desktop or task bar. If you can’t find it, you can click on the “Start” button or press the Windows Key on your keyboard.
-
Type “Outlook (new)” into the search box at the bottom of the Start Menu and click on the “Outlook (new)” icon that will appear in the search results.
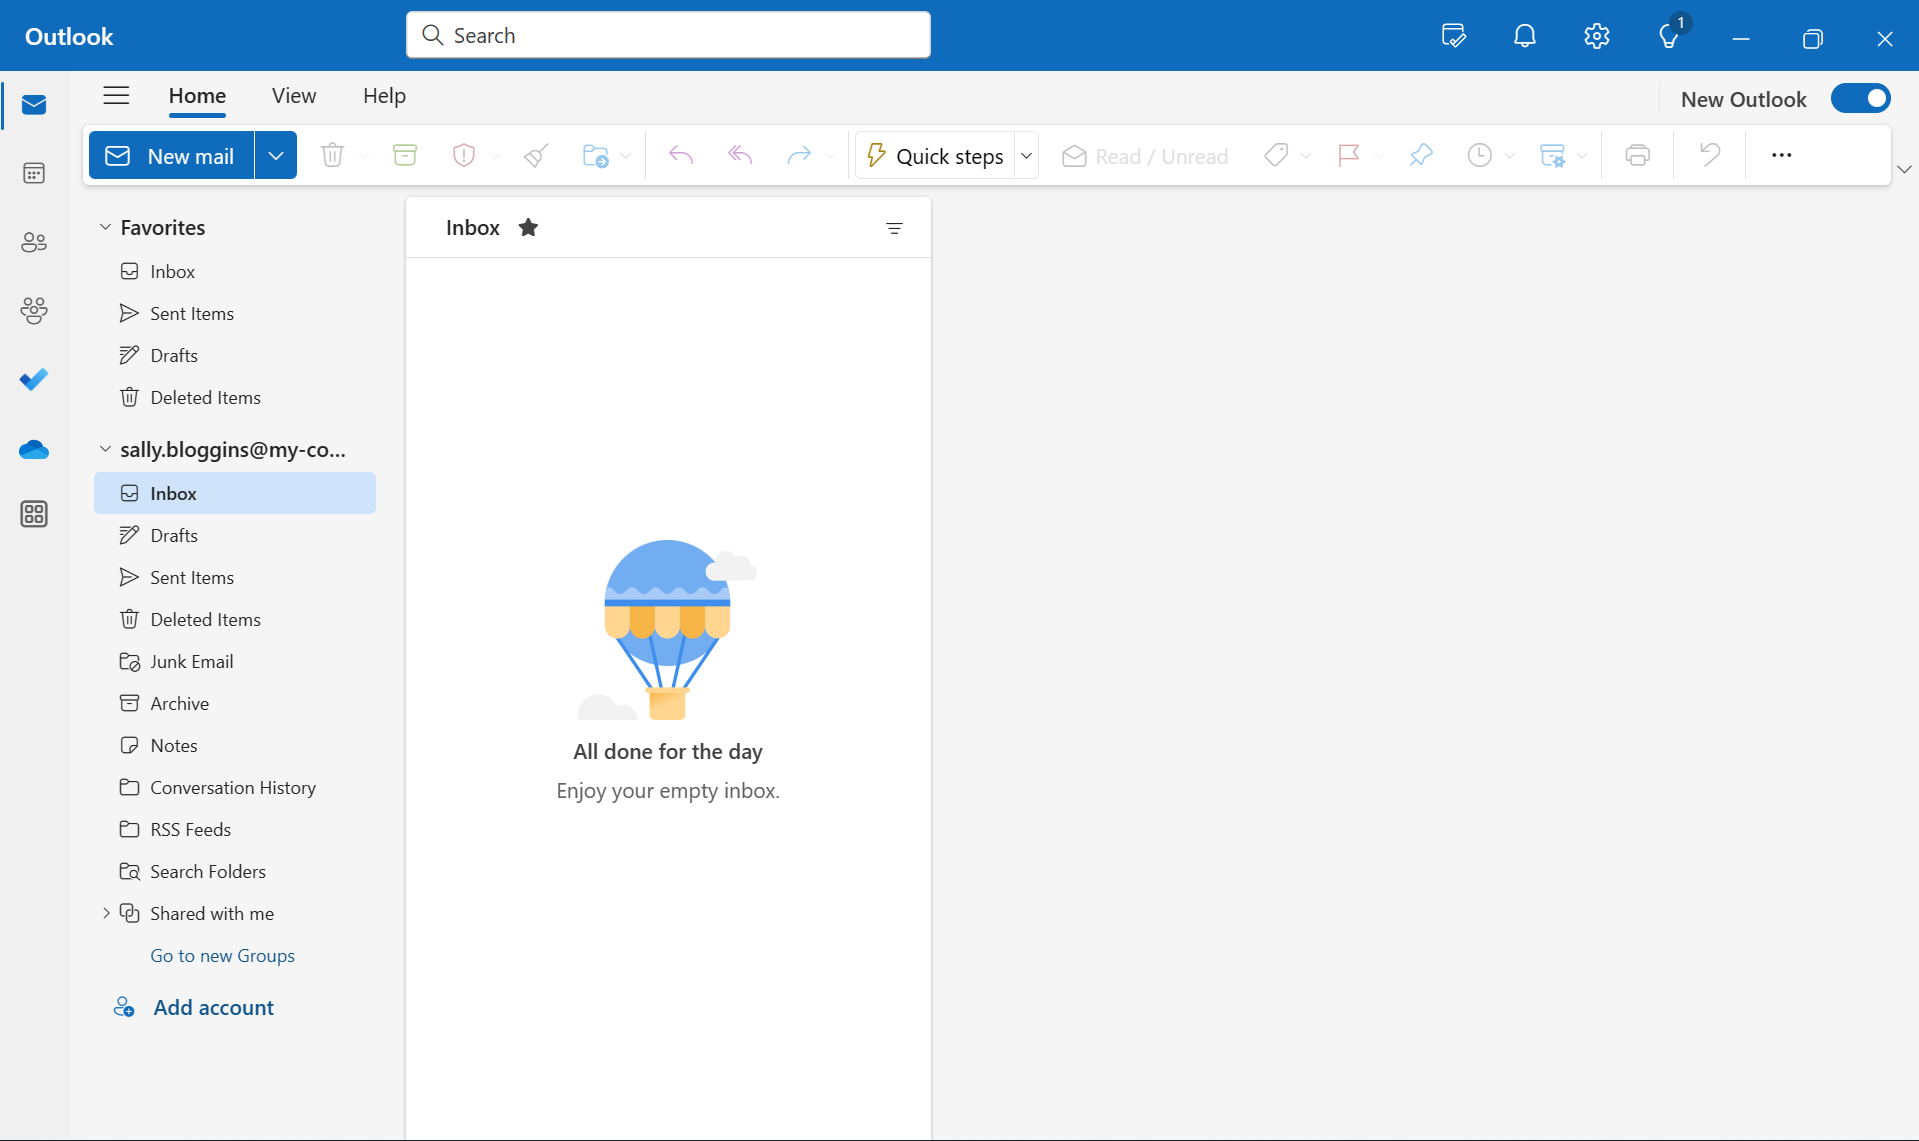
Outlook (new) will launch and your mailbox appears.
2.
Open Automatic Replies (Out of Office) settings
-
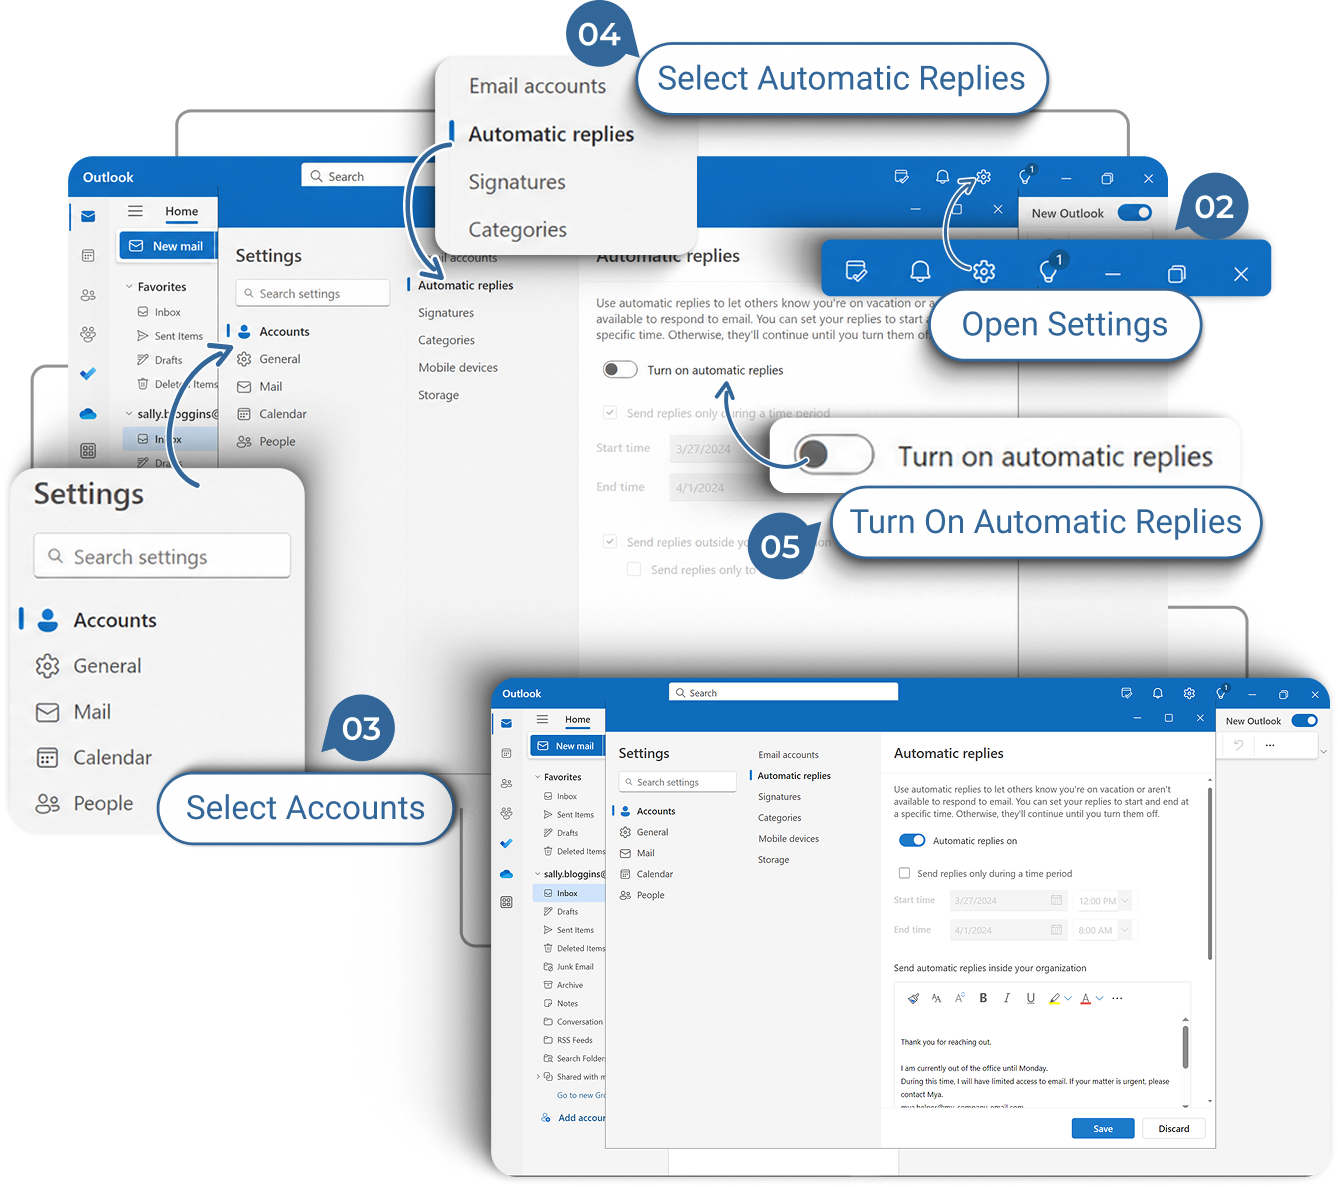
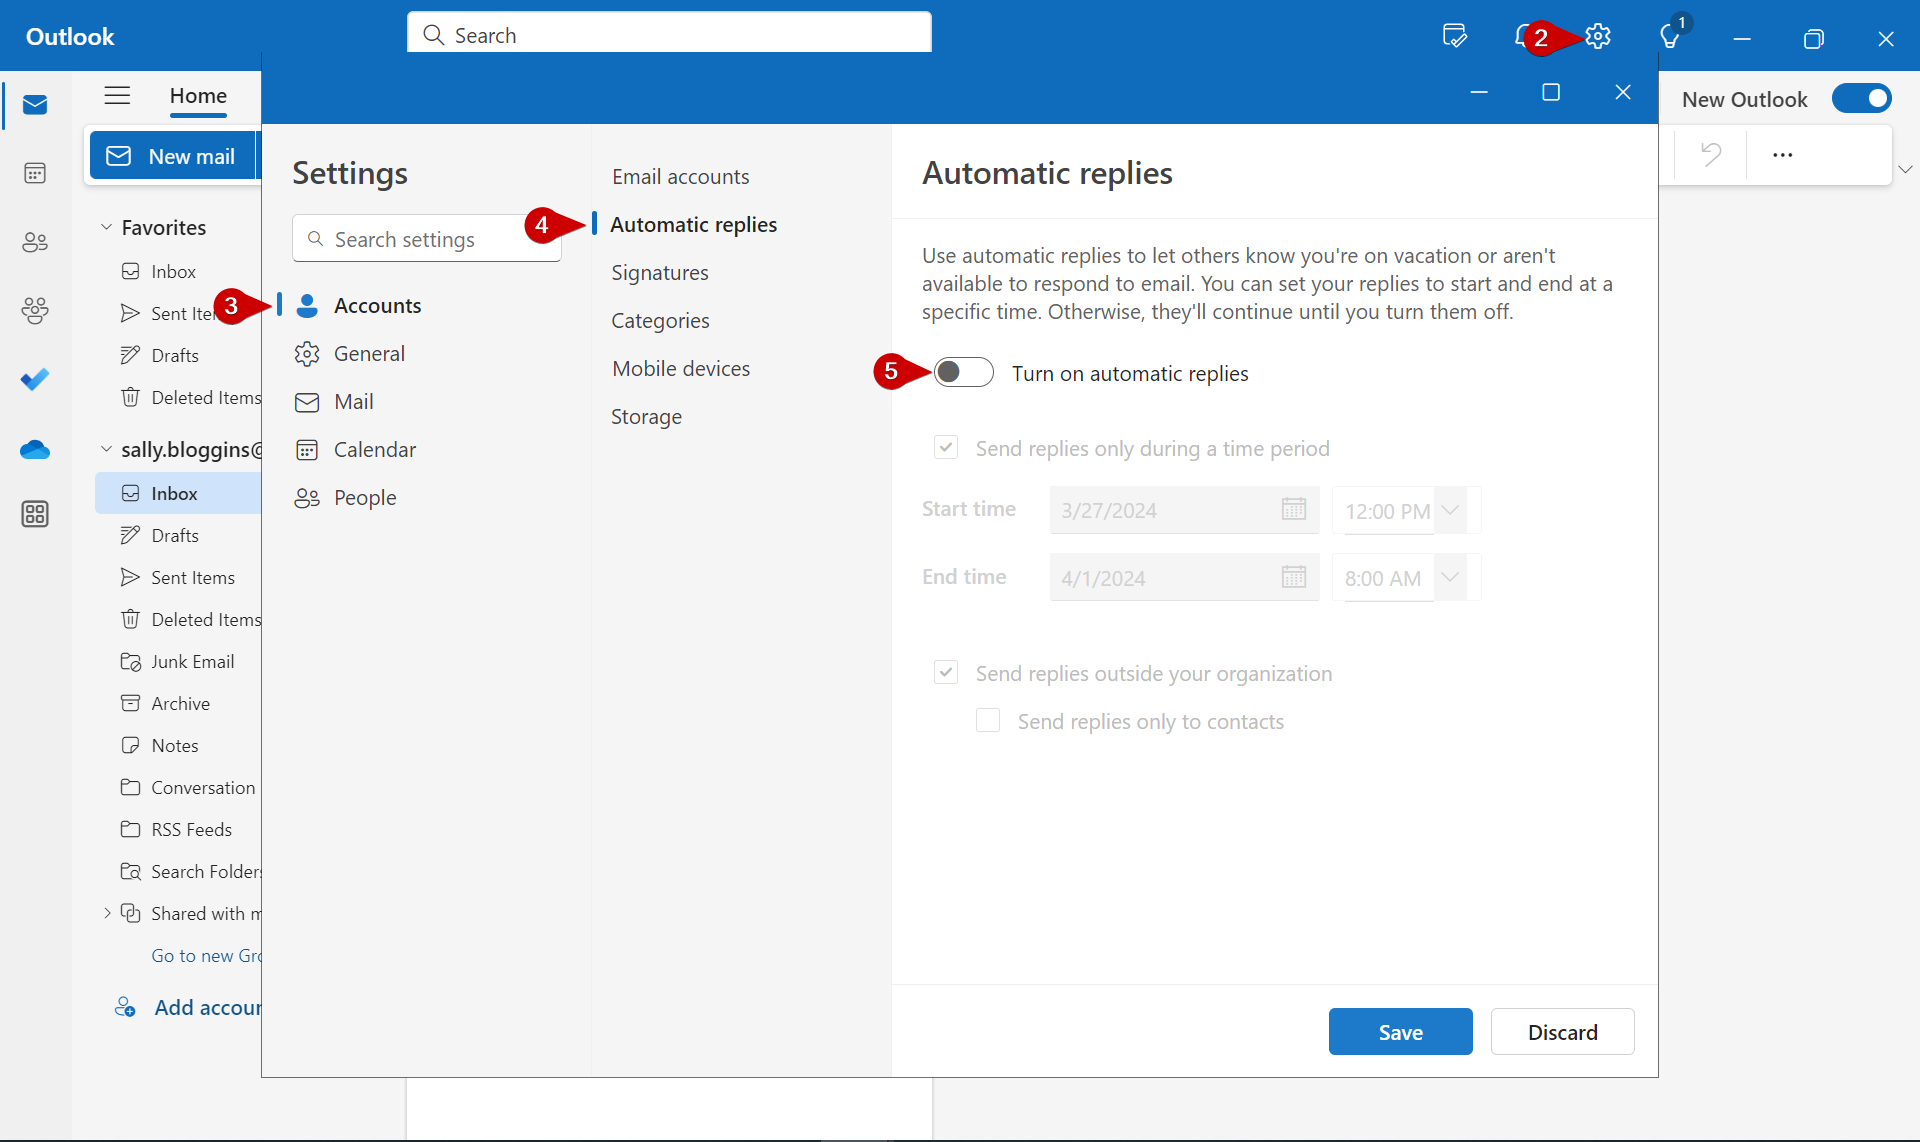
Click on the Gear “Settings” icon near the top right of the Outlook (new) window.
-
Select Accounts in the “Settings” menu on the left.
-
Click on “Automatic replies” in the sub menu to the right.
-
Toggle on the “Turn on automatic replies” slider.
3.
Configure Automatic Replies
-
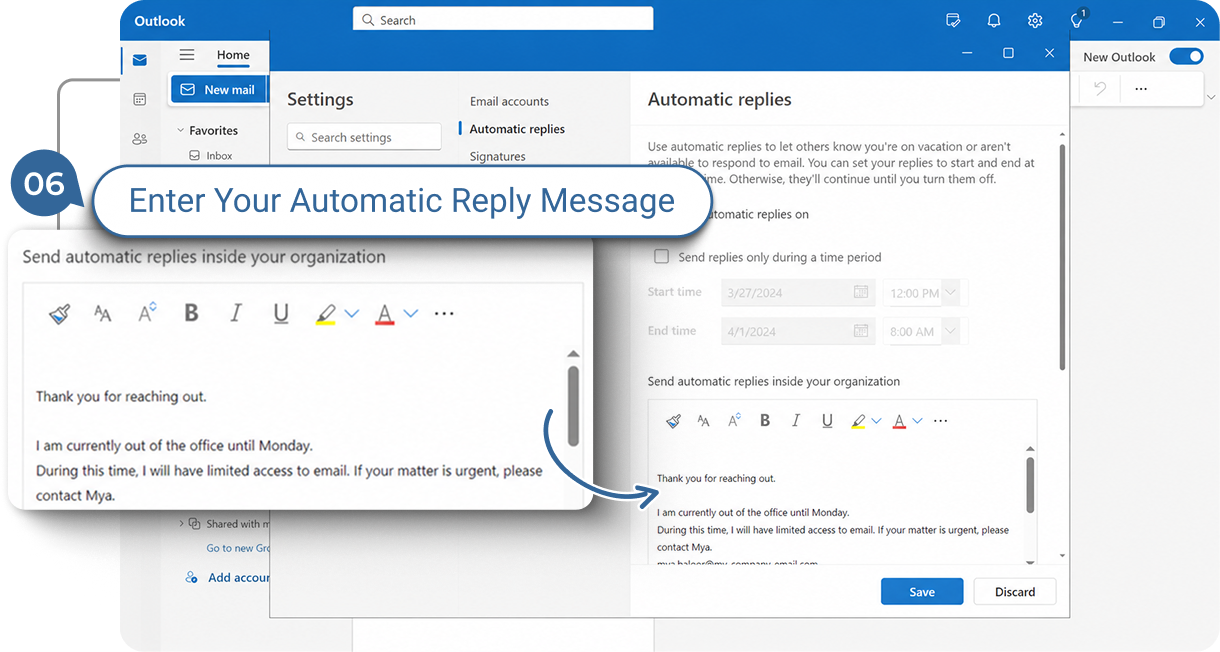
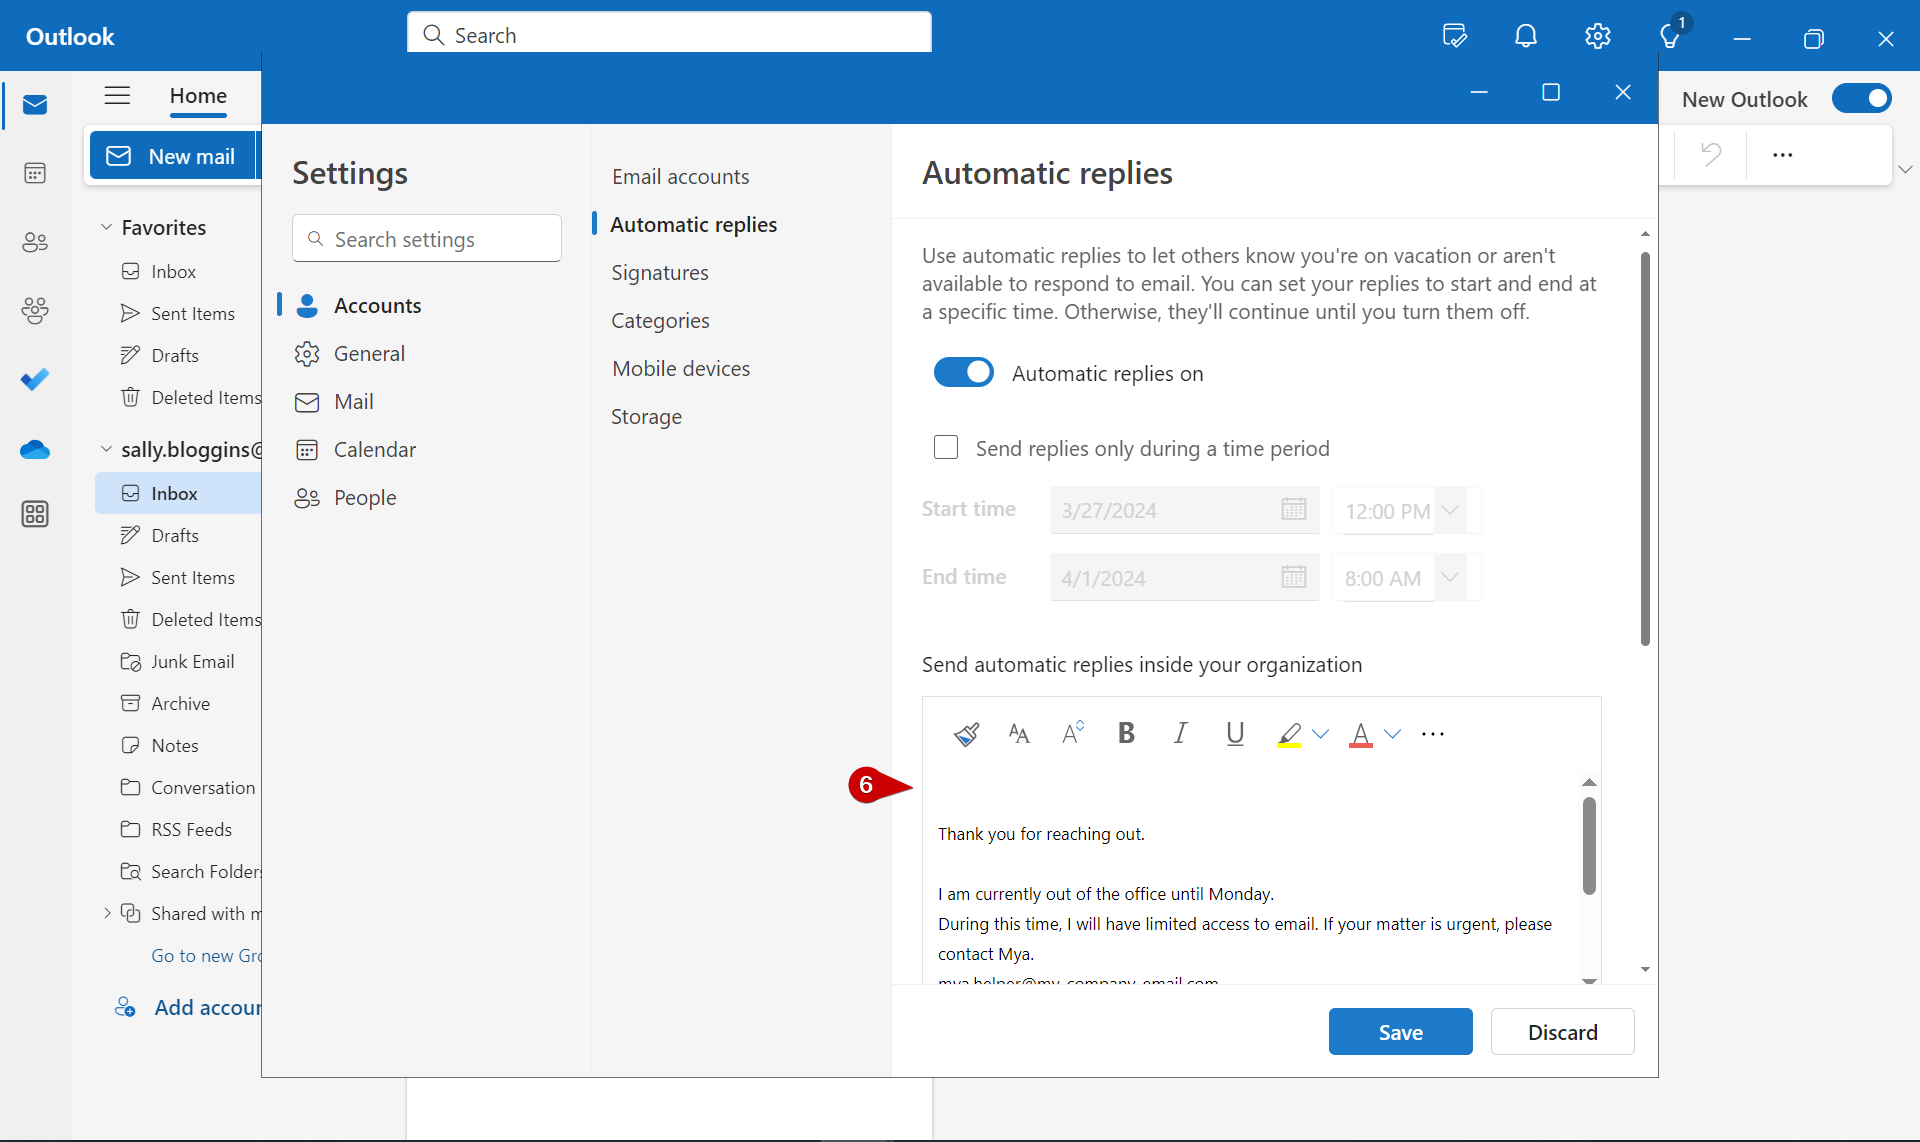
Enter the message that people inside your organization will receive when they email this mailbox.
-
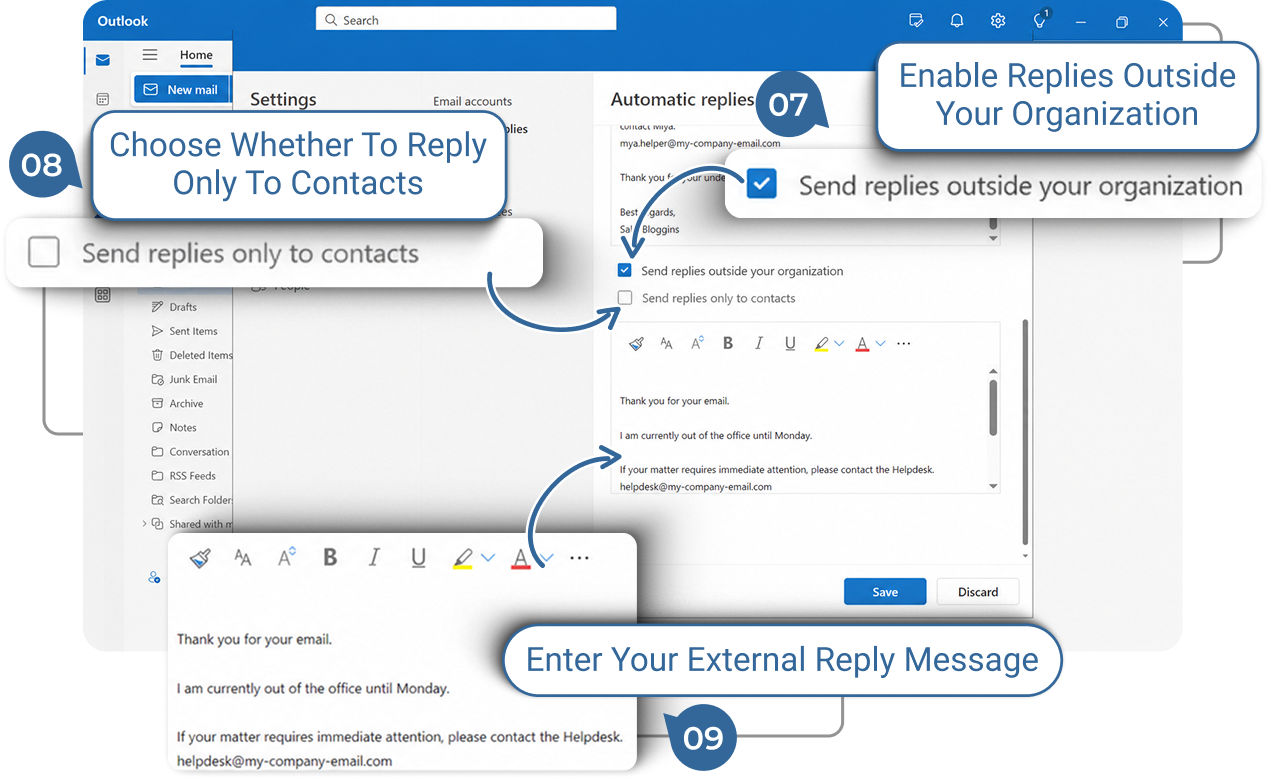
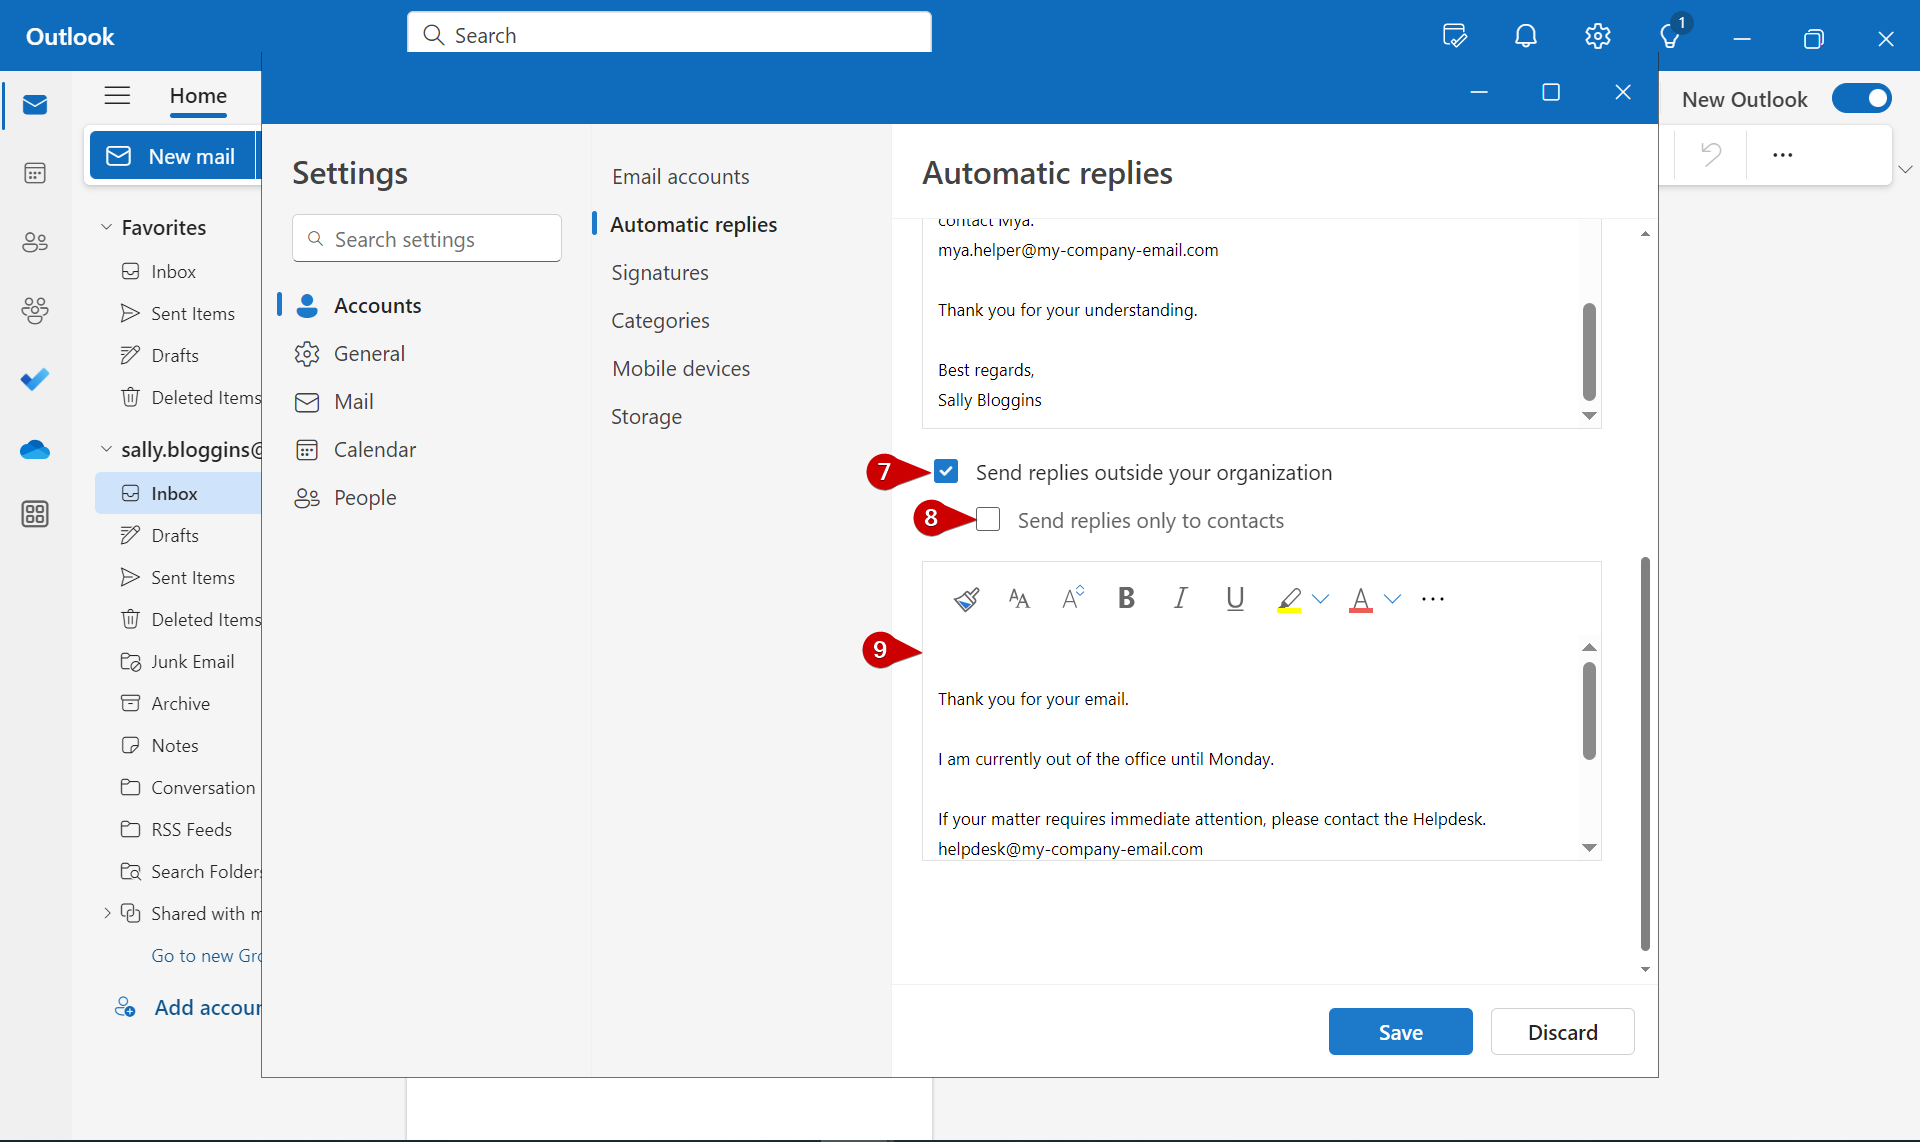
Decide whether you want to send emails to people outside your organization as well. If you do, then check the “Send replies outside your organization” checkbox.
-
Click on the “Send replies only to contacts” box if you only want to reply to your saved contacts.
-
Enter the message that people outside your organization will receive when they email this mailbox.
4.
Schedule Automatic Replies
If you would like the Automatic Replies to start and stop automatically, you can schedule it as follows:
-
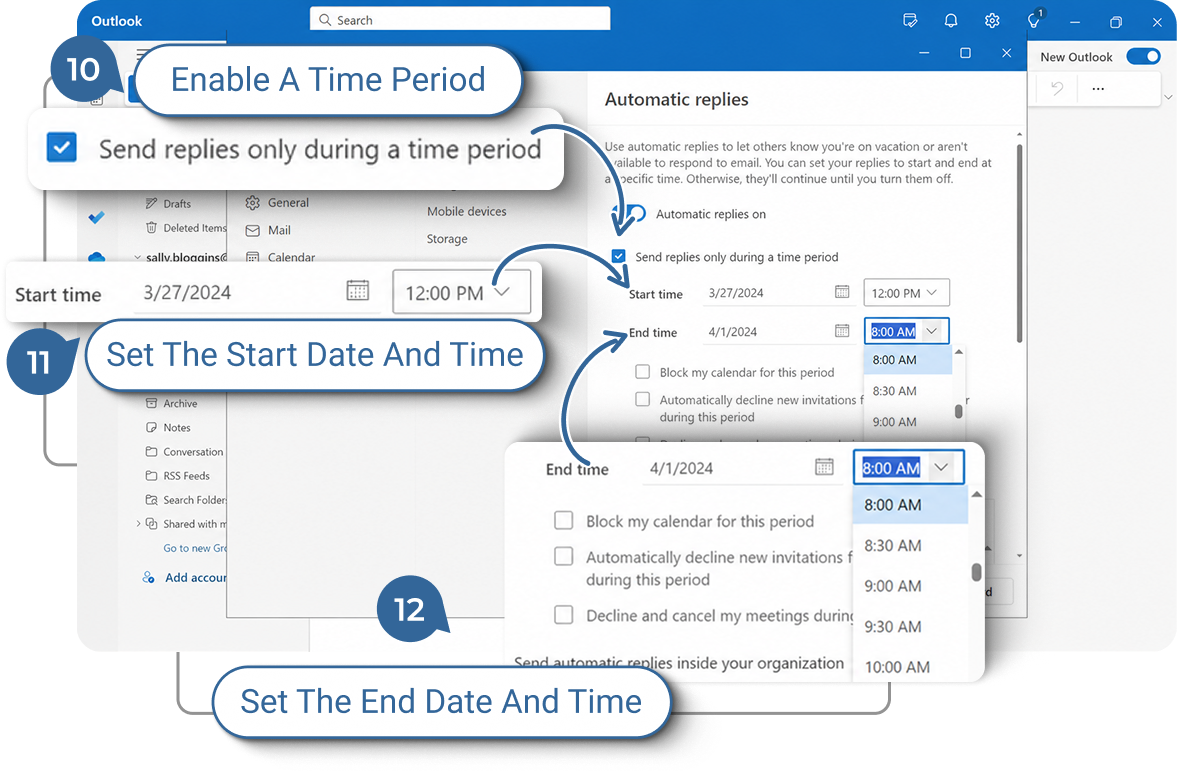
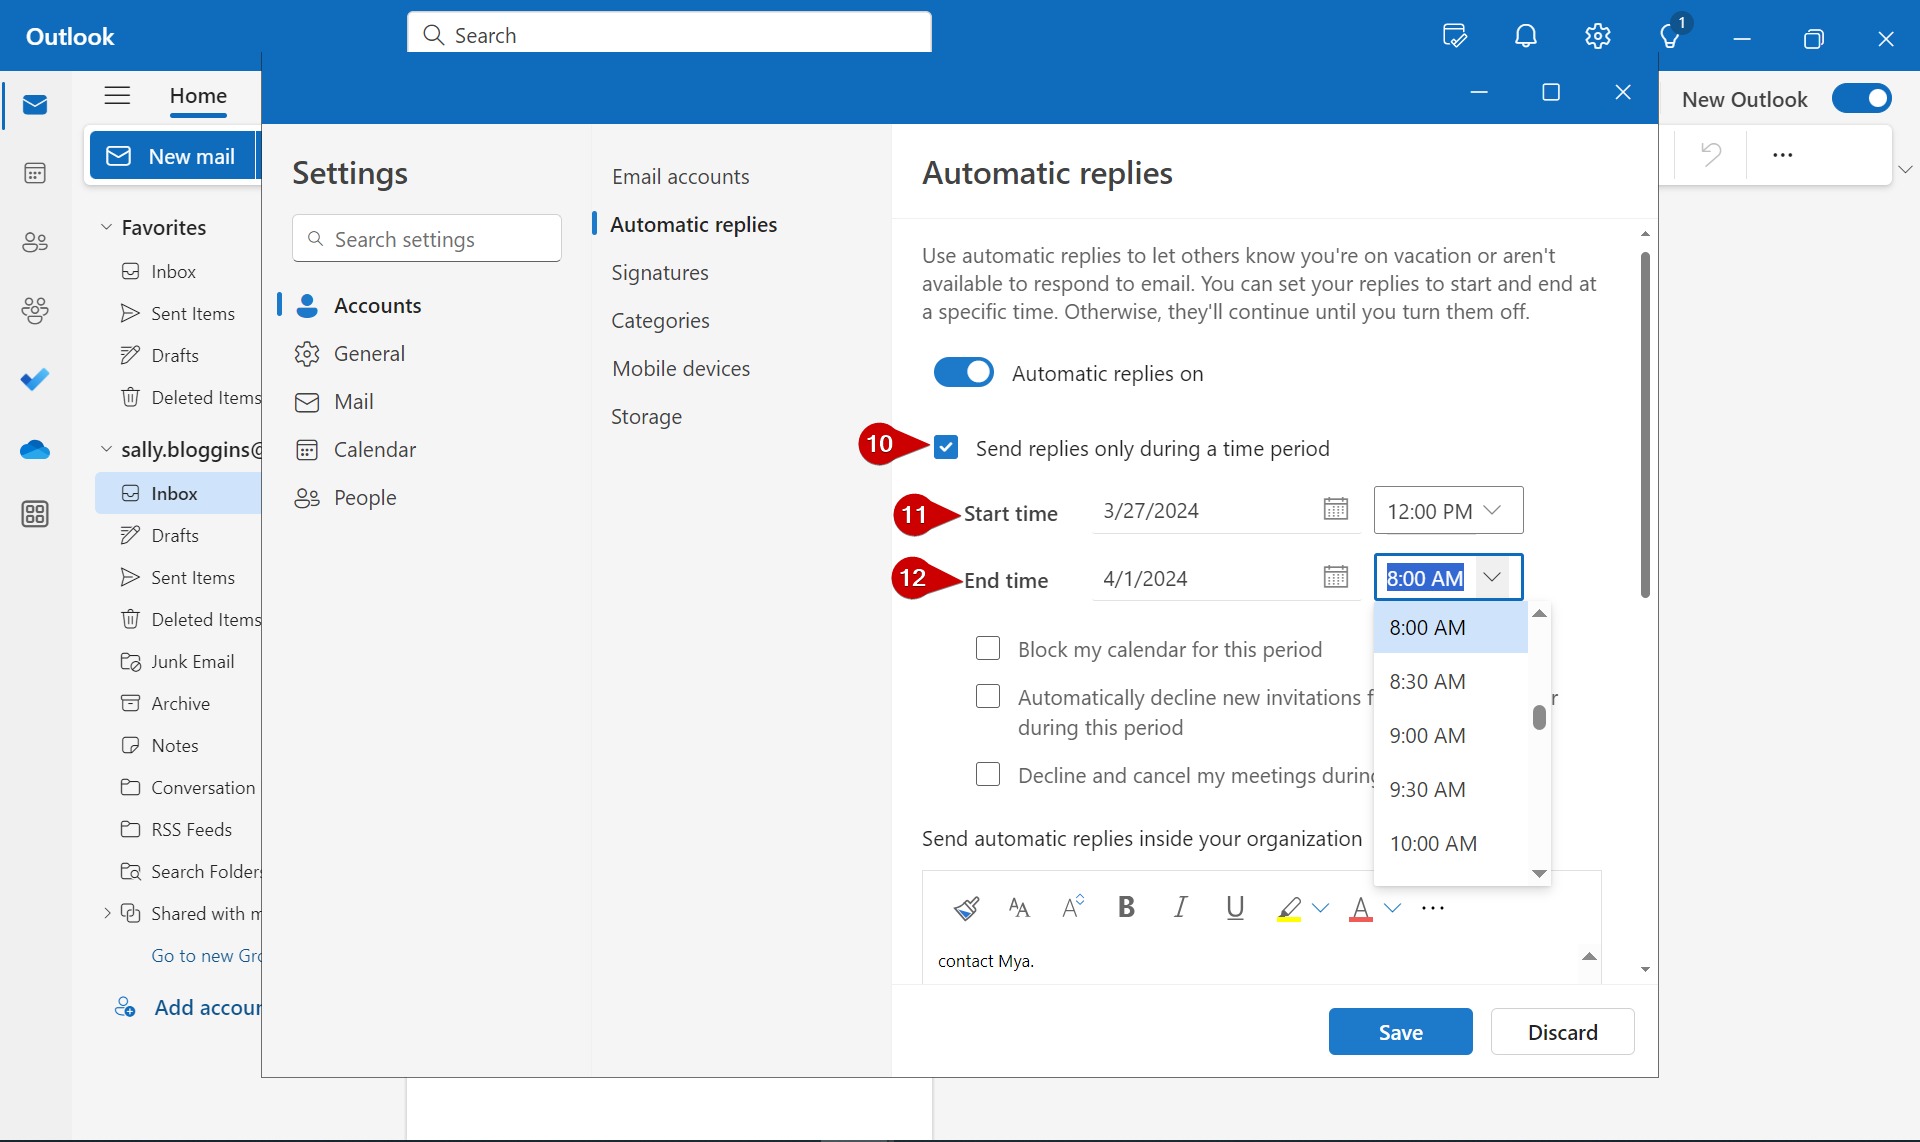
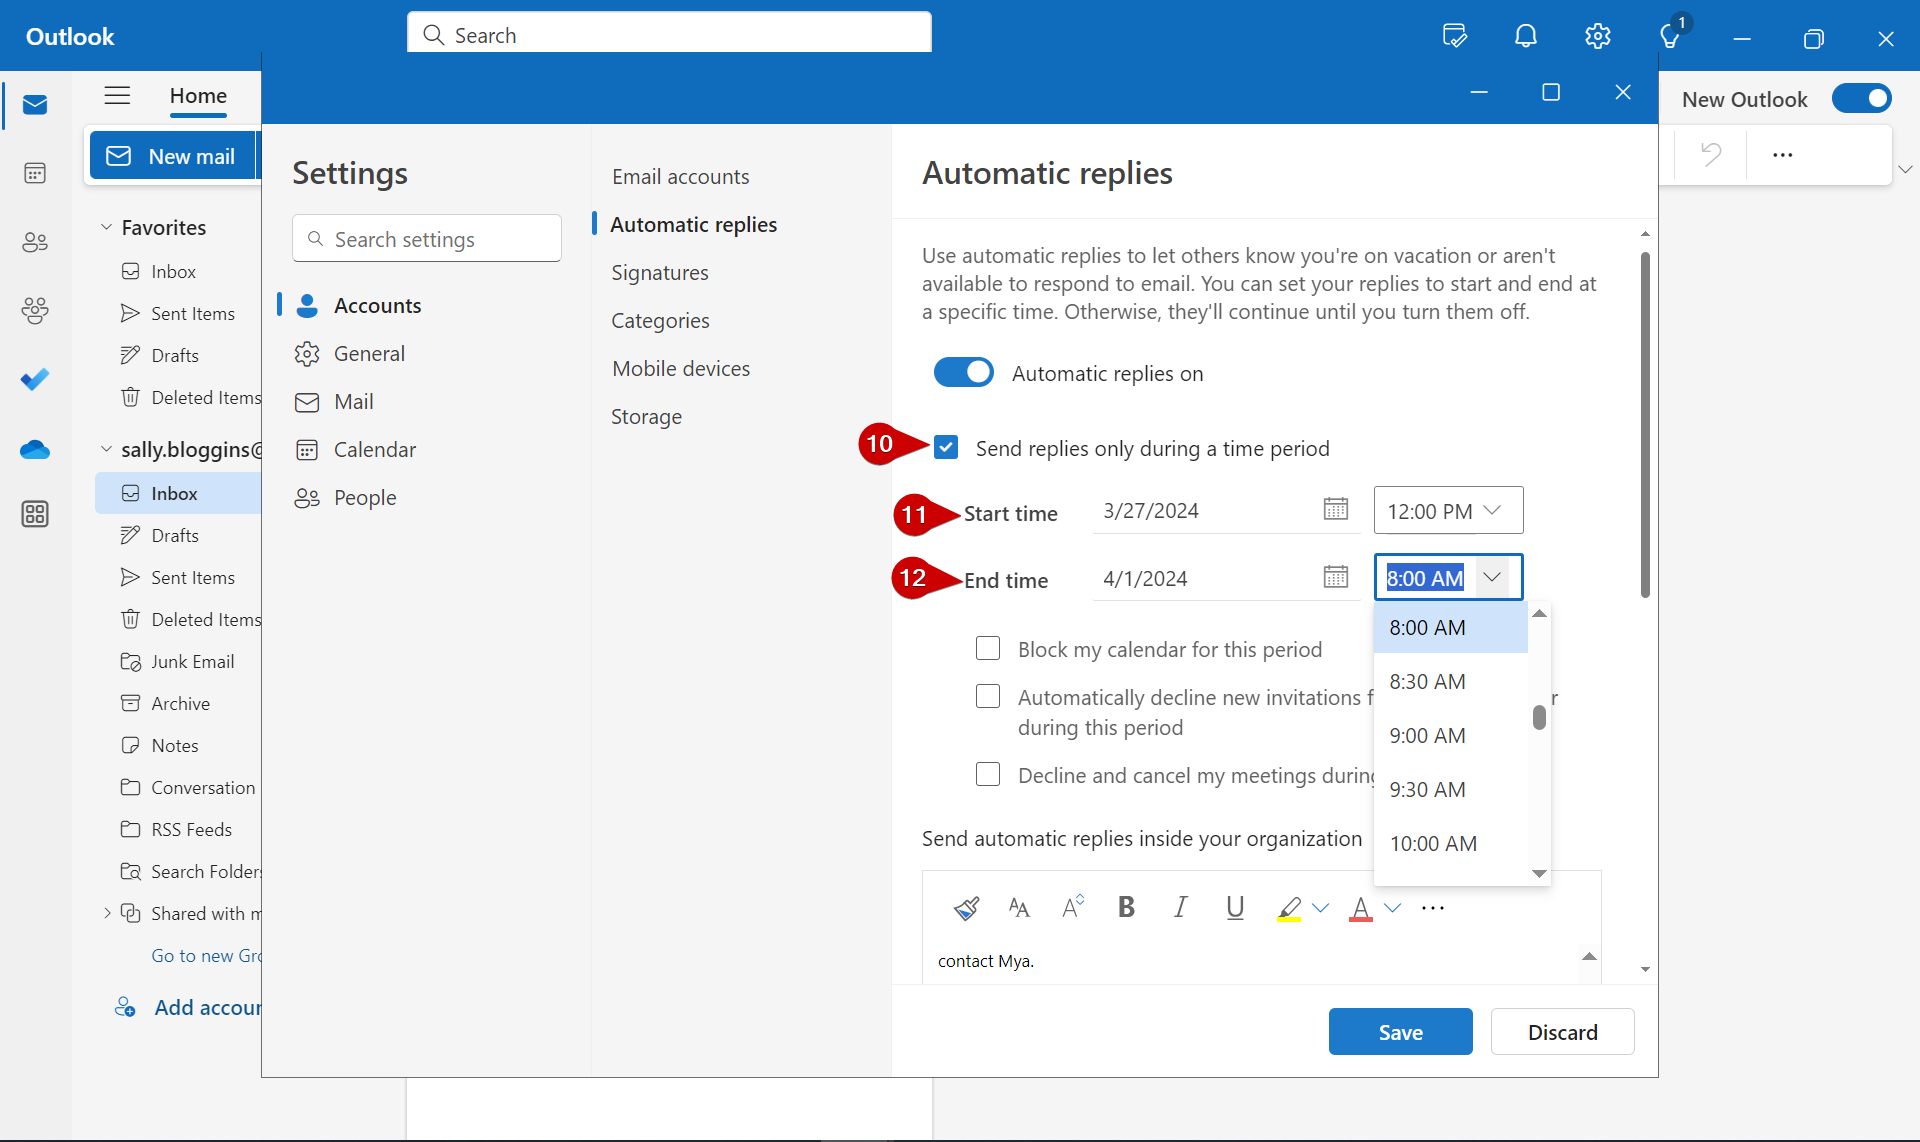
Check the “Send replies only during a time period” checkbox.
-
Enter the Start Date and Time.
-
Enter the End Date and Time.
-
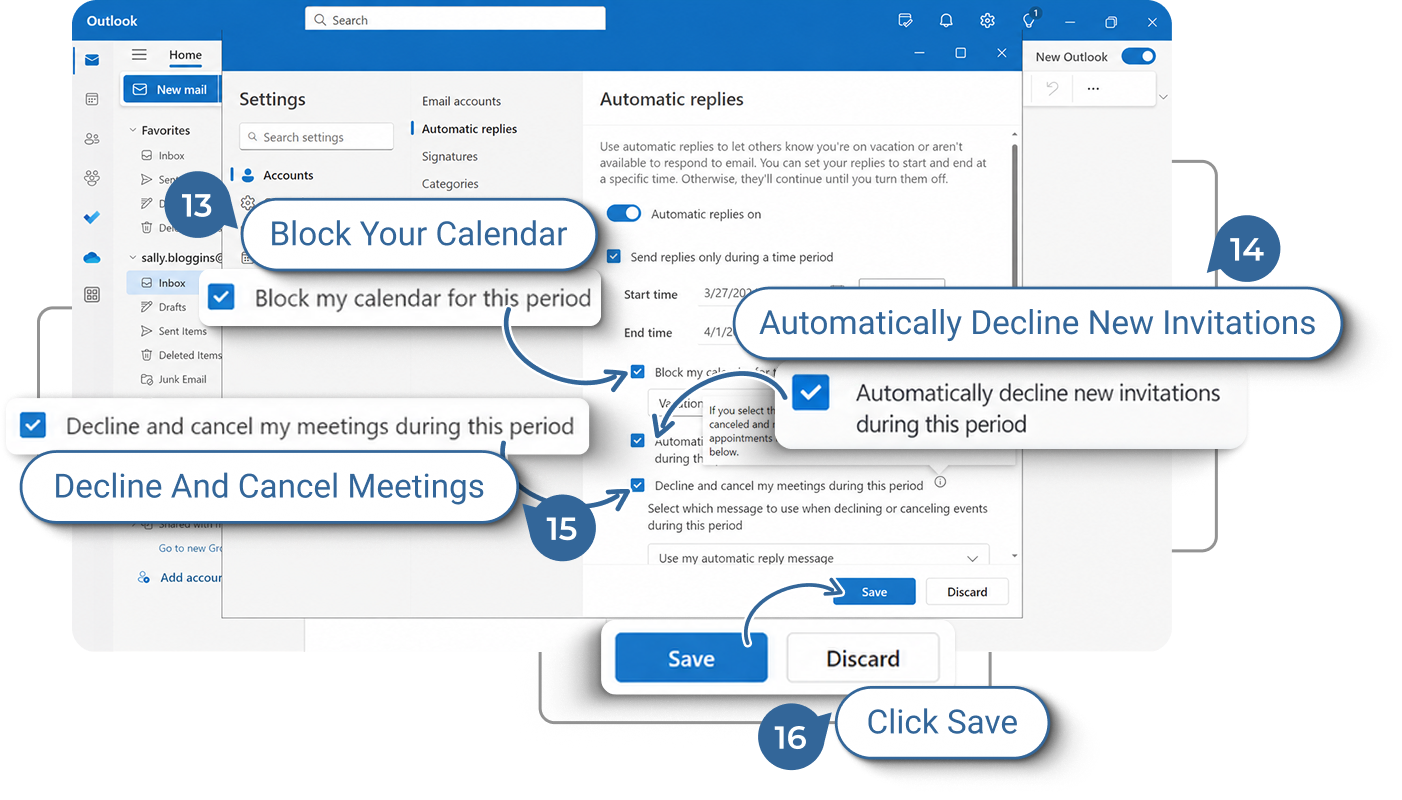
If you wish to block your calendar during the scheduled window, select the “Block my calendar for this period” checkbox.
-
You can set Outlook (new) to decline calendar events by clicking “Automatically decline new invitations for events that occur during this period”.
-
Outlook (new) can also decline and cancel all of your meetings during the scheduled time if you select “Decline and cancel my meetings during this period”.
-
Finally, click on the “Save” button to save your Automatic Reply settings.
When you click on the “Save” Button it will disappear to indicate that your settings are saved.
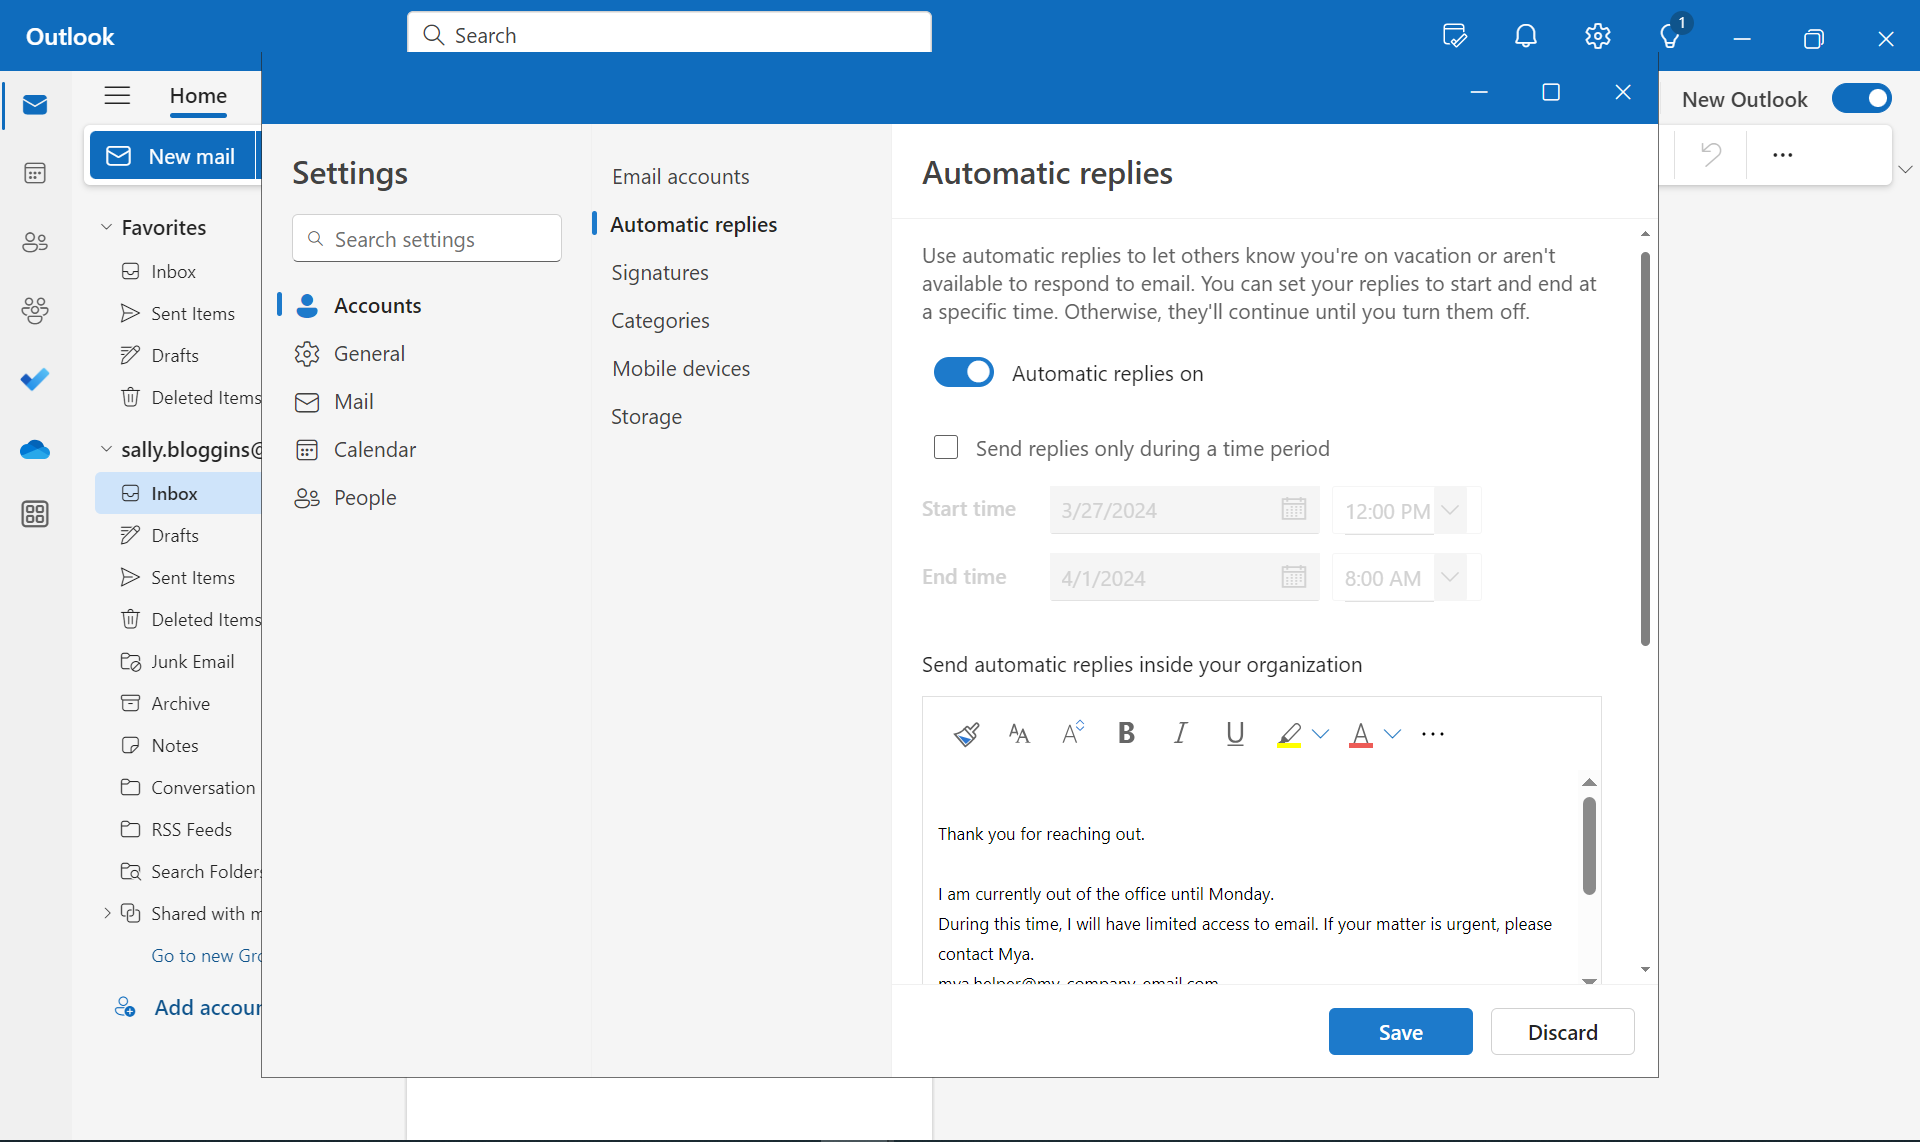
The “Automatic replies” toggle coloured in blue with the slider in the far right position lets you know that your automatic replies are configured and active