Cole Systems Inc.

How to set on a

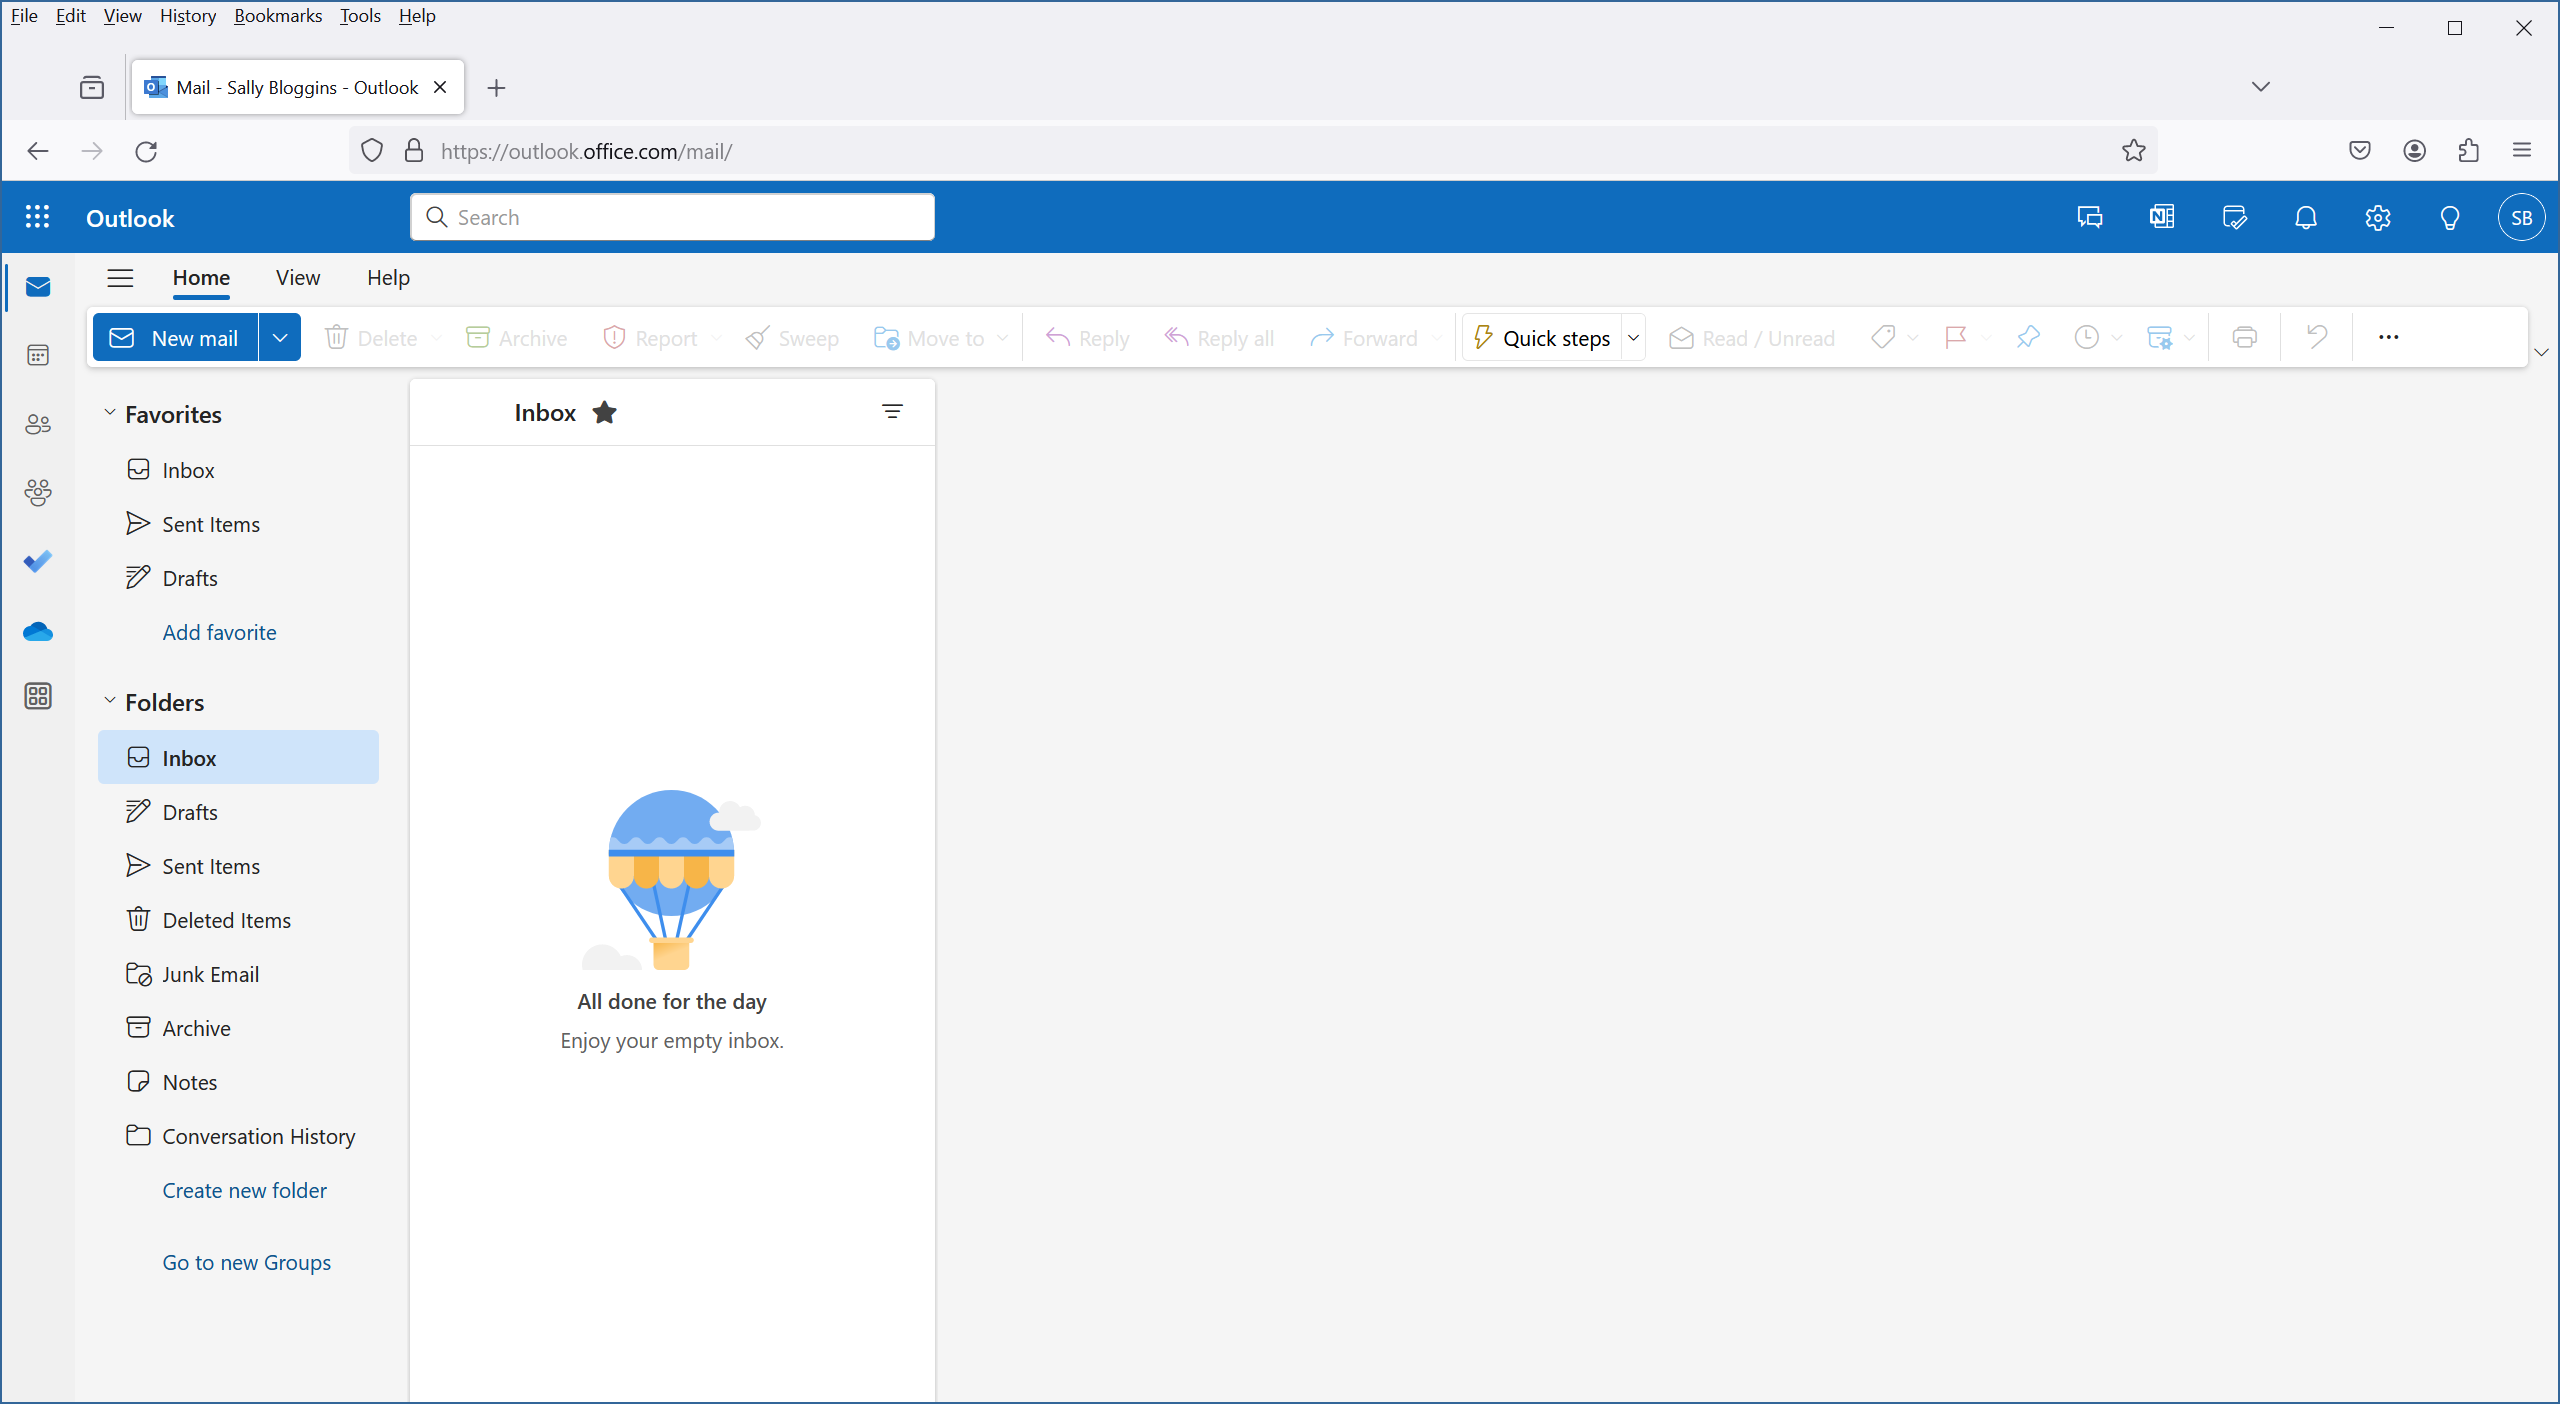
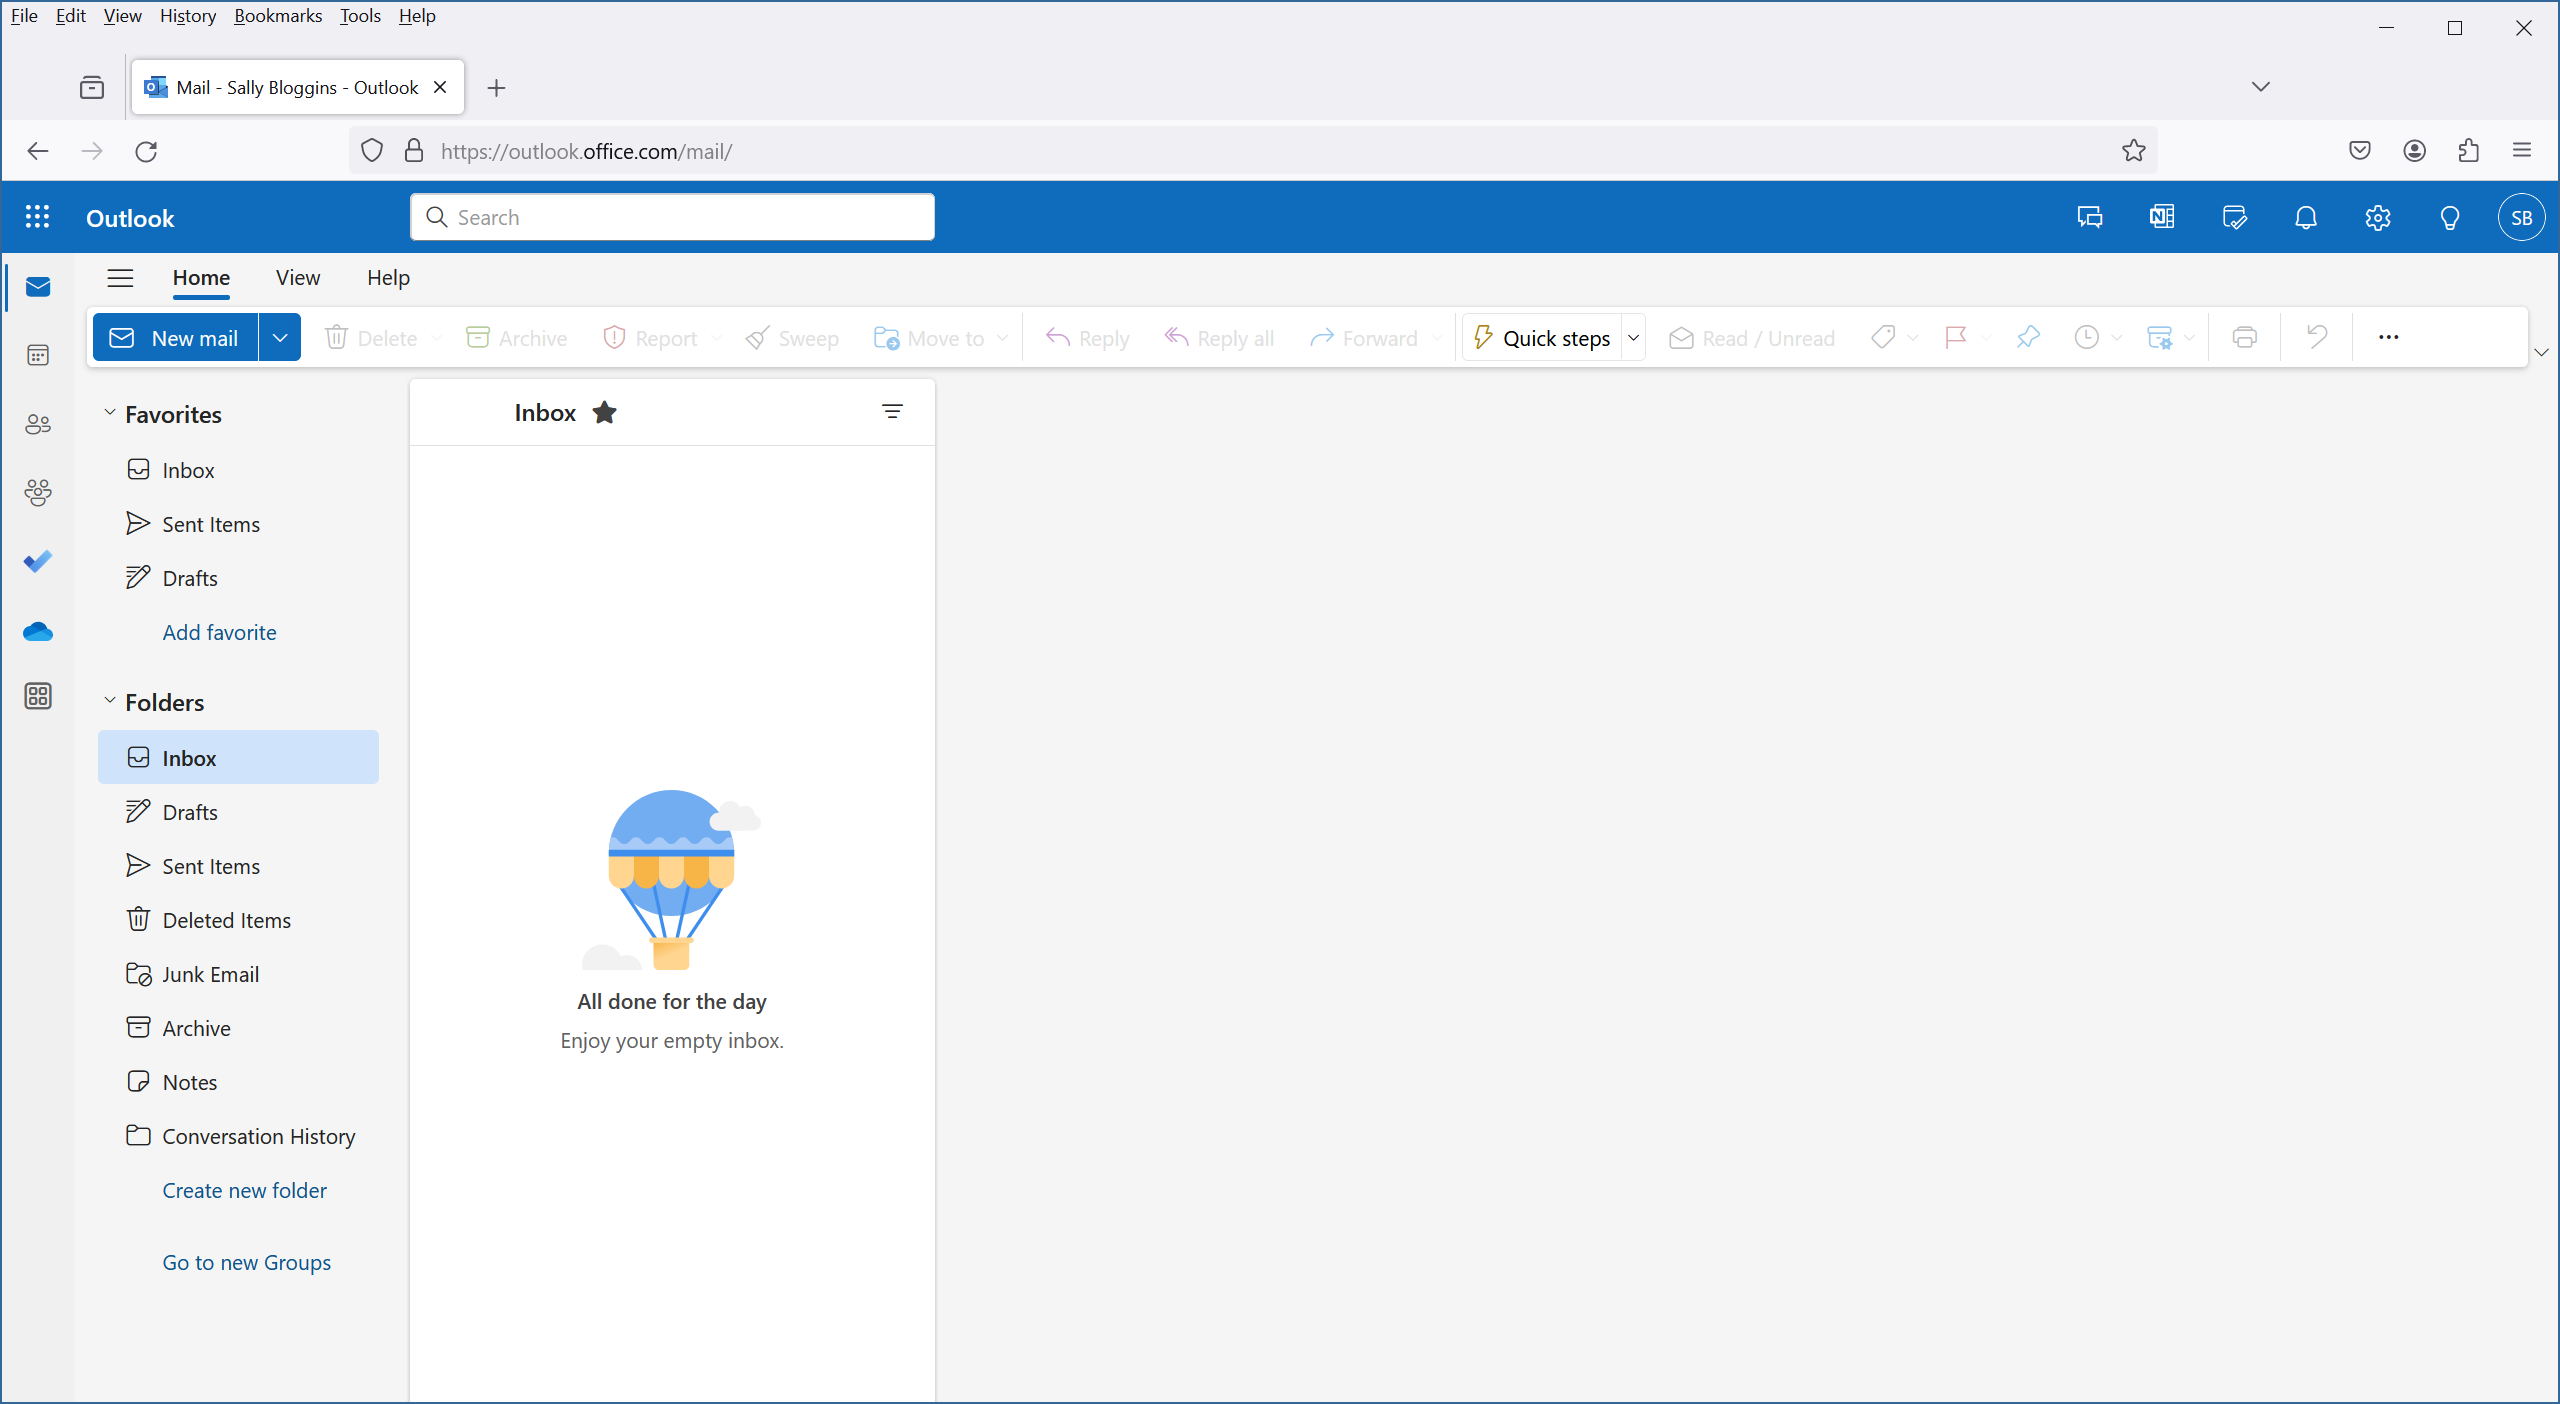
Log in to the online version of Outlook

1.
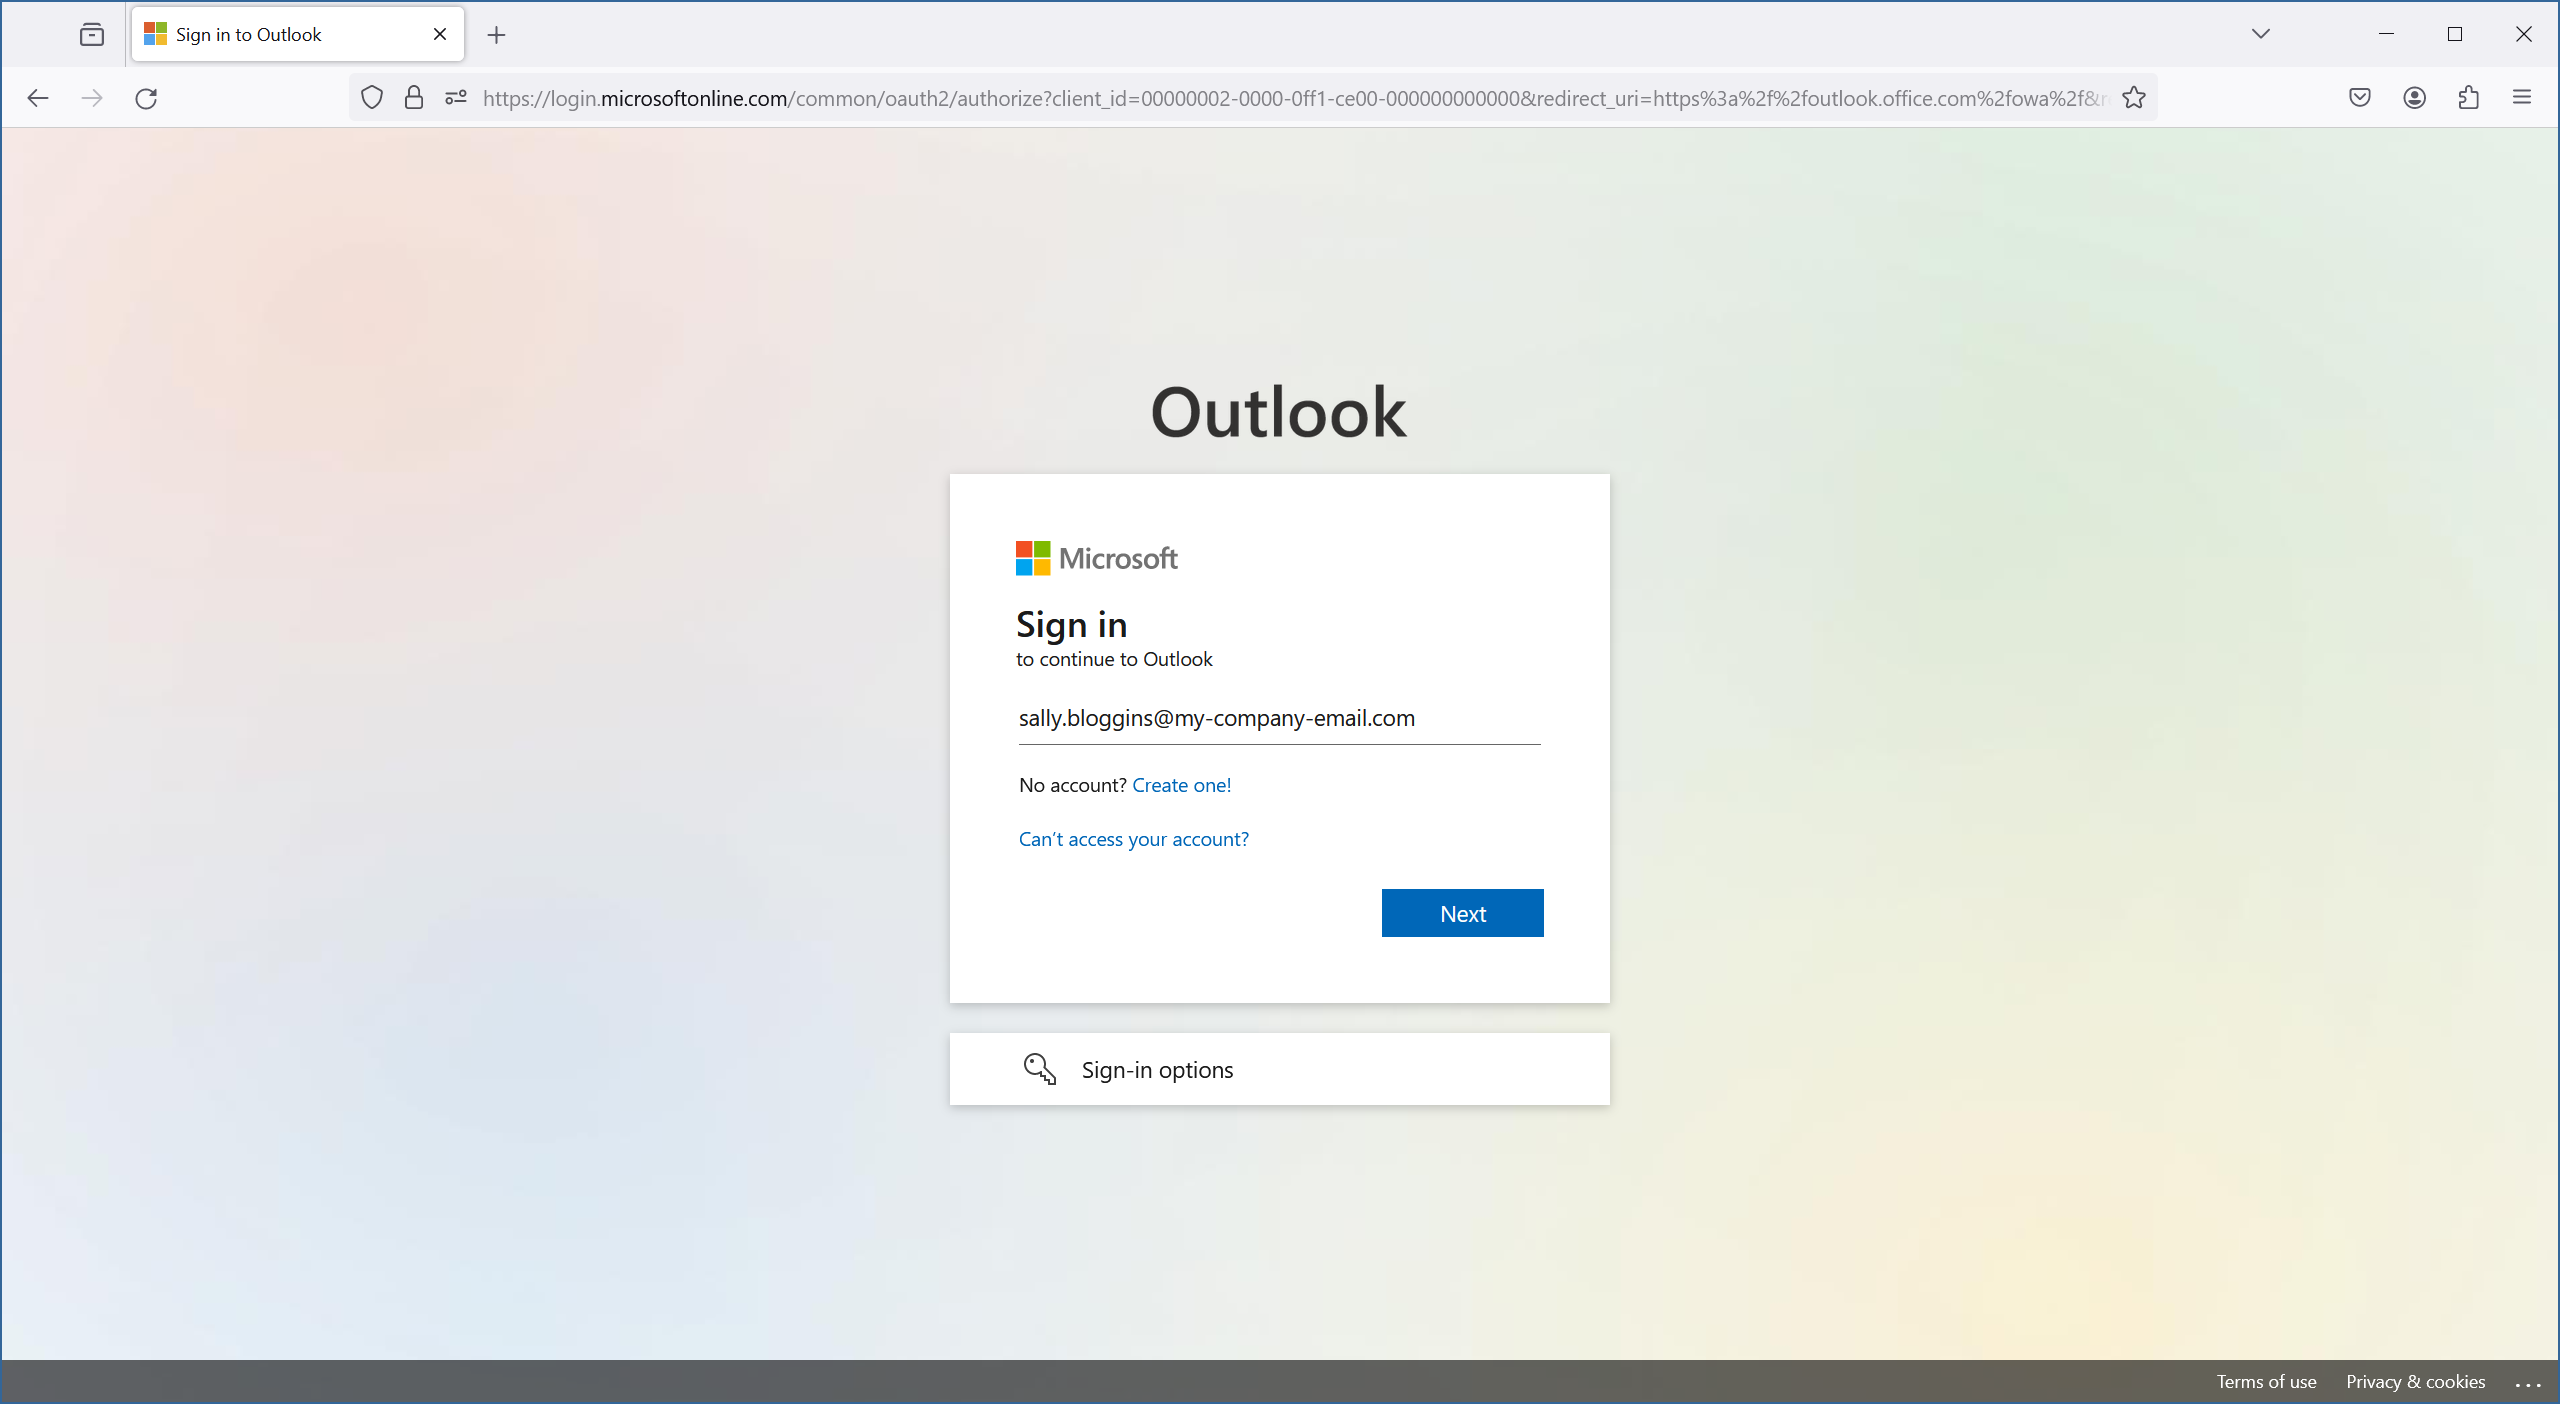
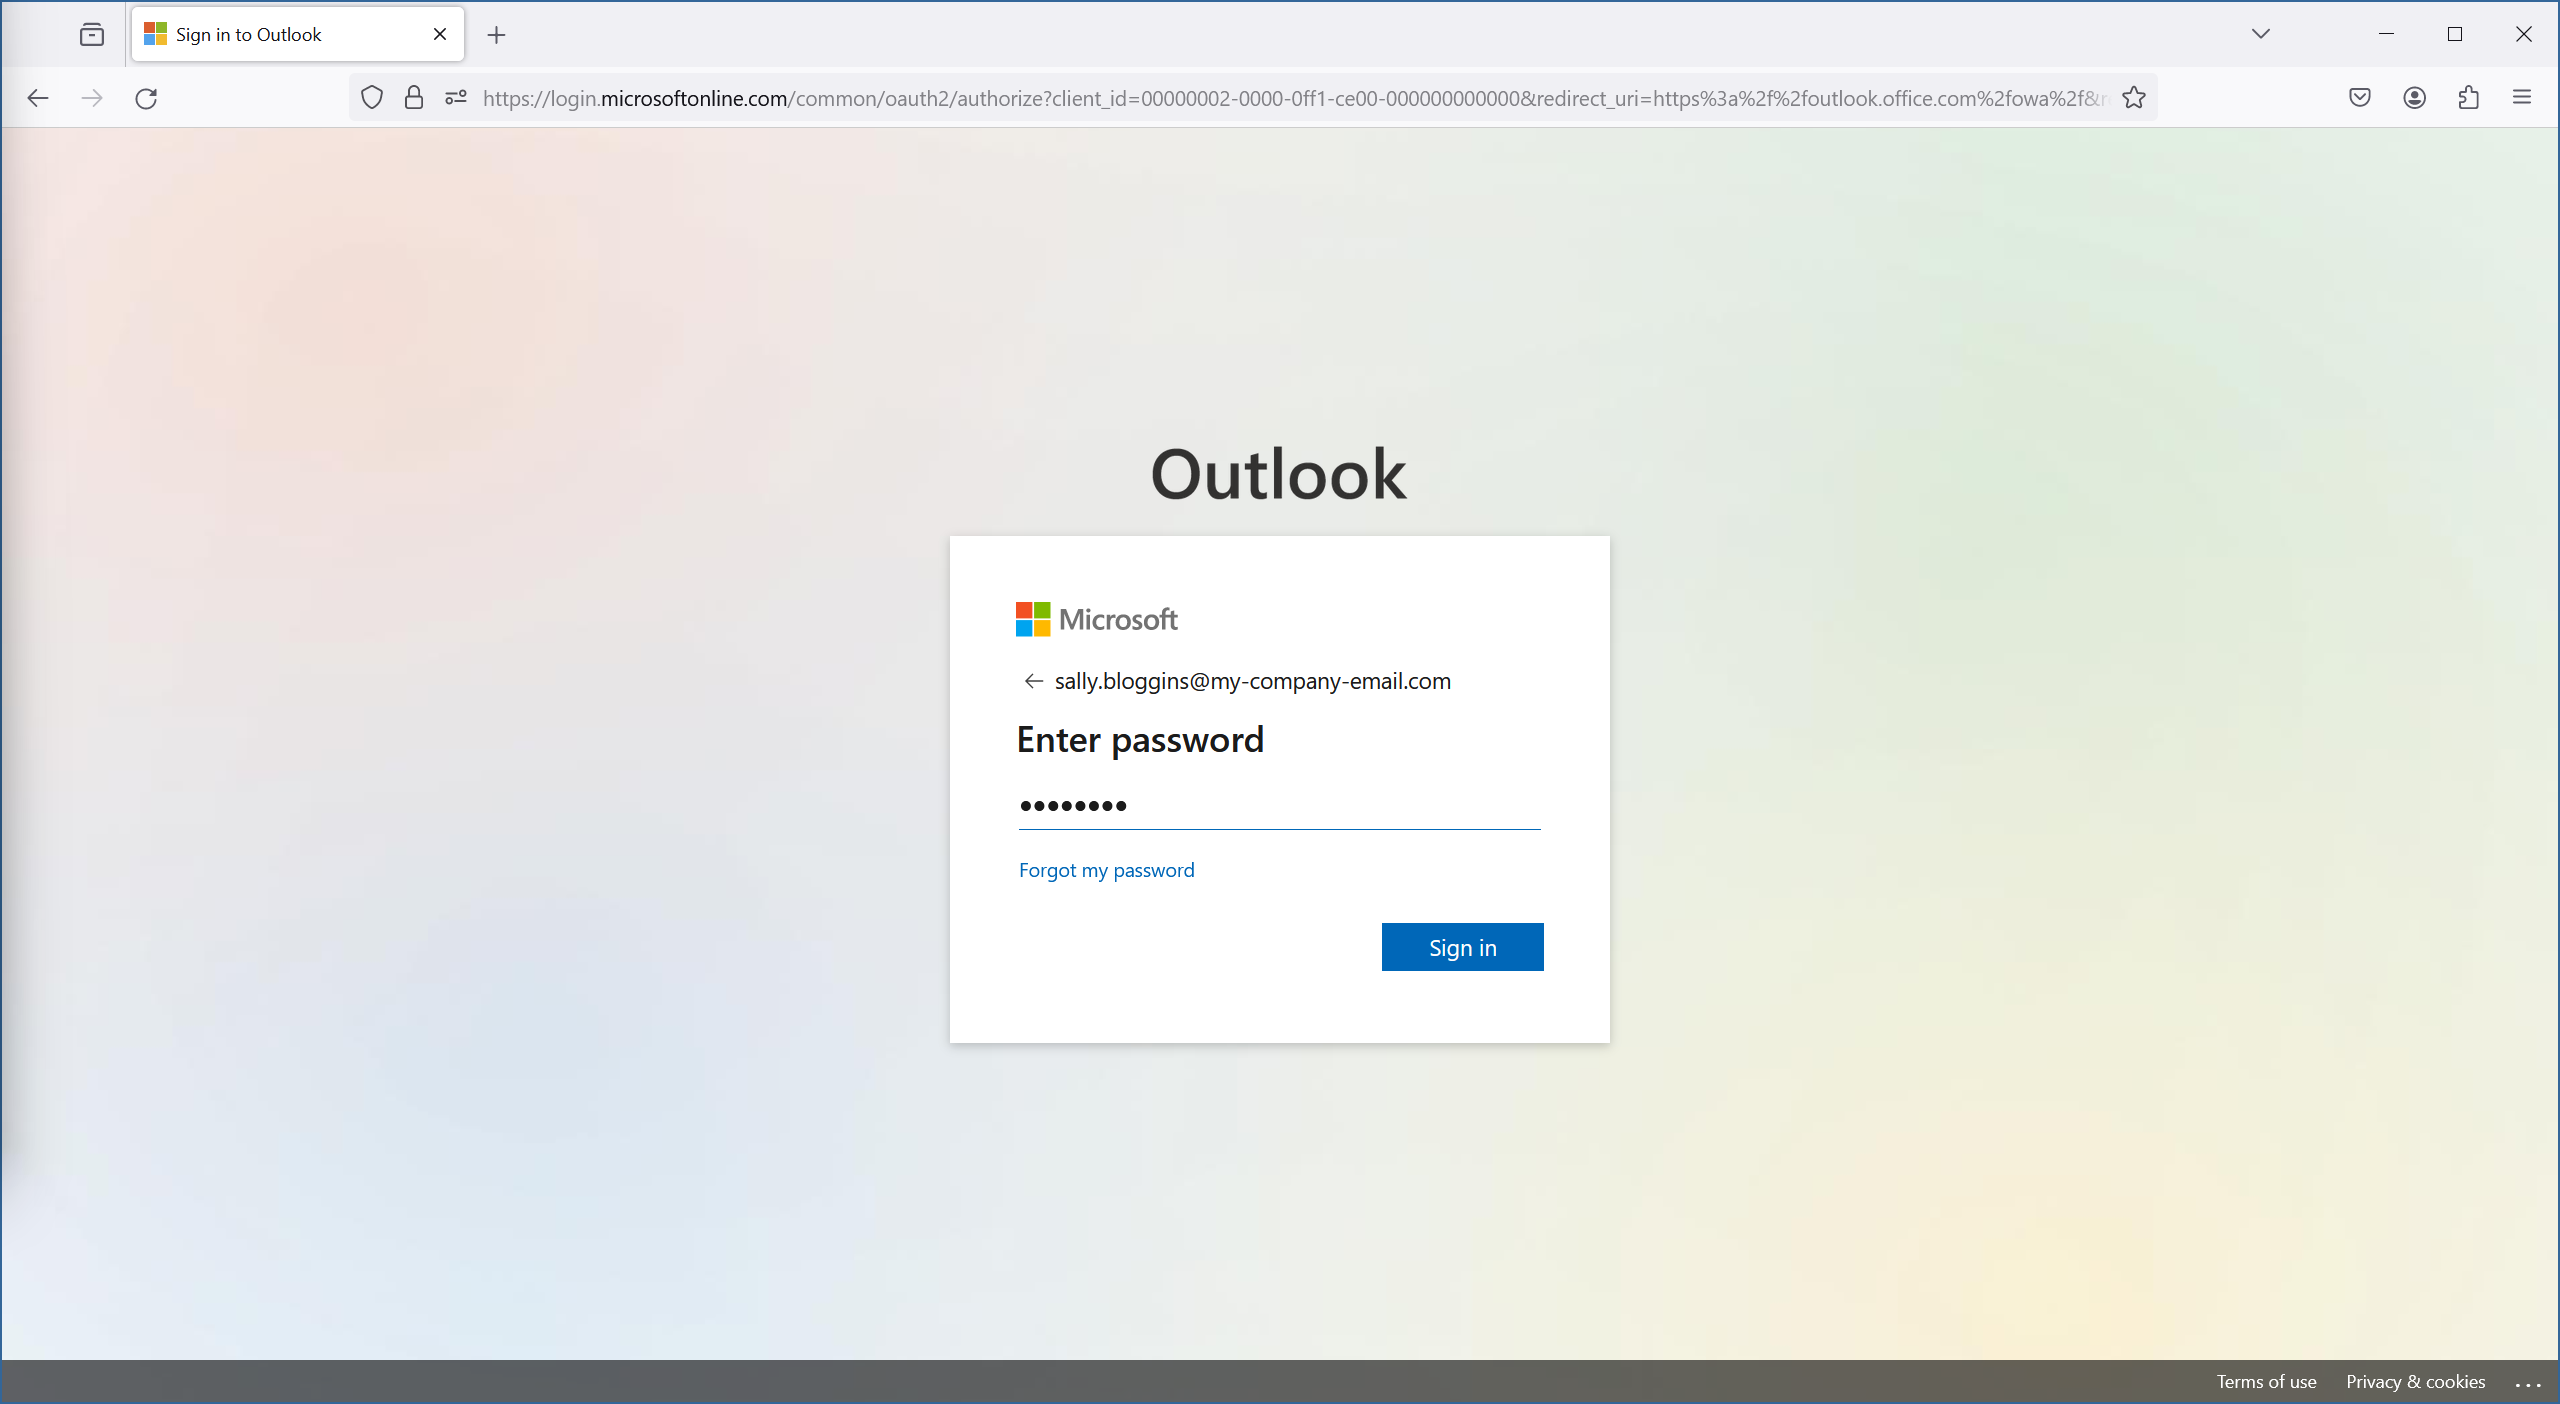
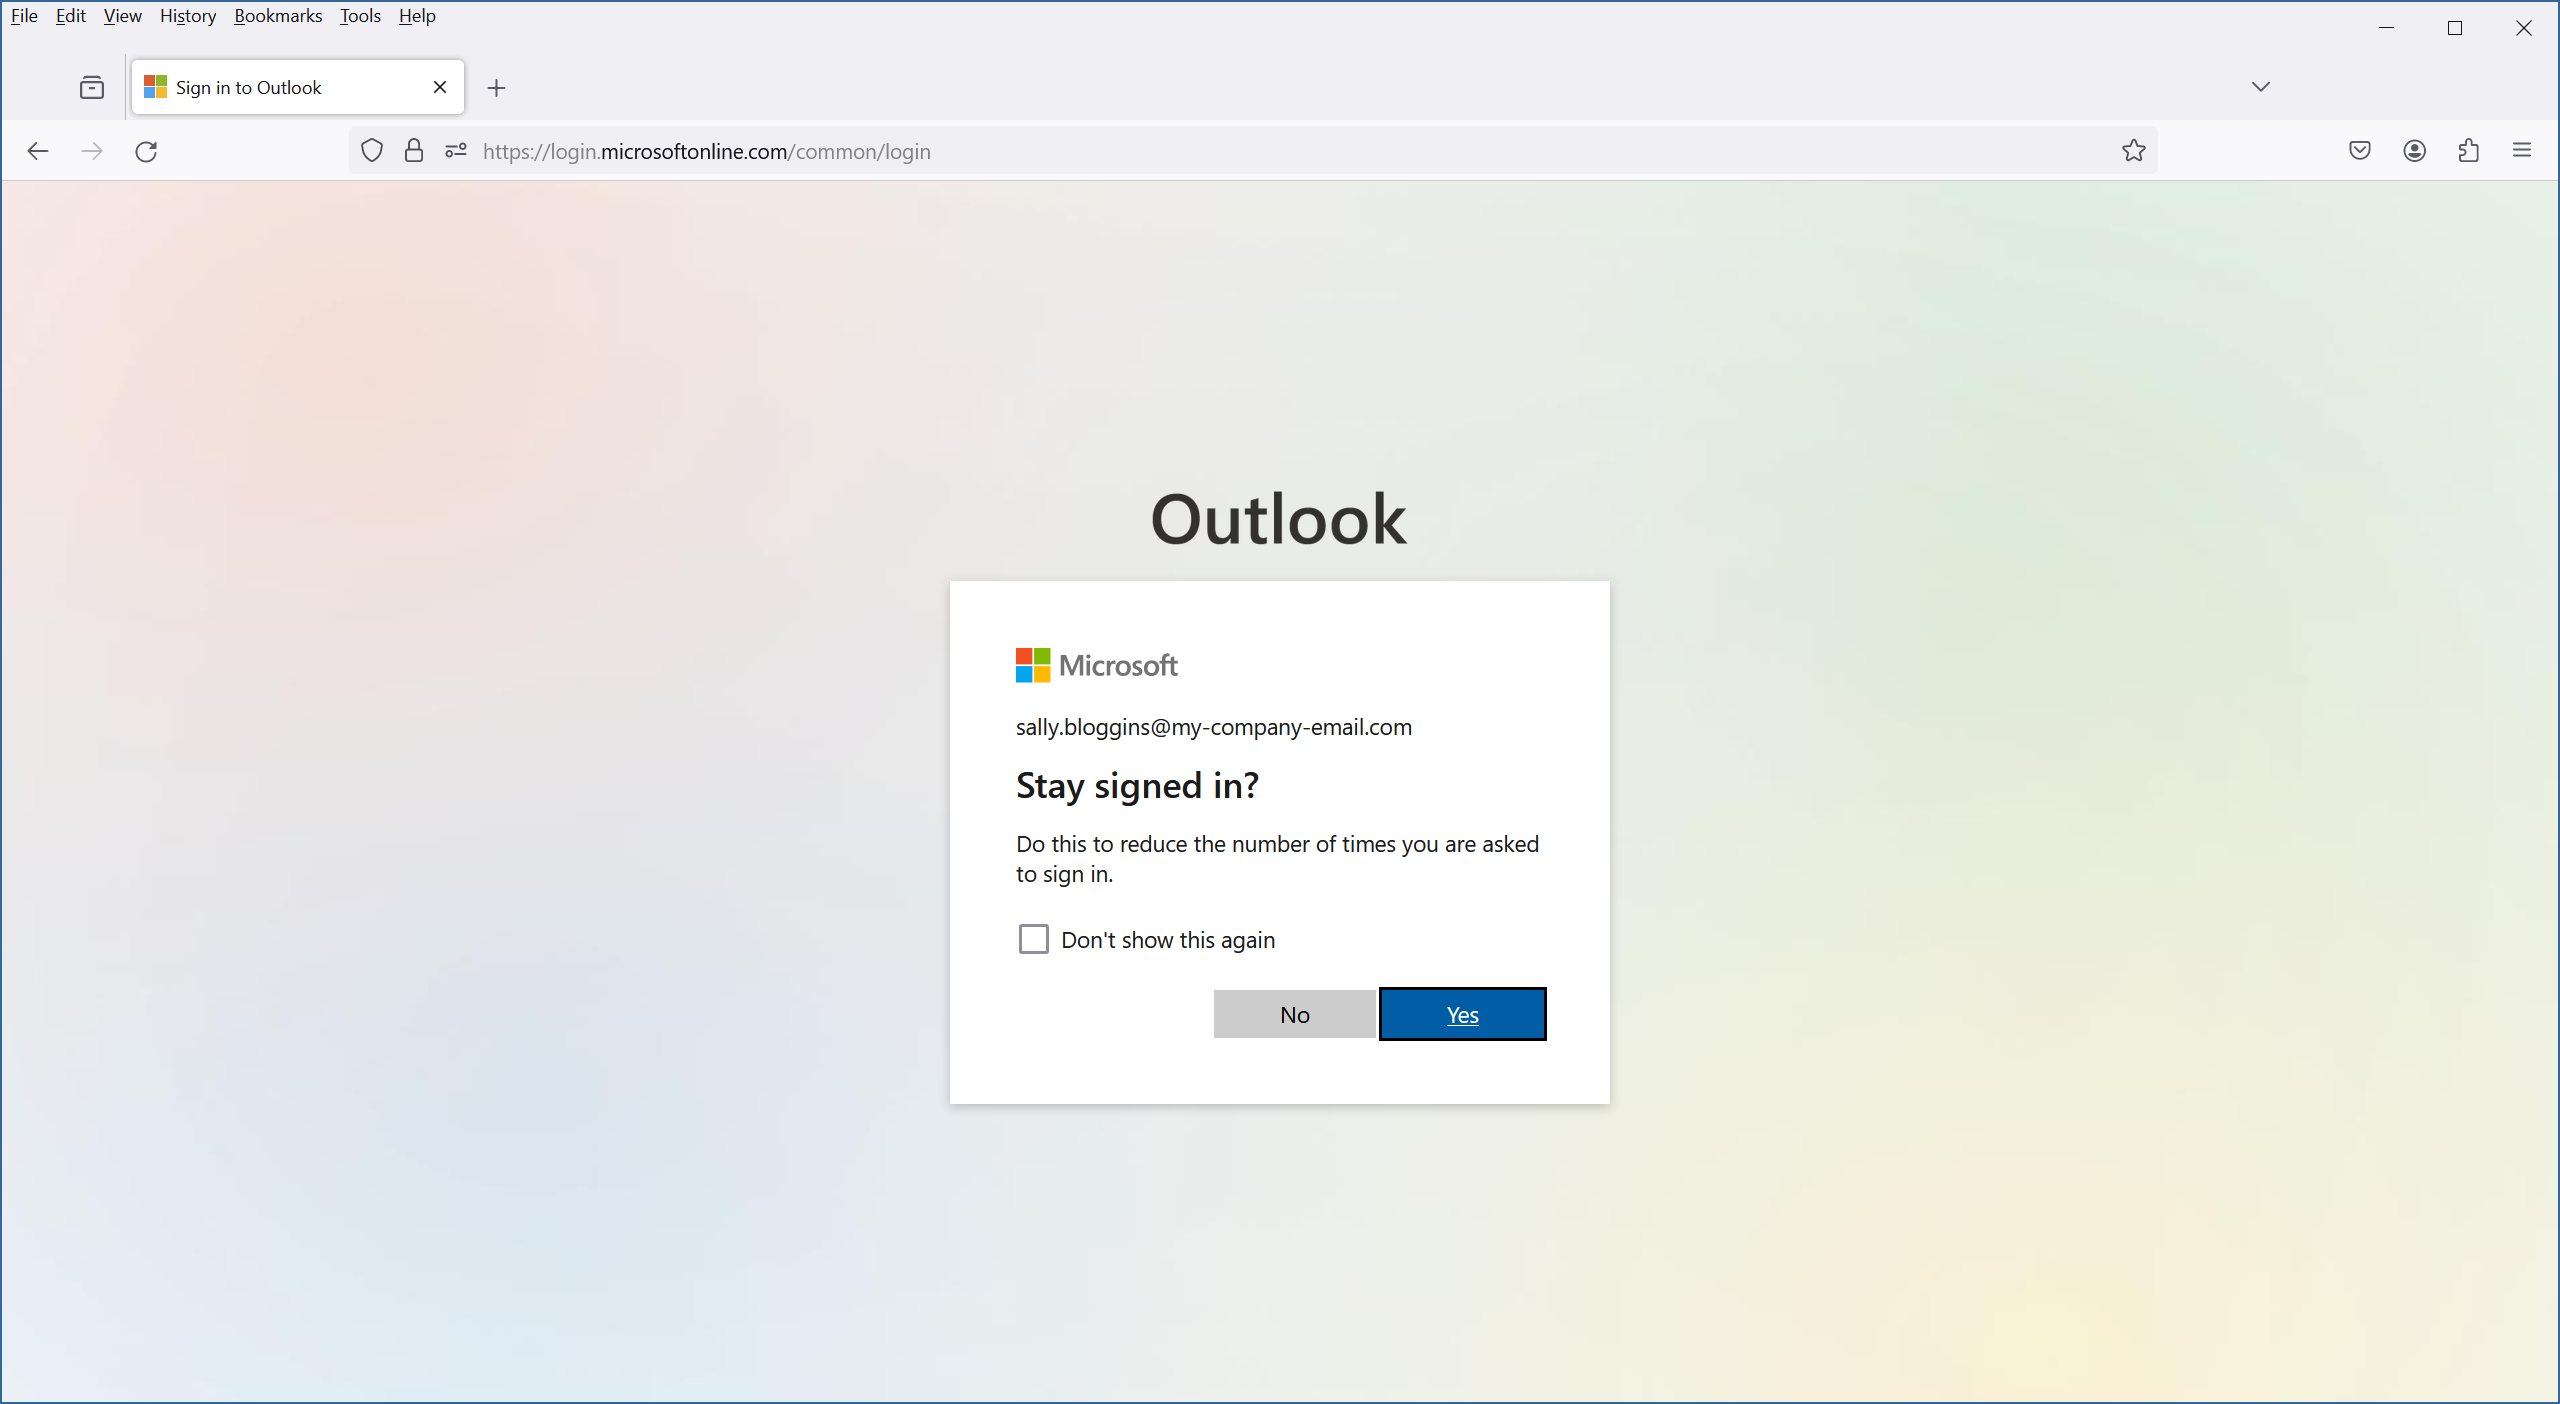
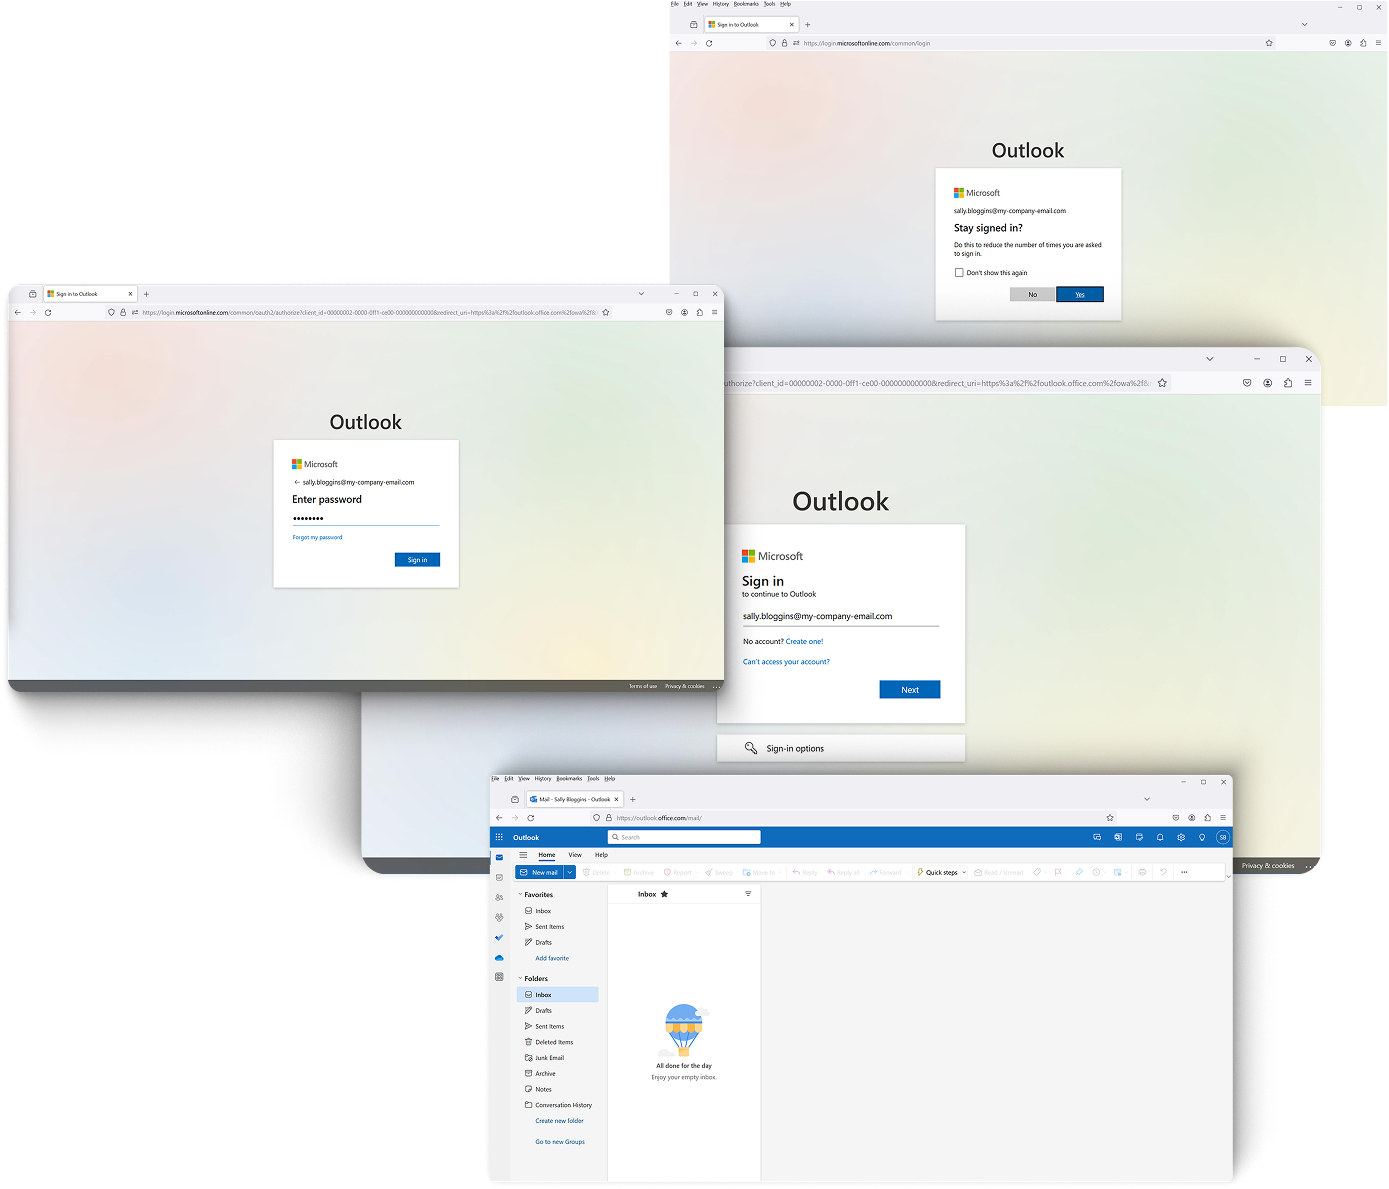
Log in to the web version of Outlook using your own account to begin.

You cannot perform this task using the desktop version of Outlook.

Open the Shared Mailbox

1.
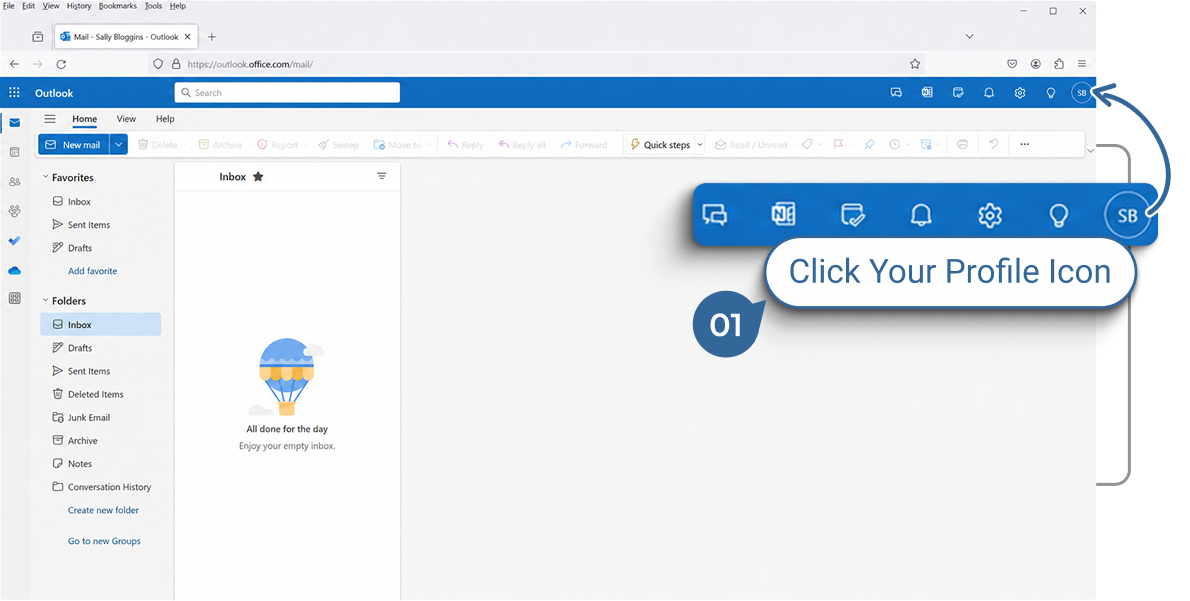
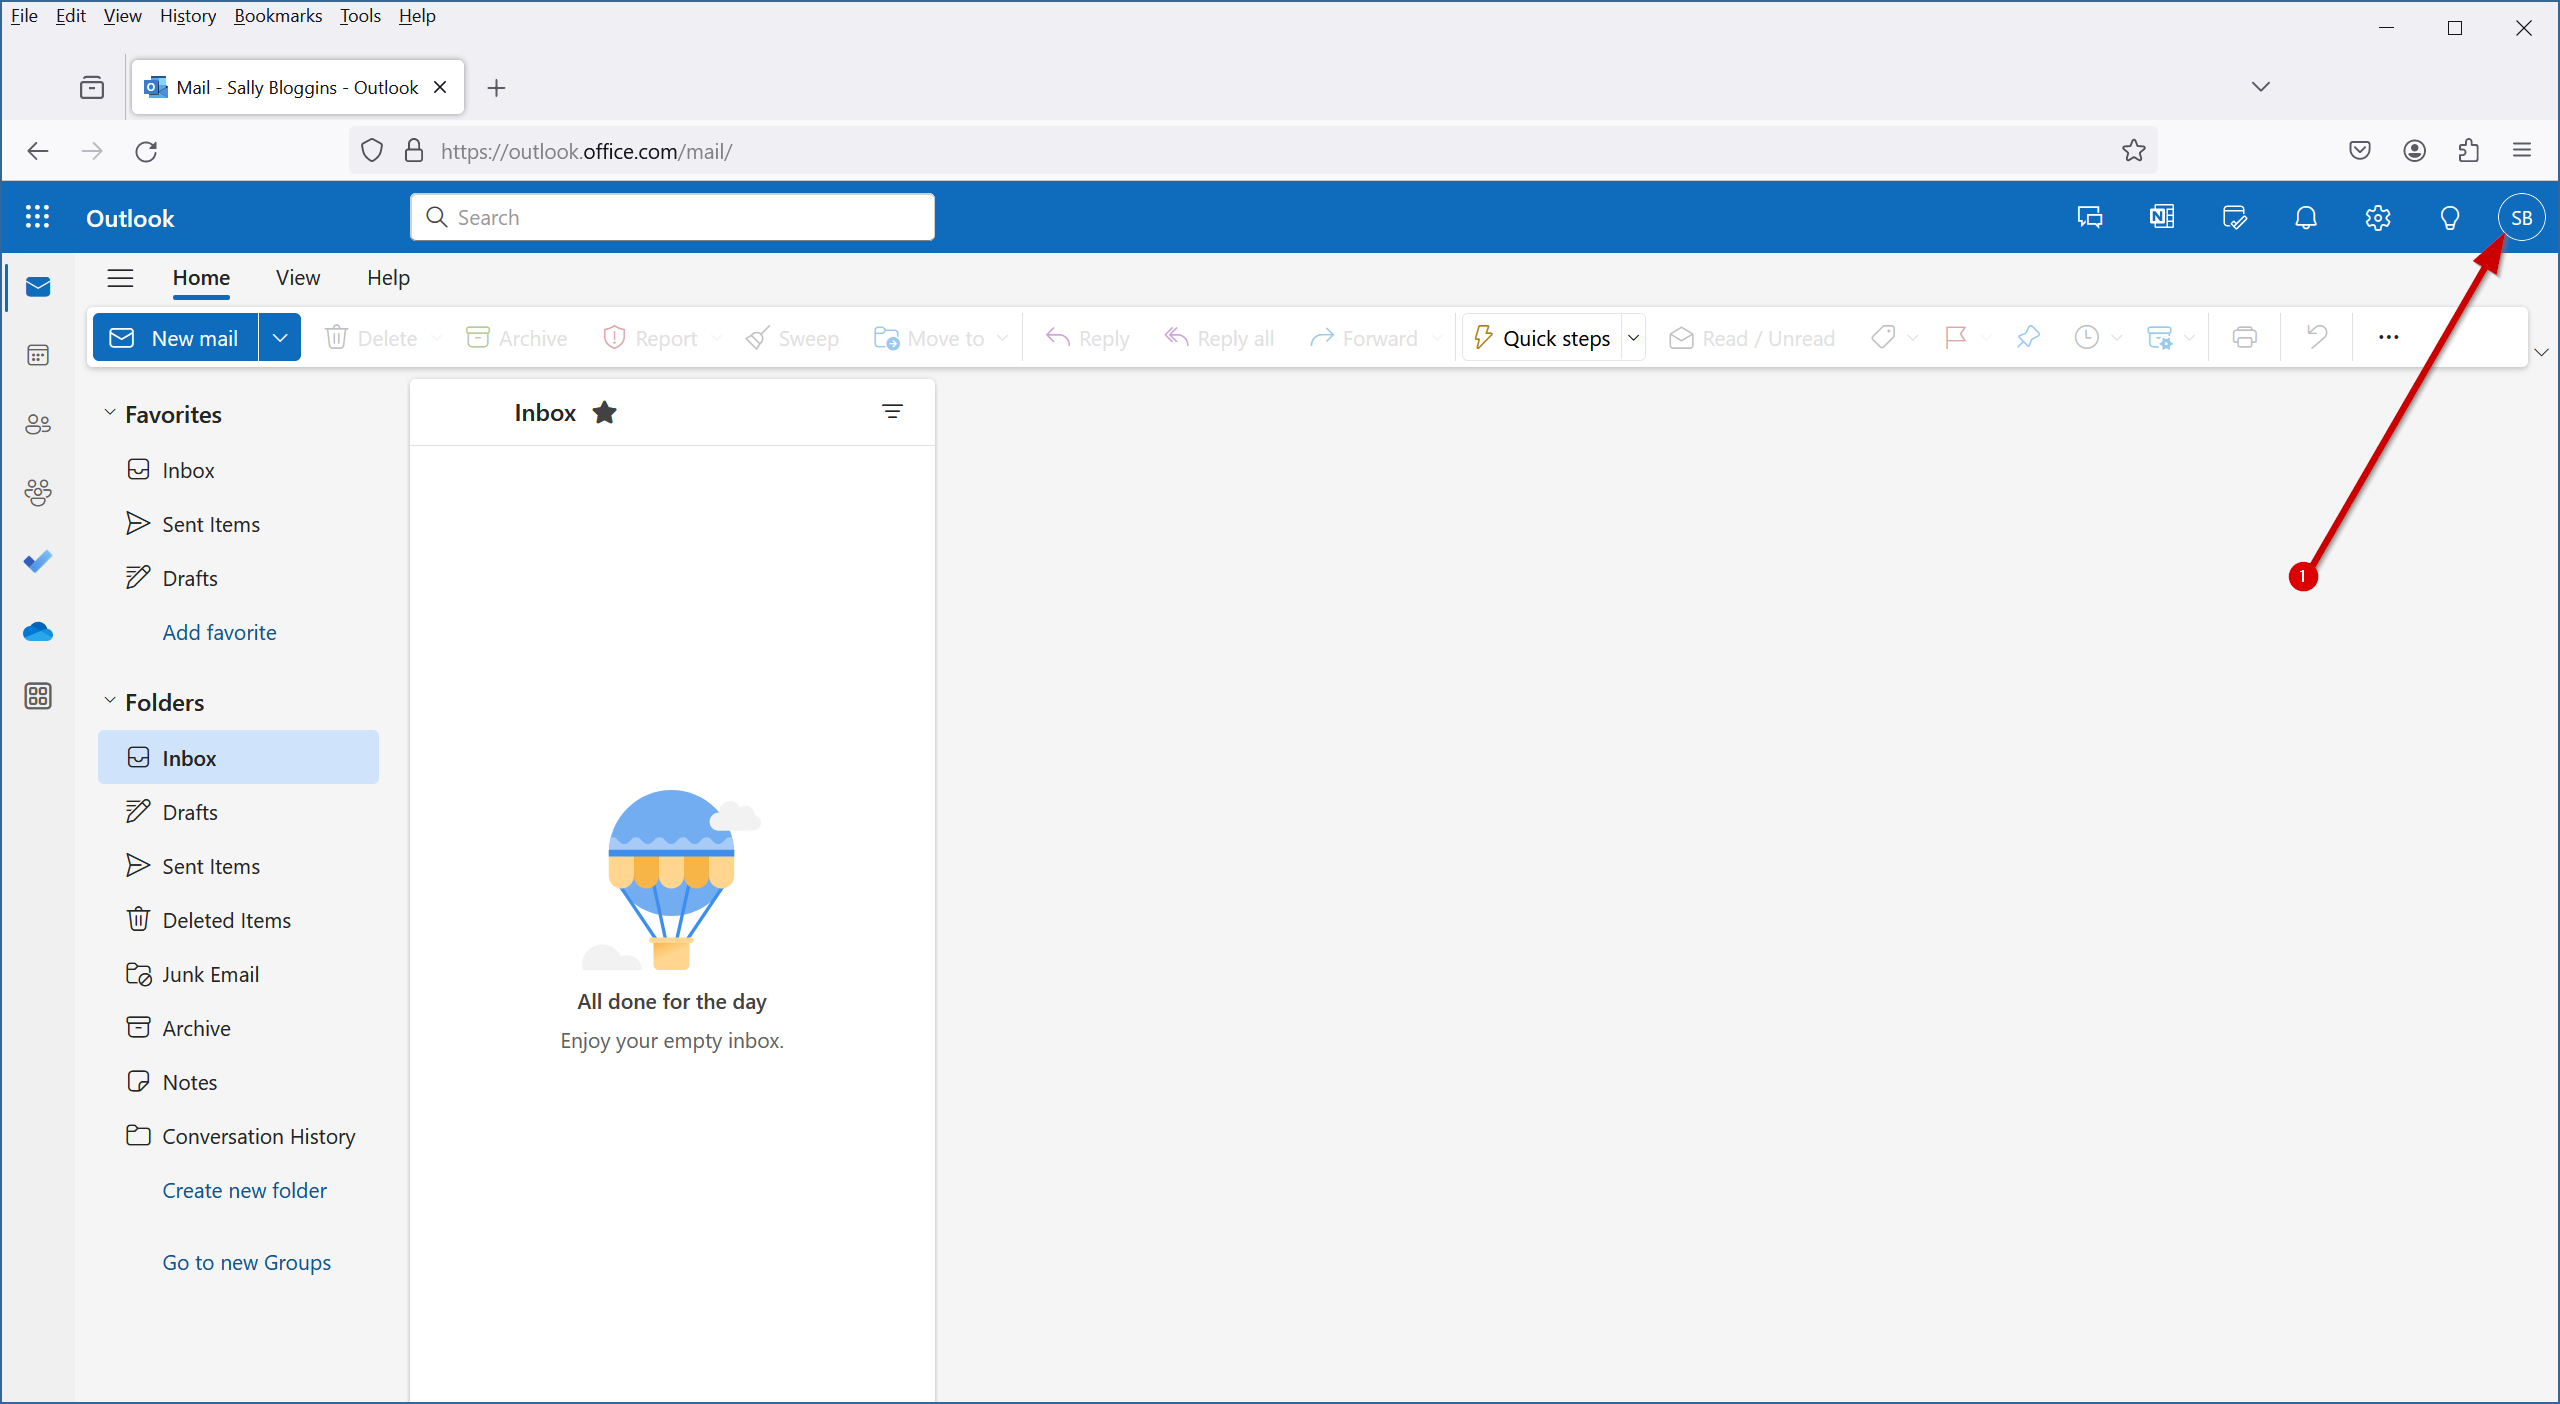
Click on your profile image or initials at the top-right.
2.
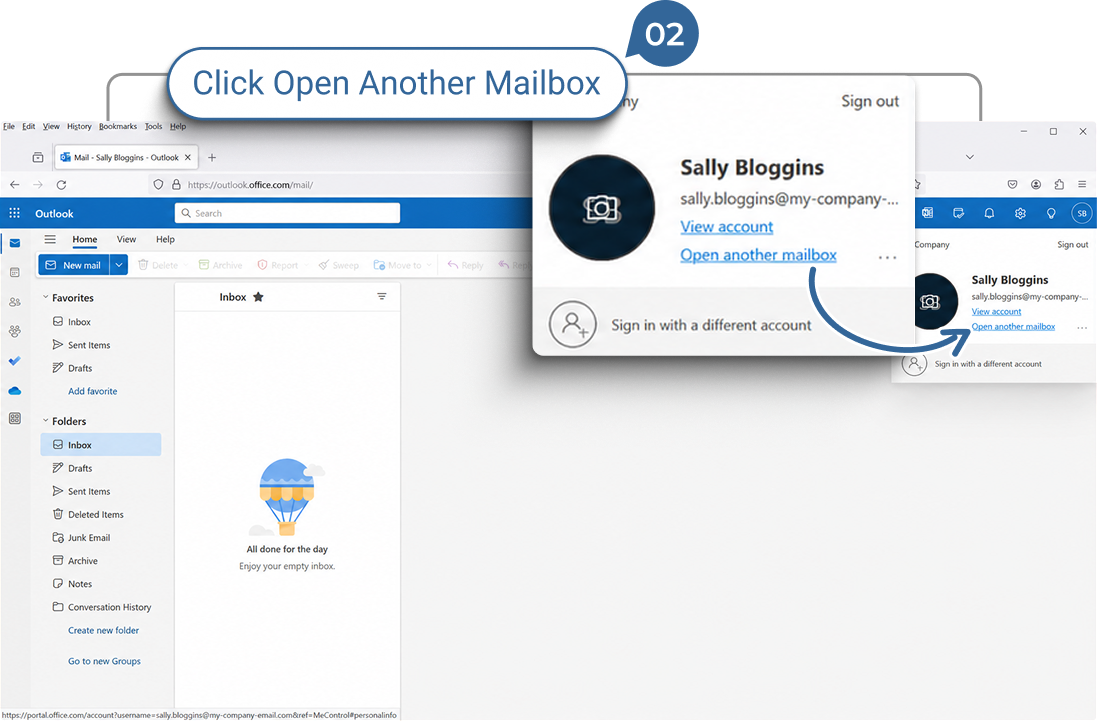
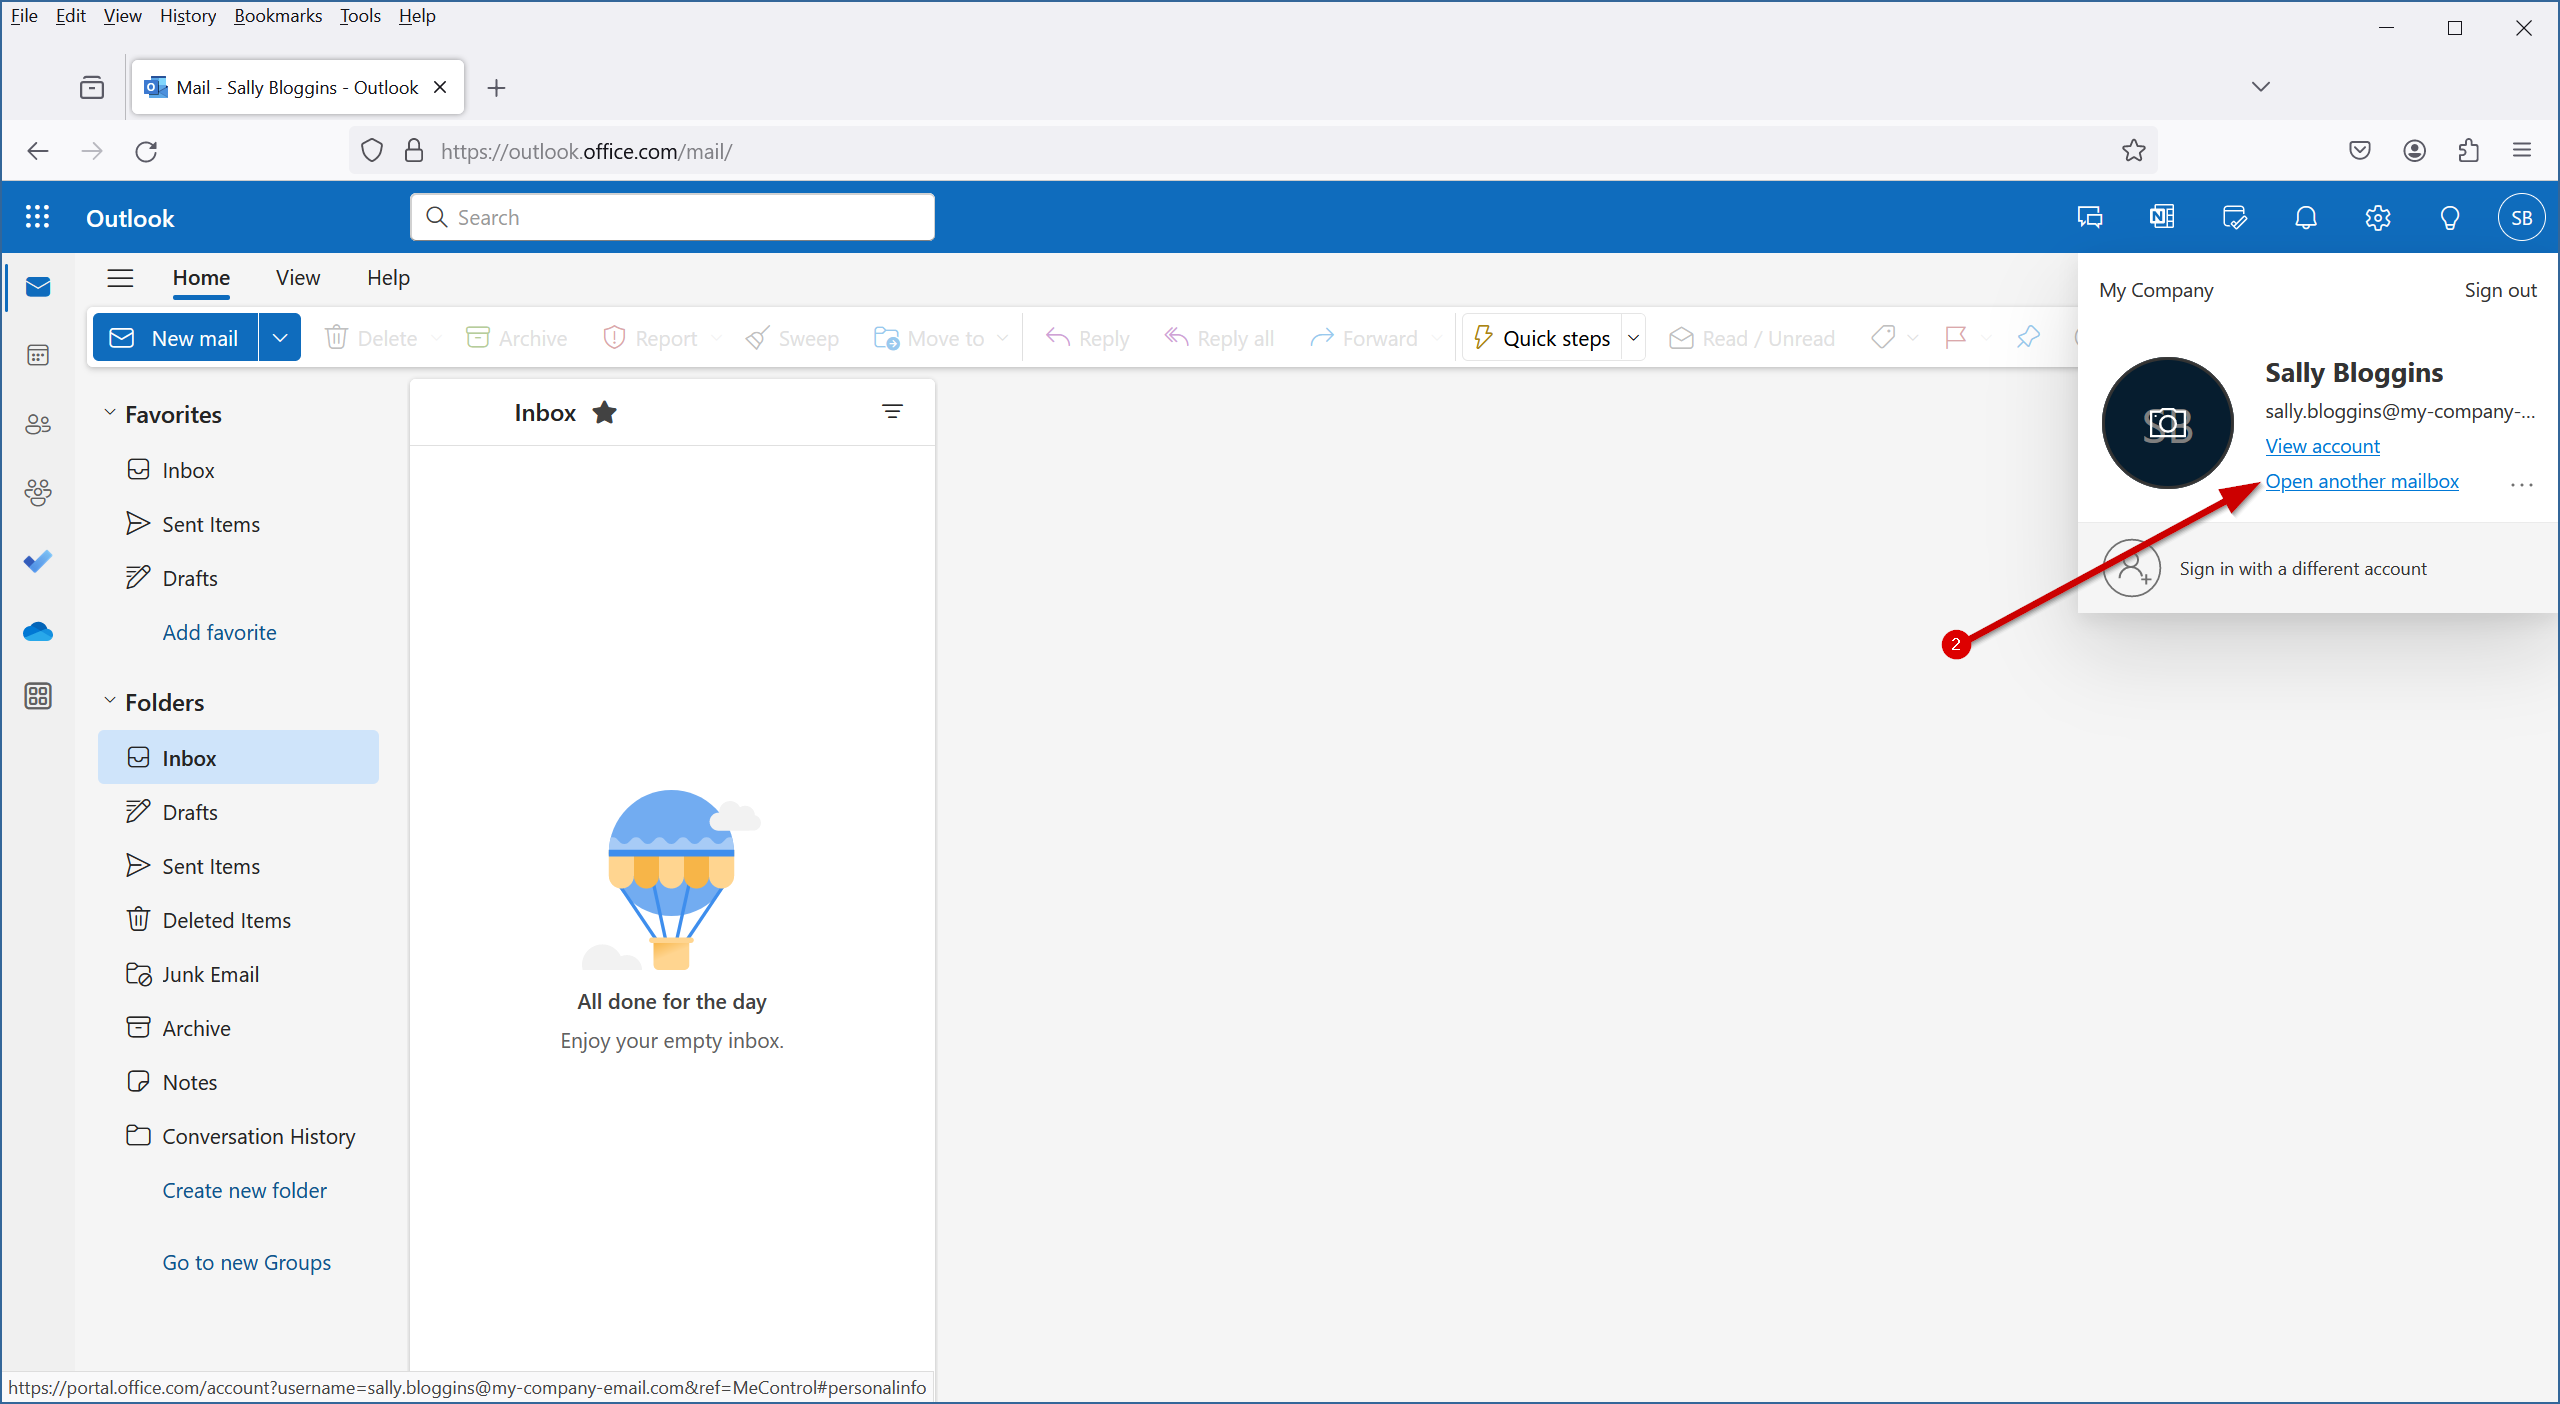
Click on the “Open another mailbox” link.
3.
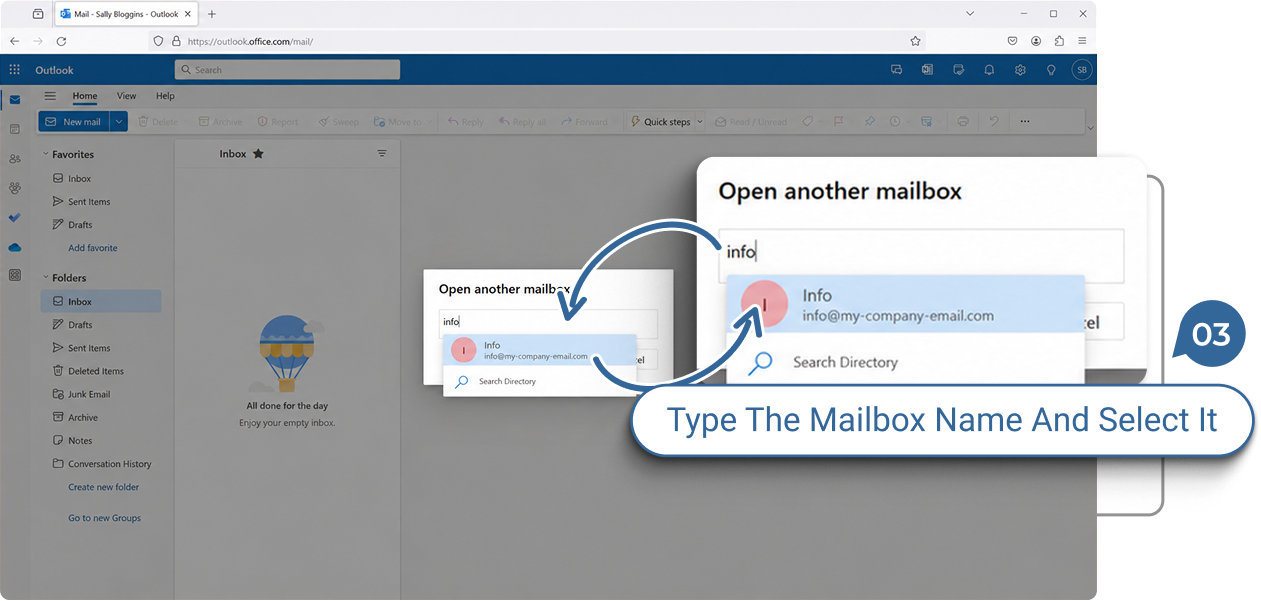
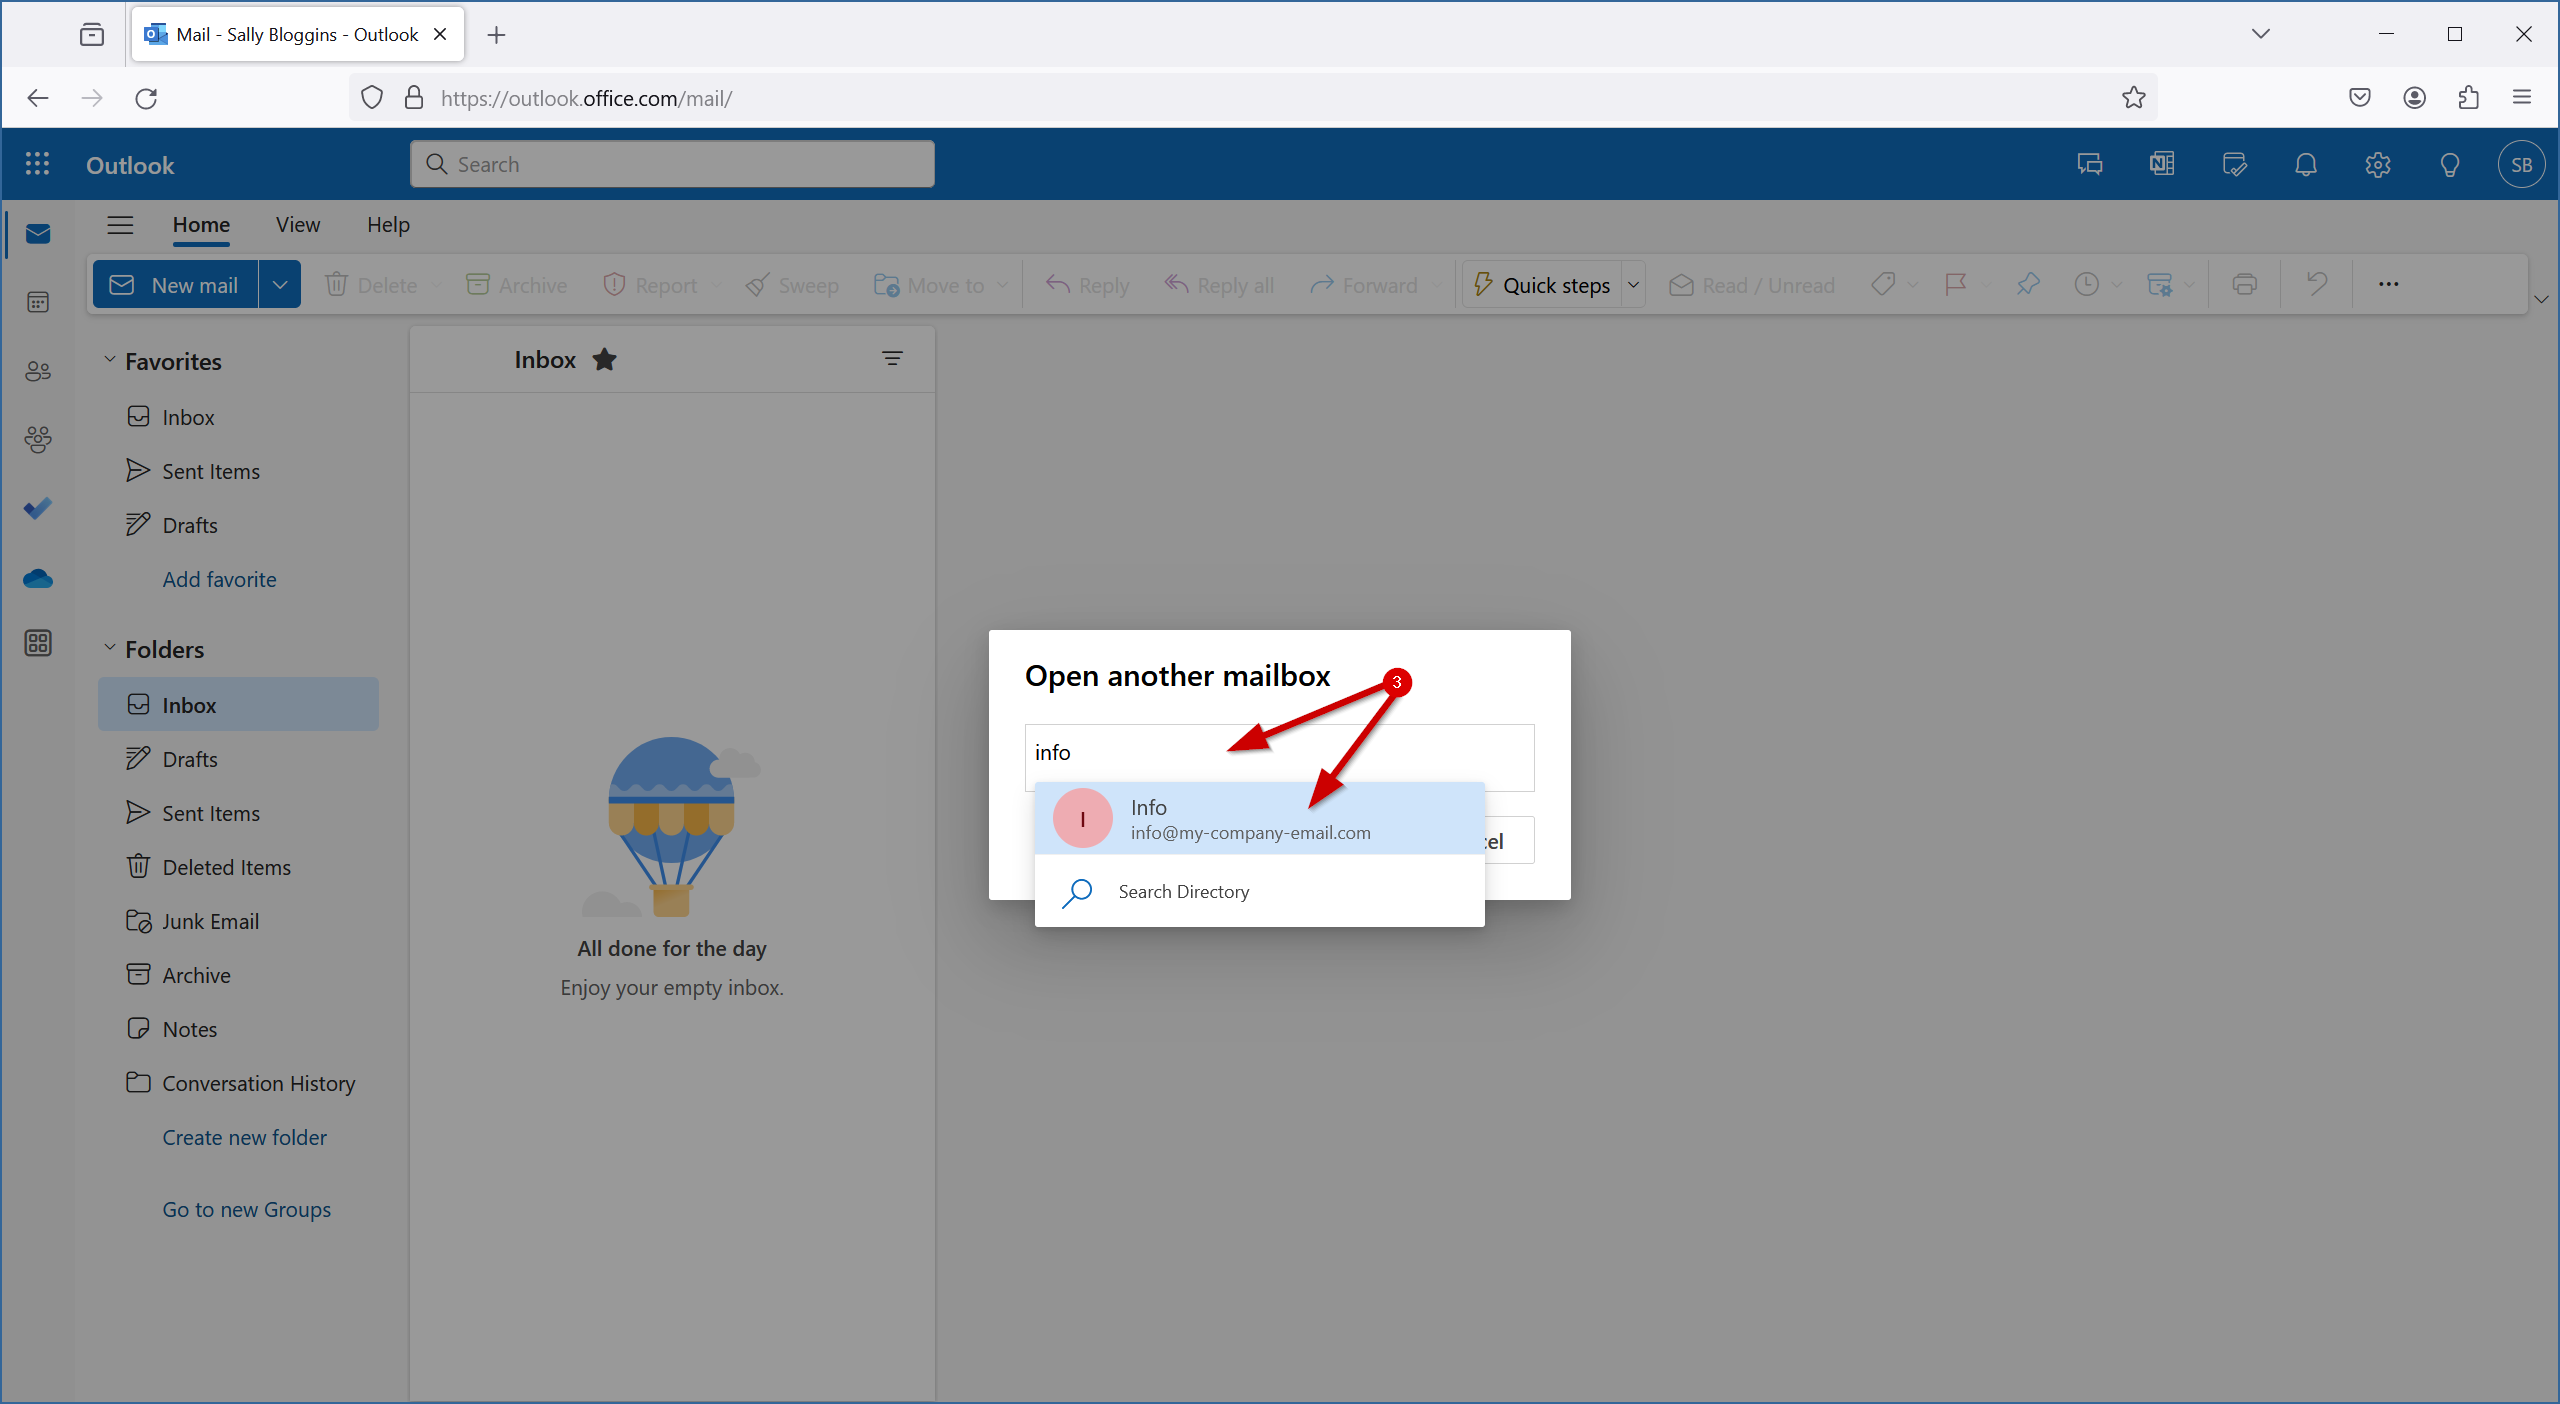
Enter the email address or name of the shared mailbox and click on it to select it from the list.
4.
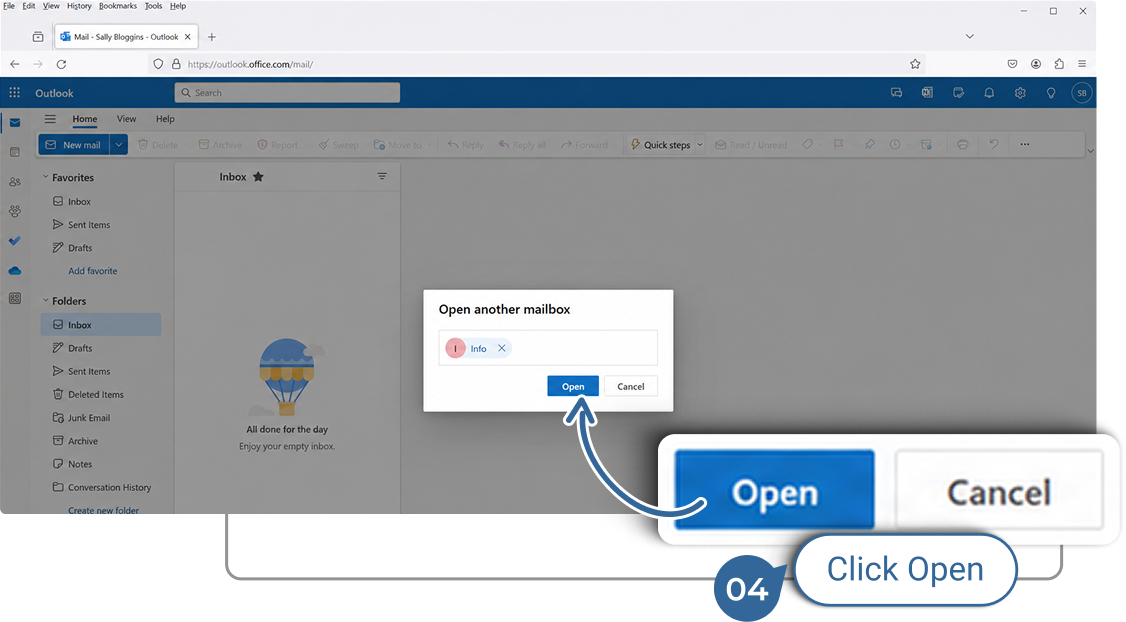
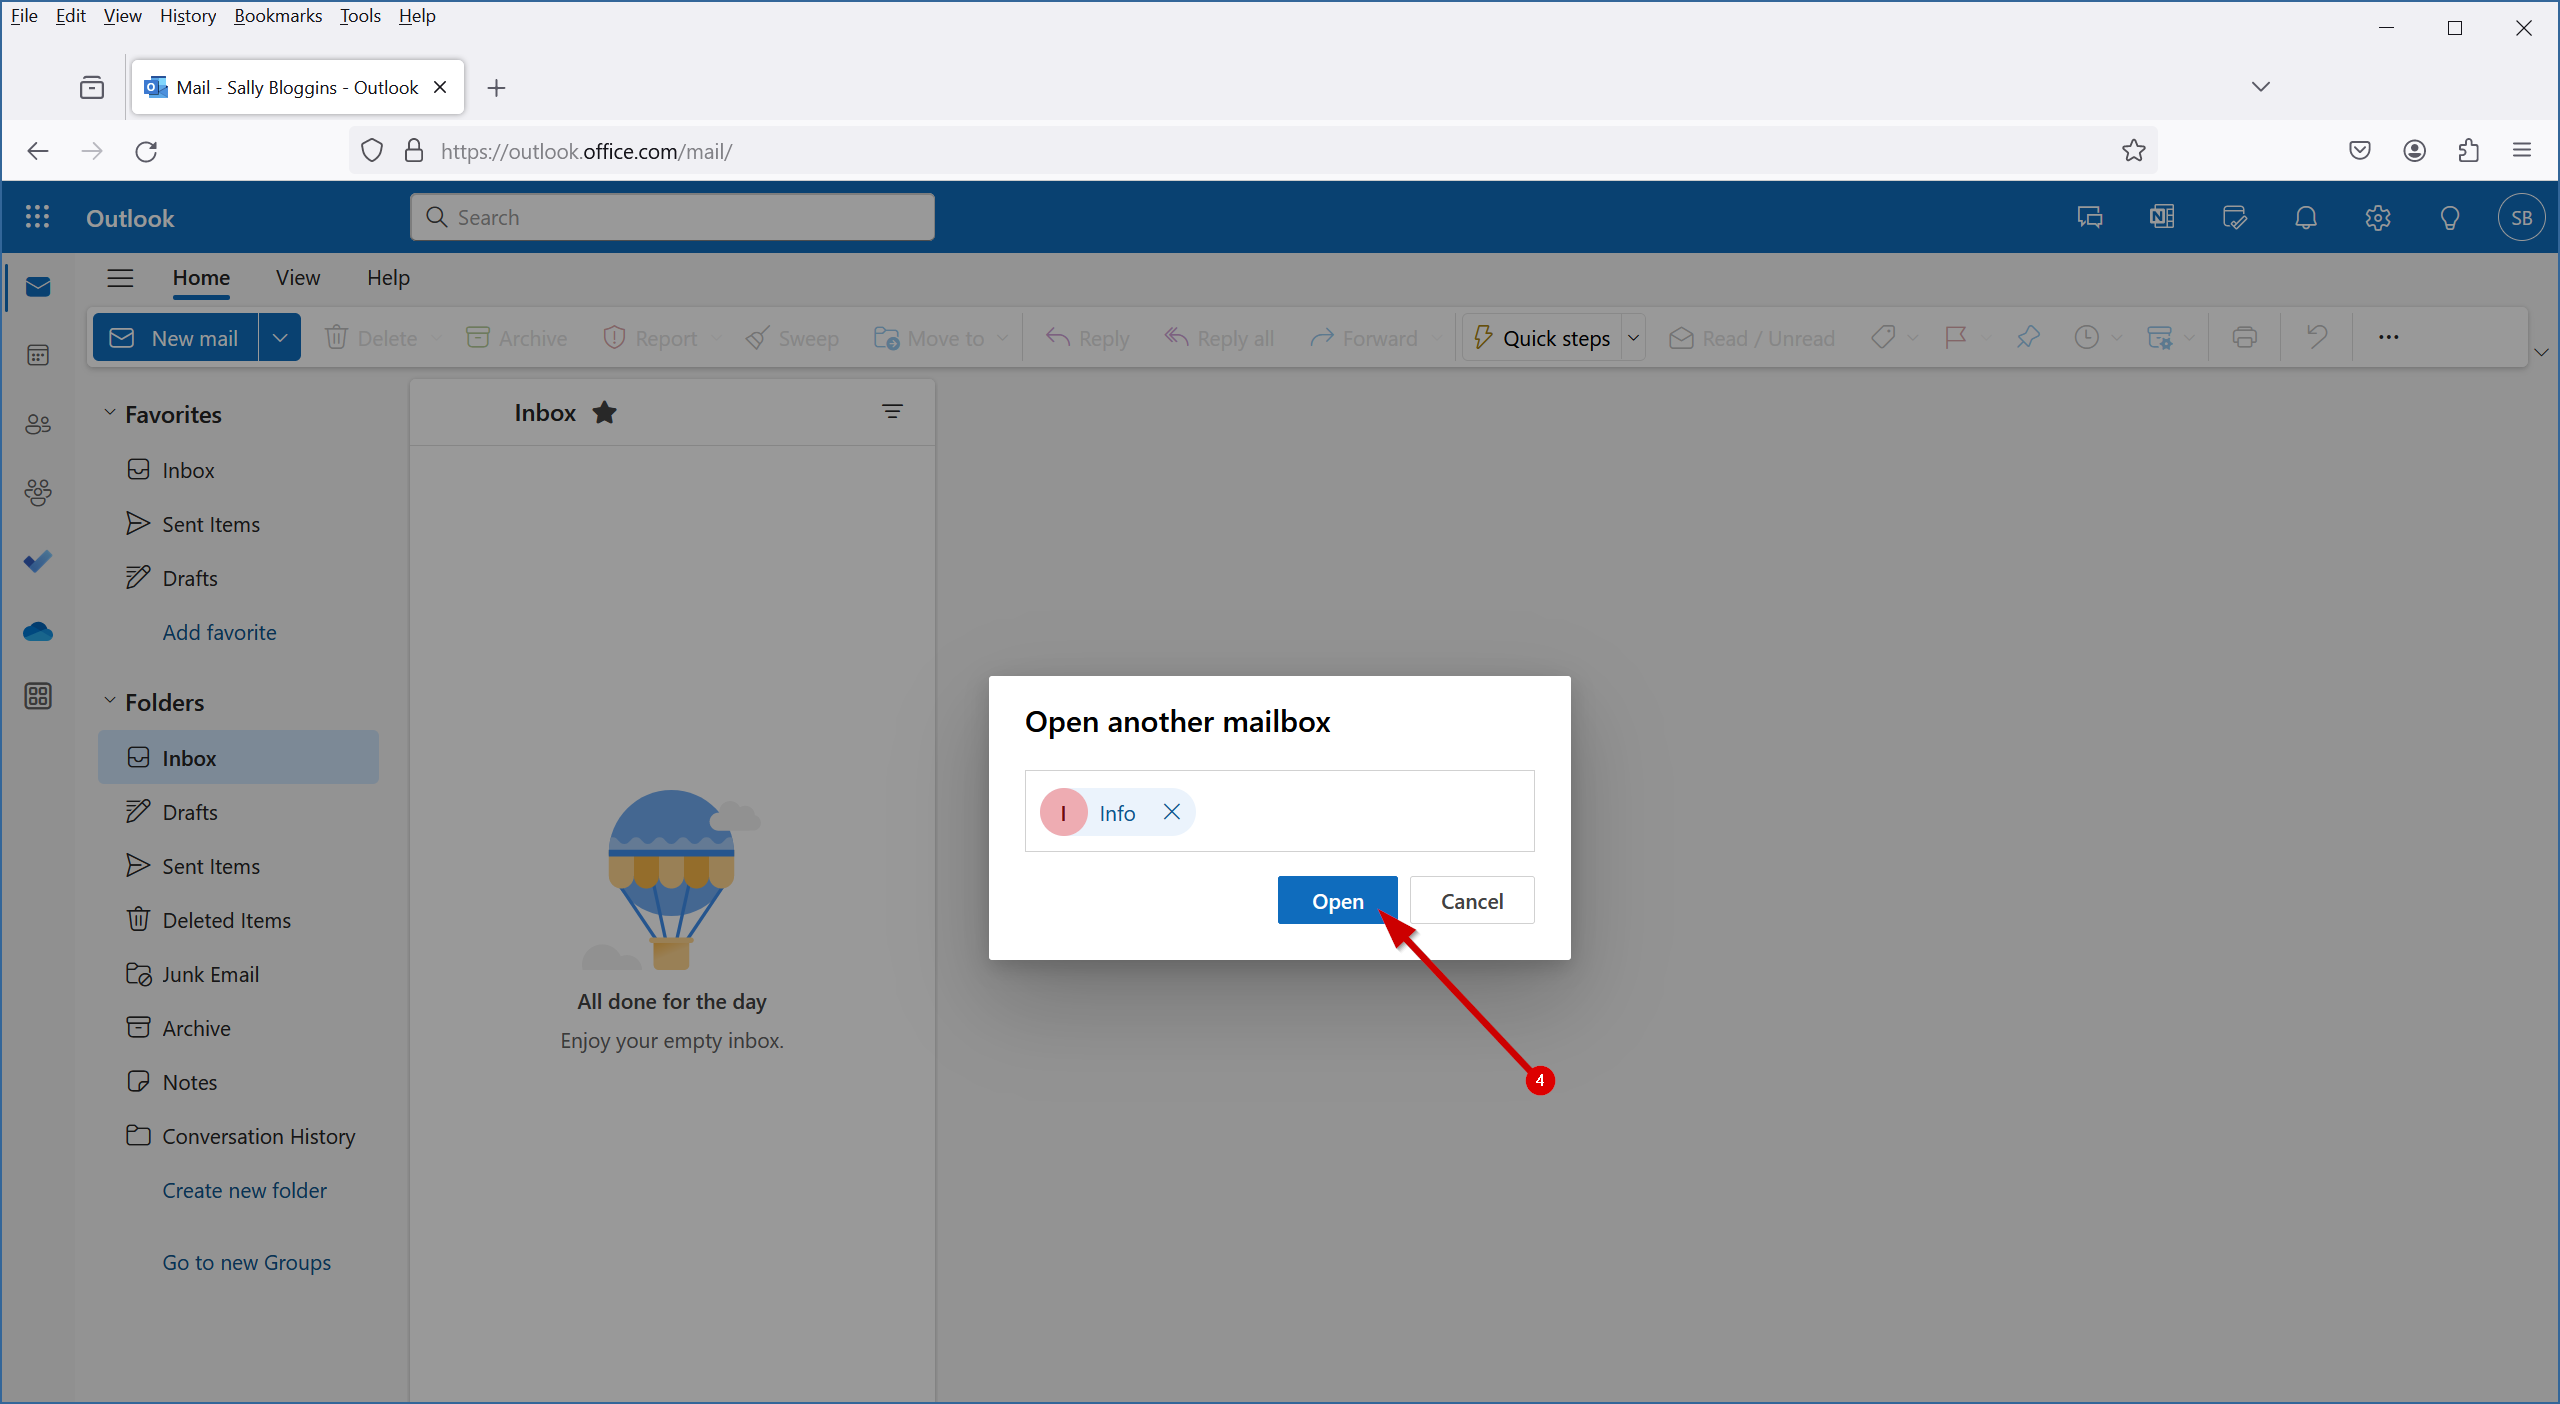
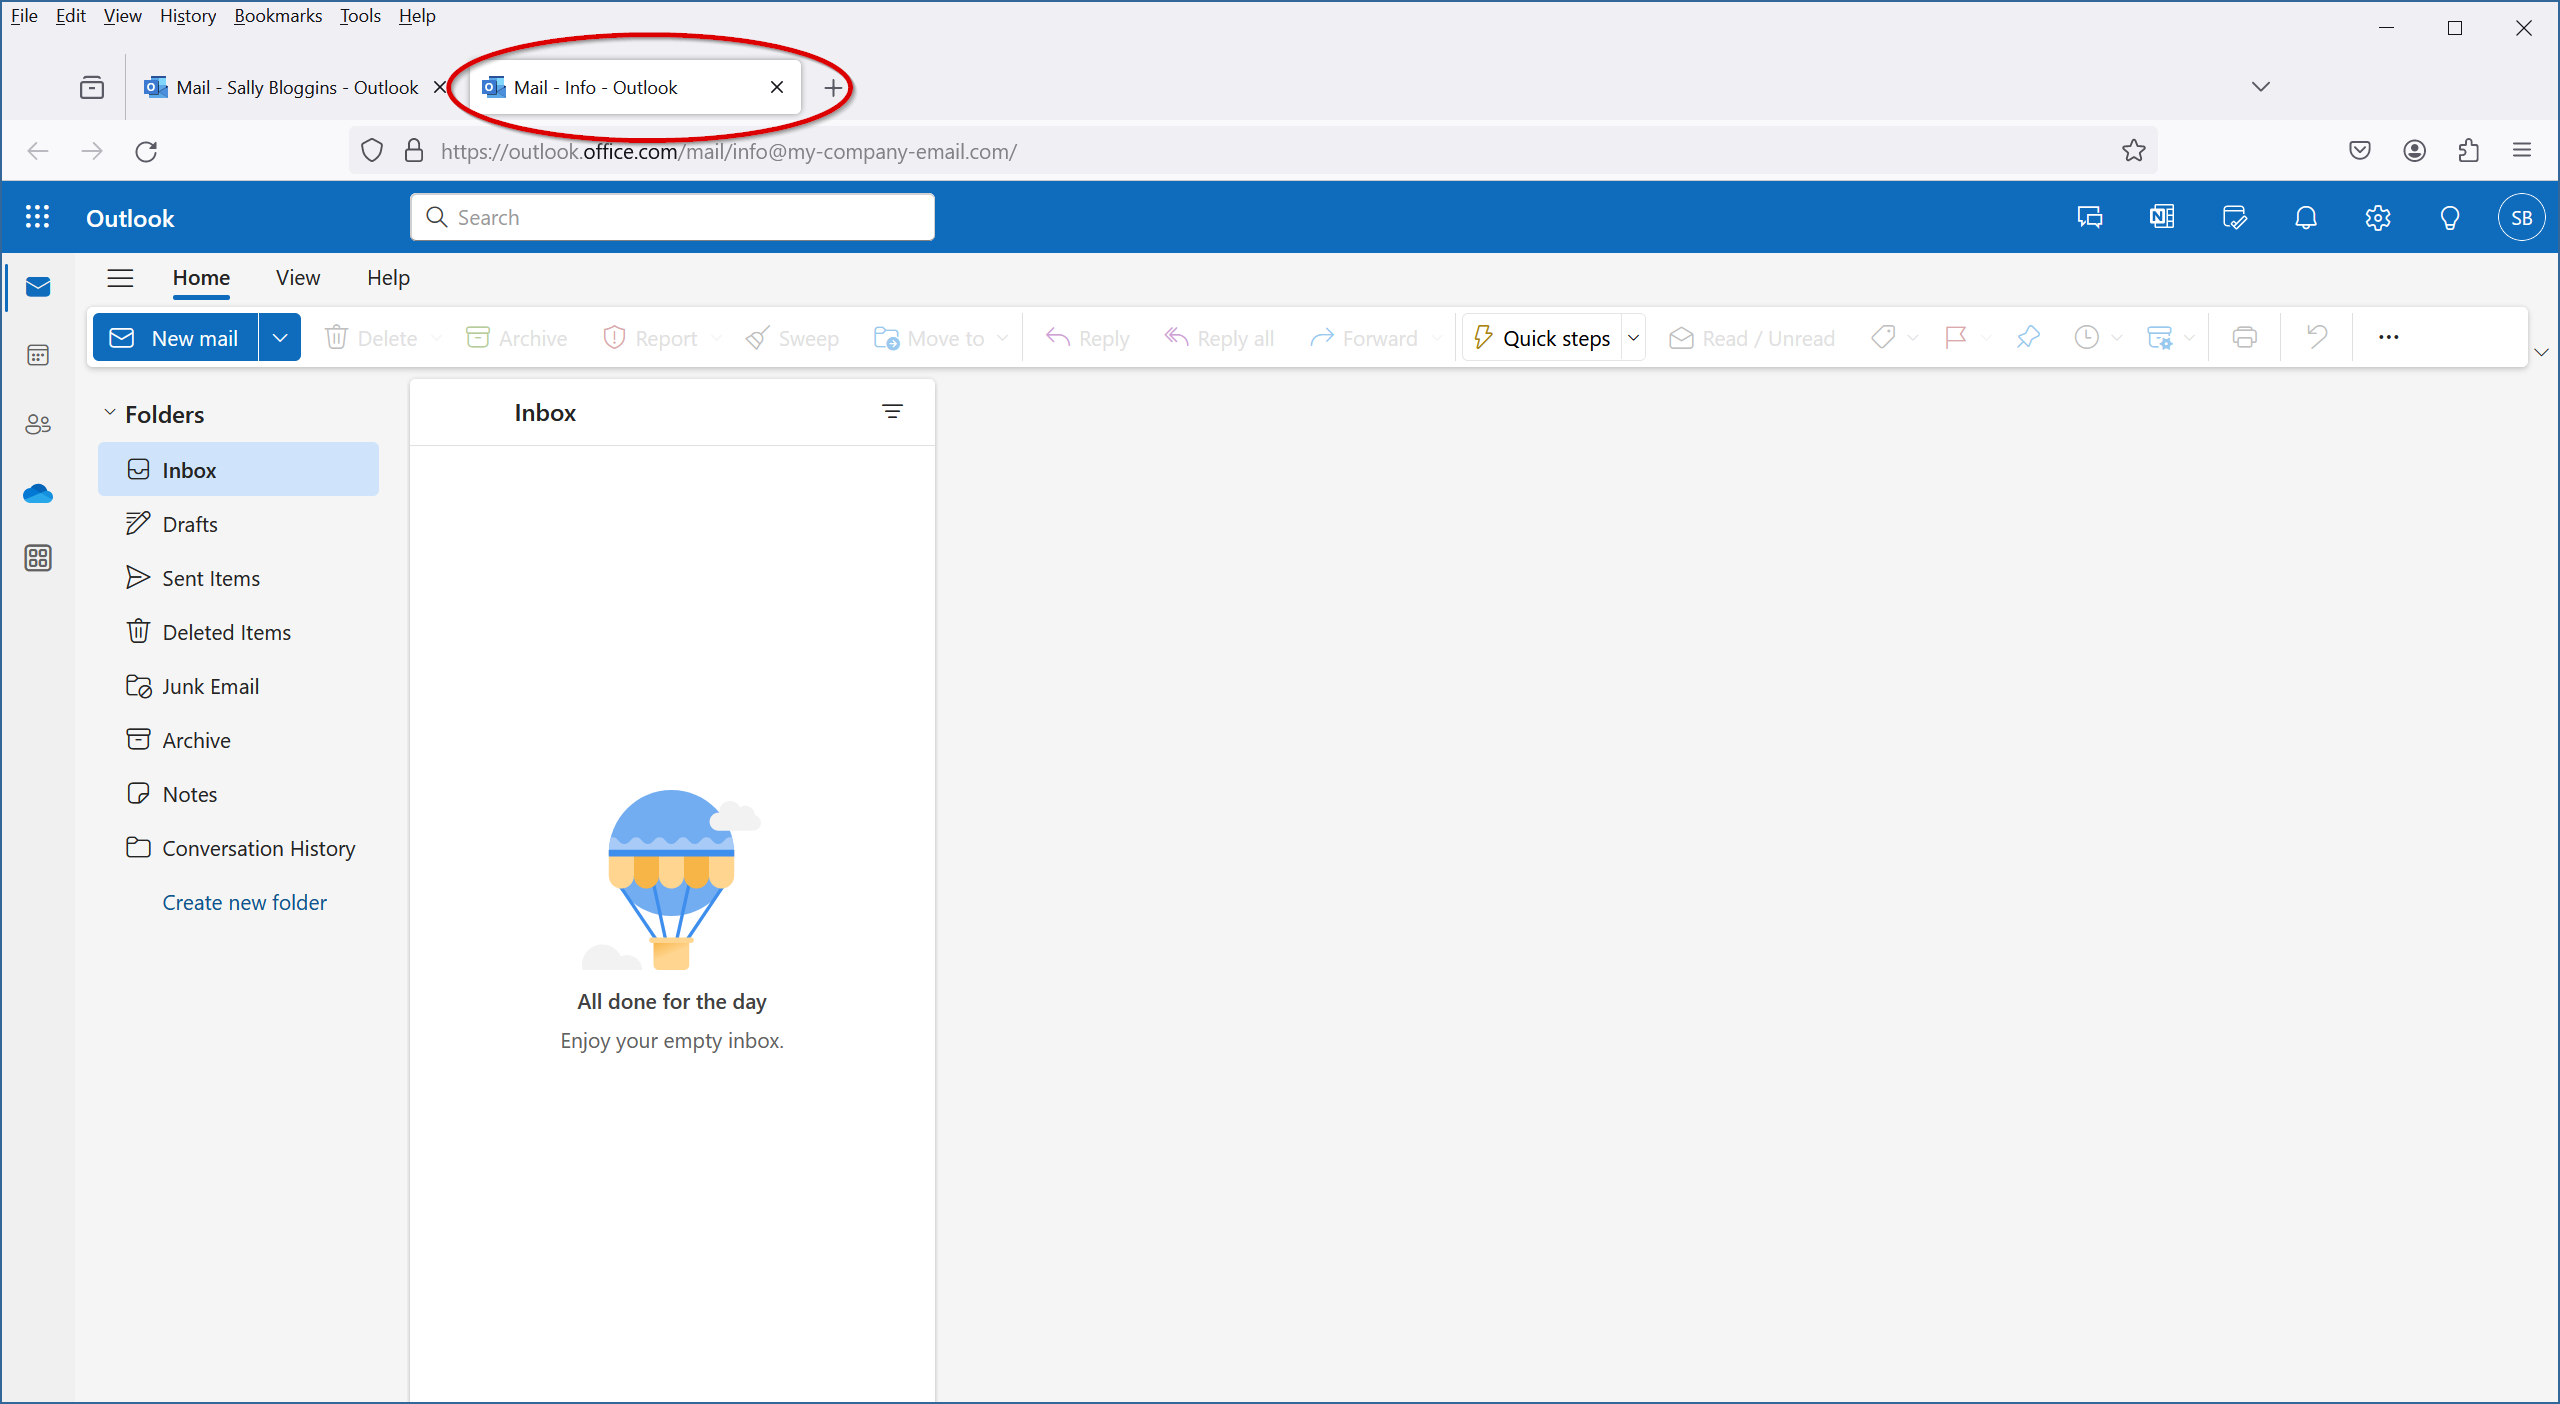
Click the “Open” button and the shared mailbox will open in a new browser tab.

Edit Shared Mailbox Settings

1.
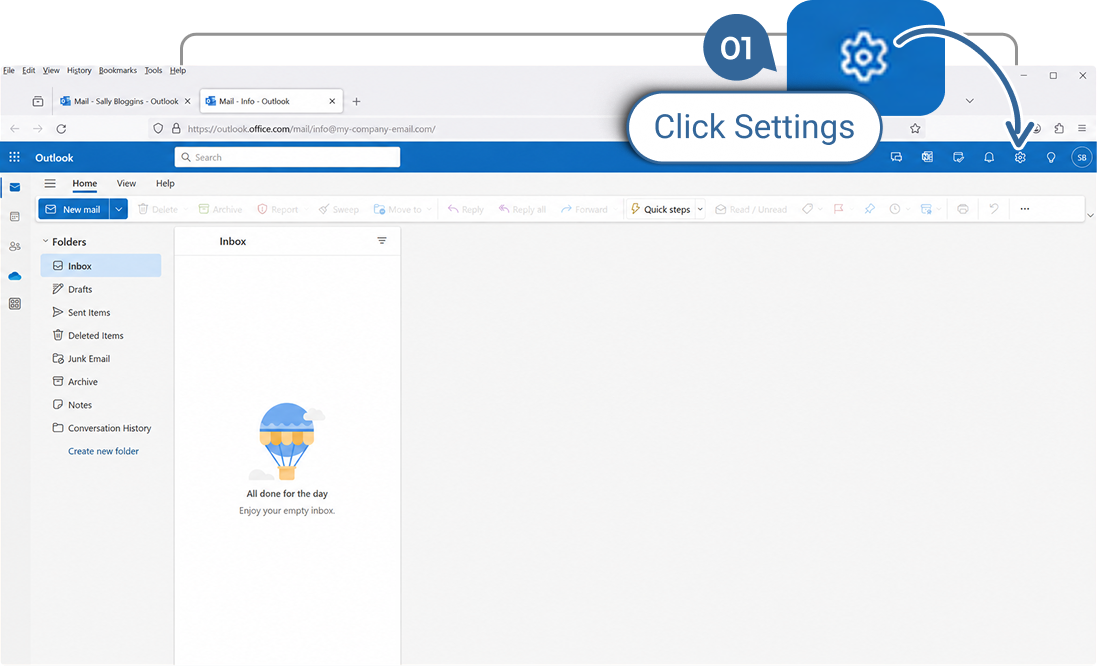
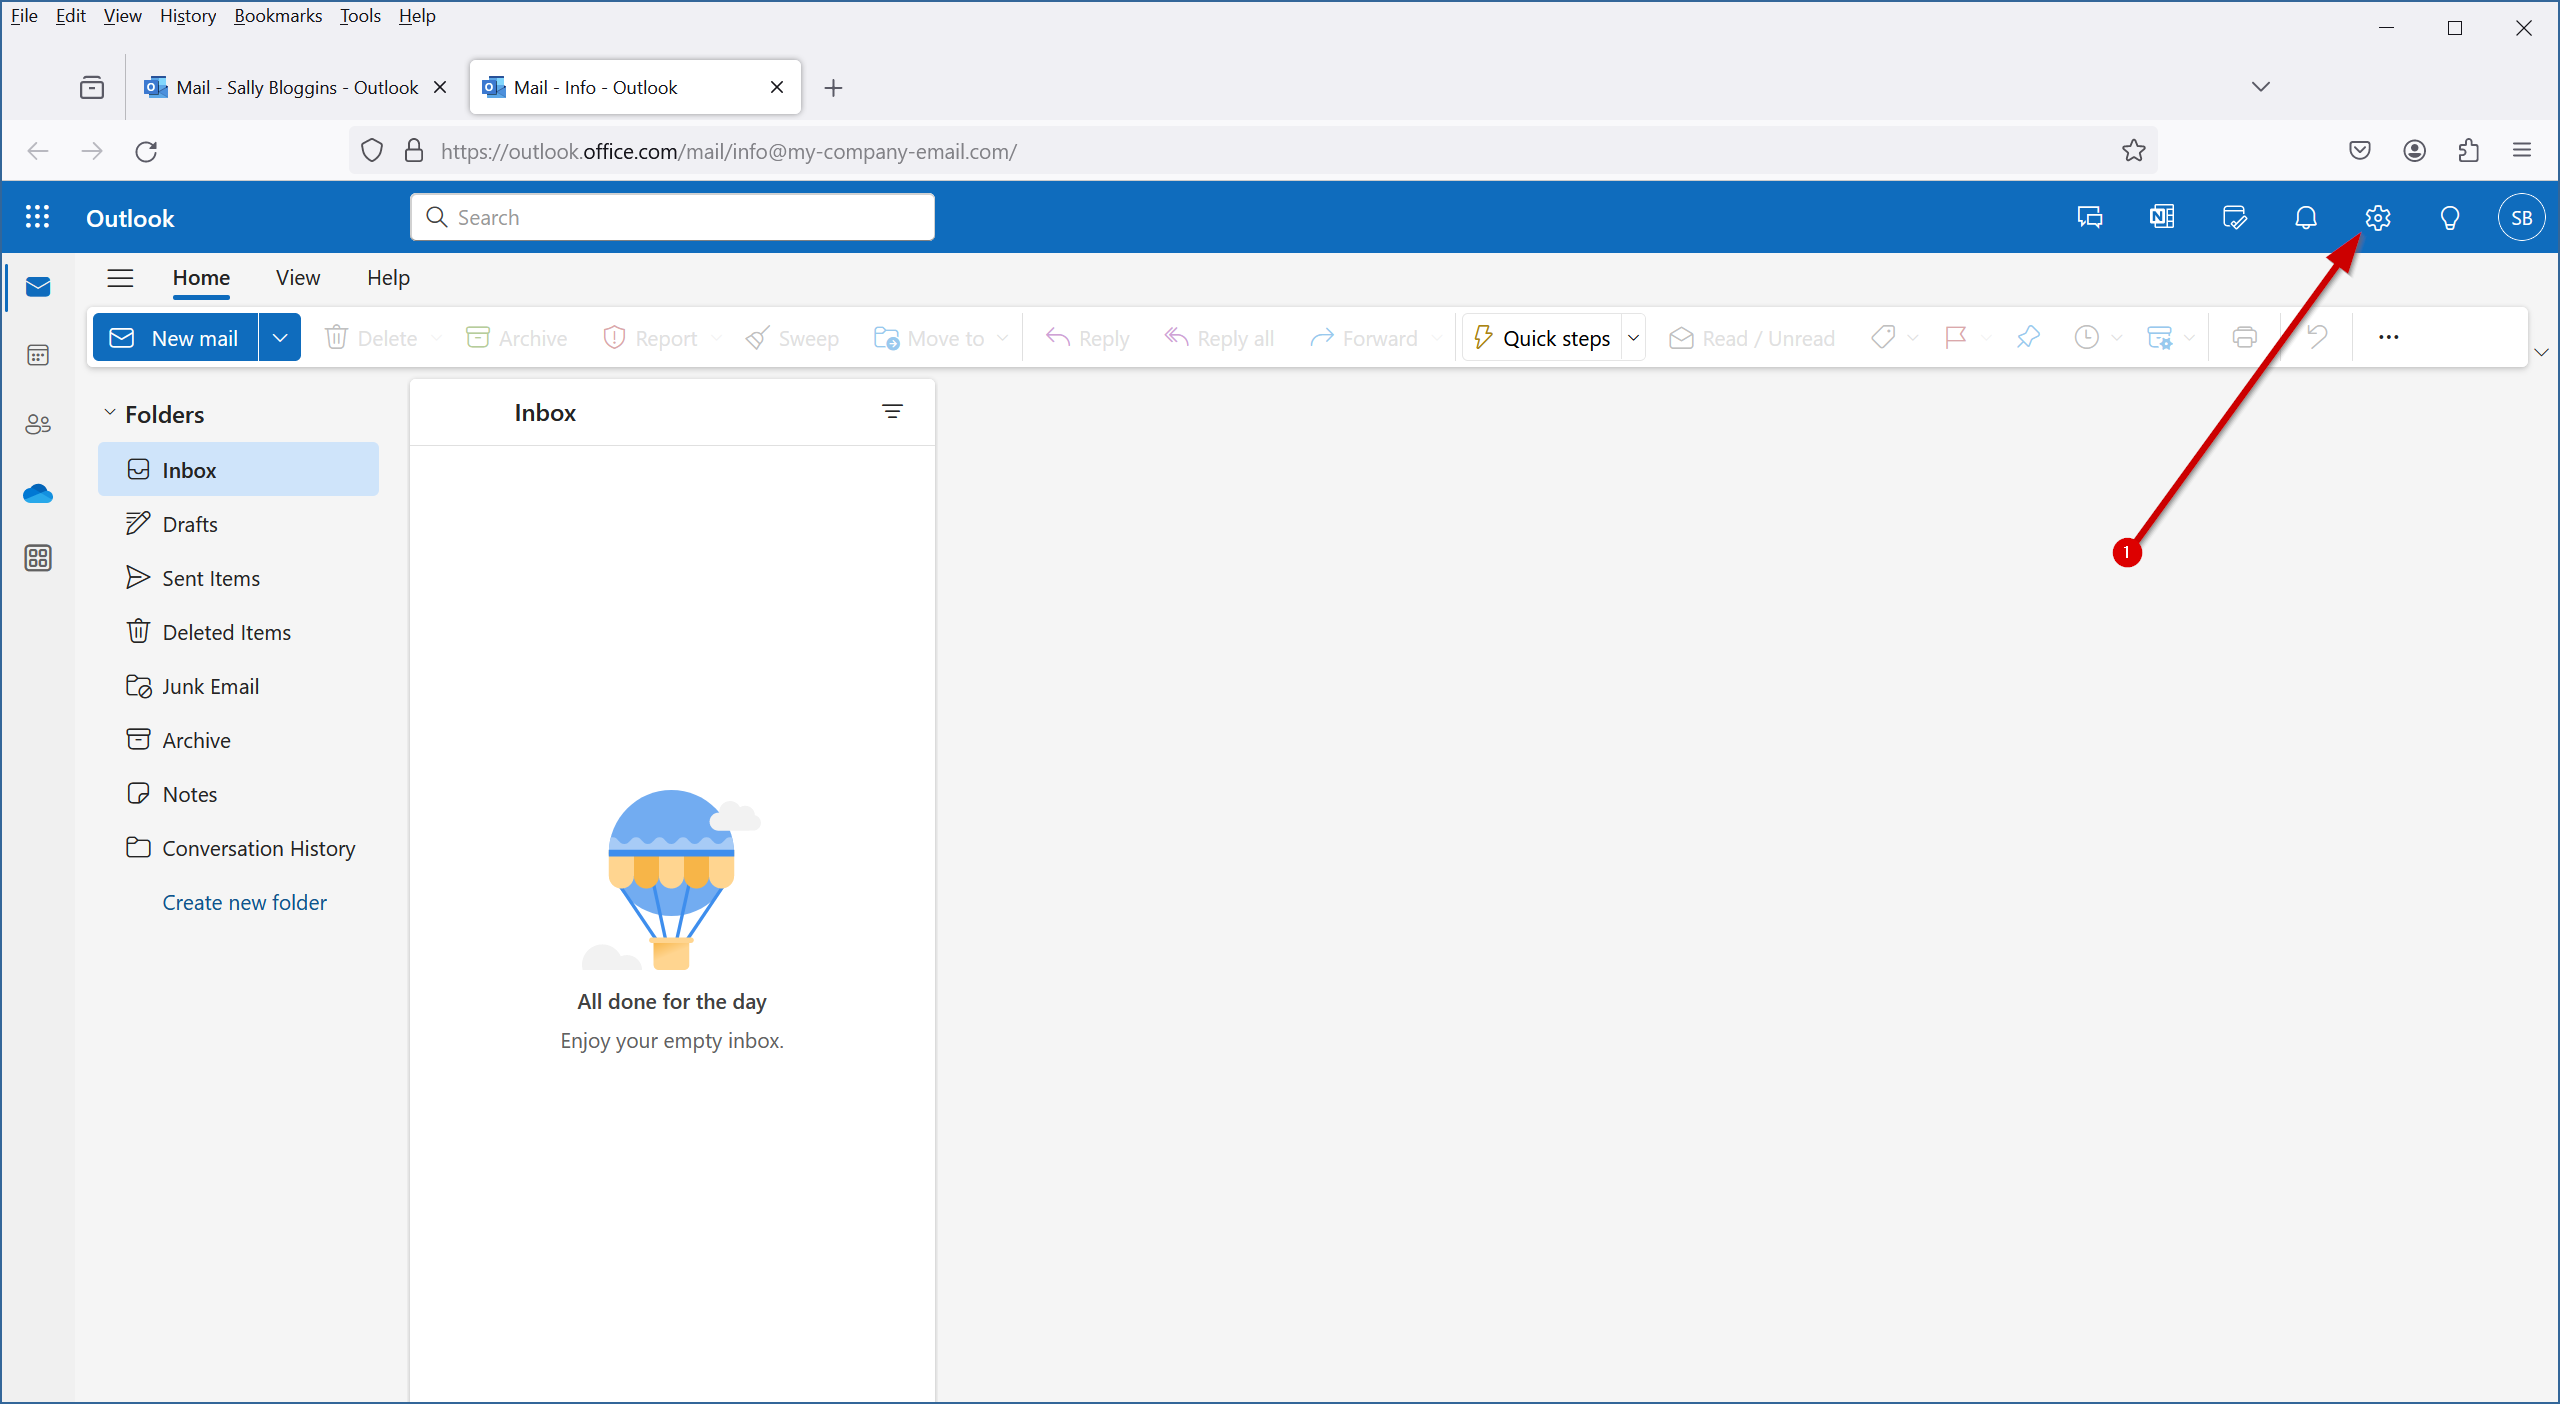
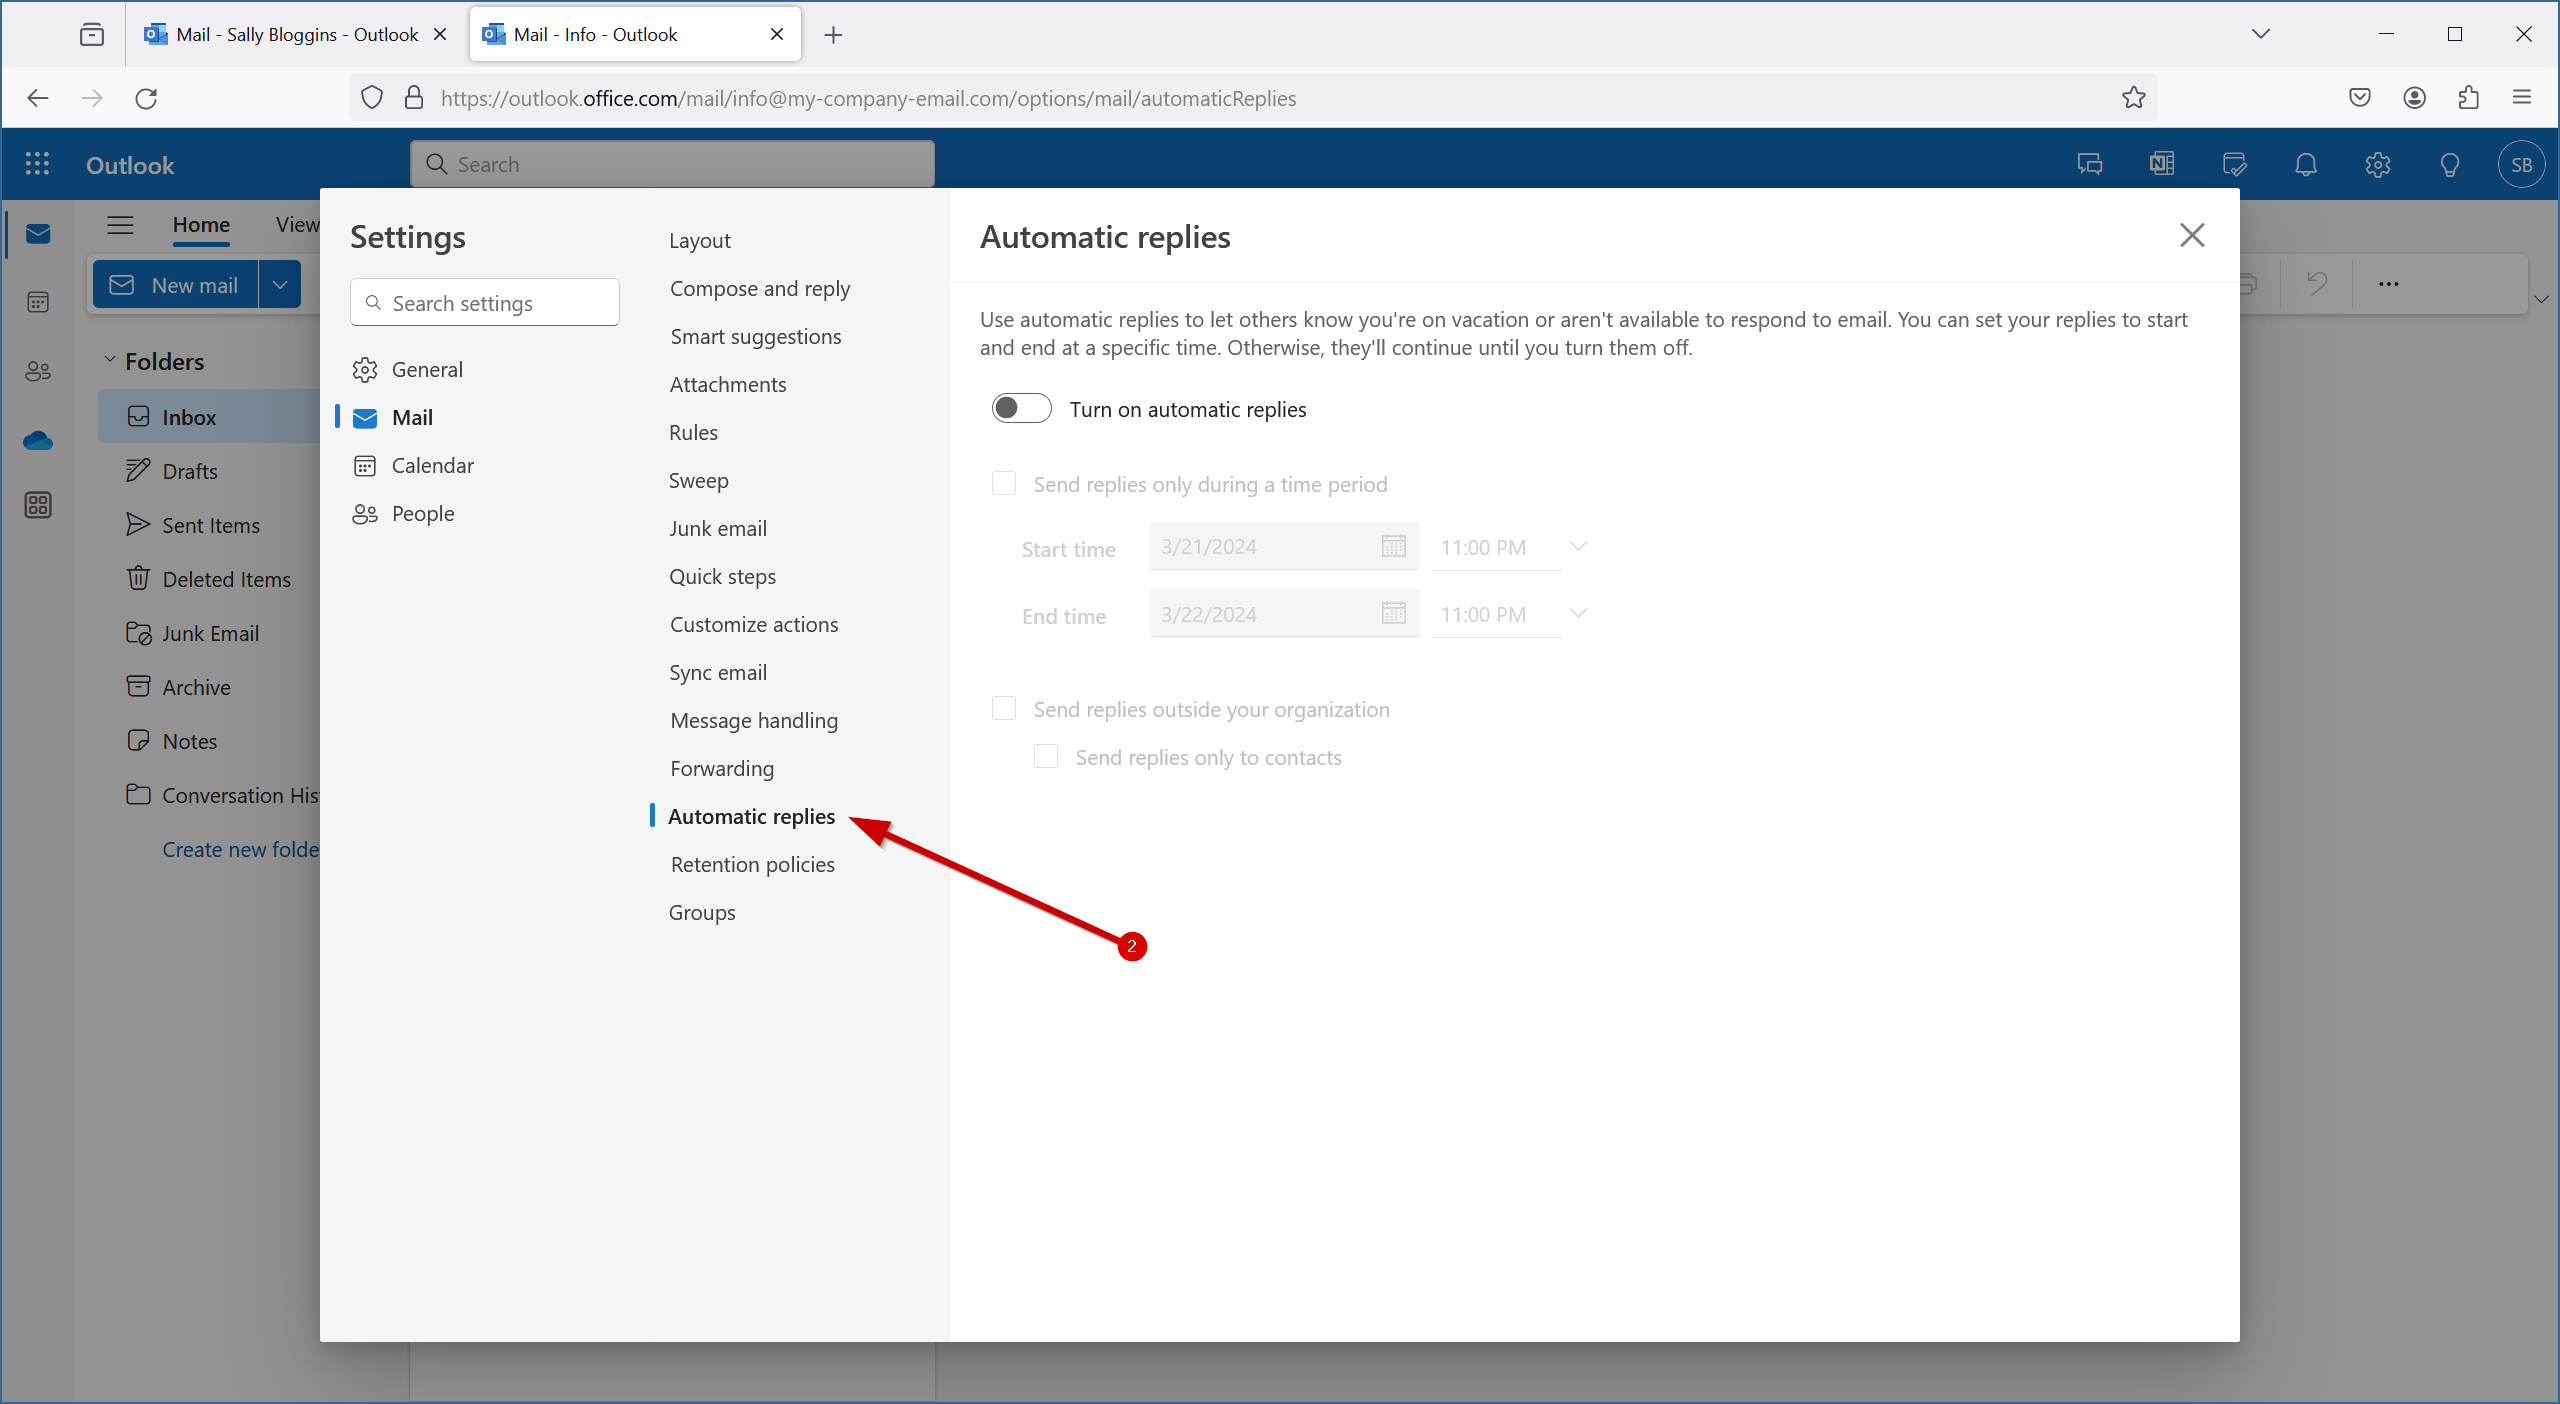
Click the settings cog near the top-right of your browser window to open the Settings panel.
2.
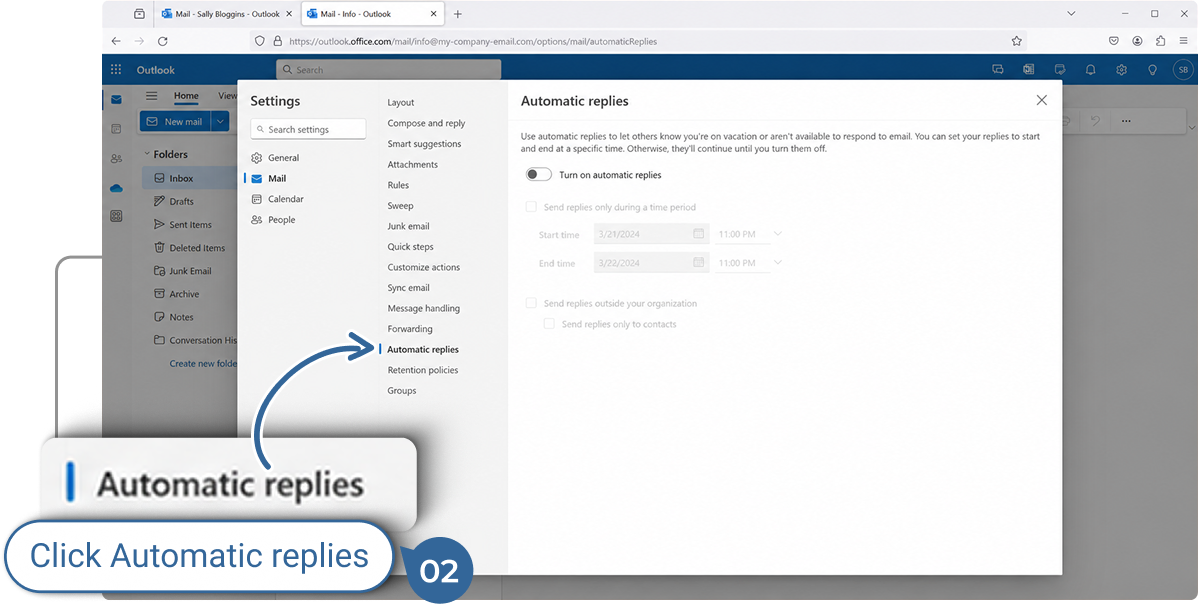
Click “Automatic replies” in the list on the left.

Configure Automatic Replies

1.
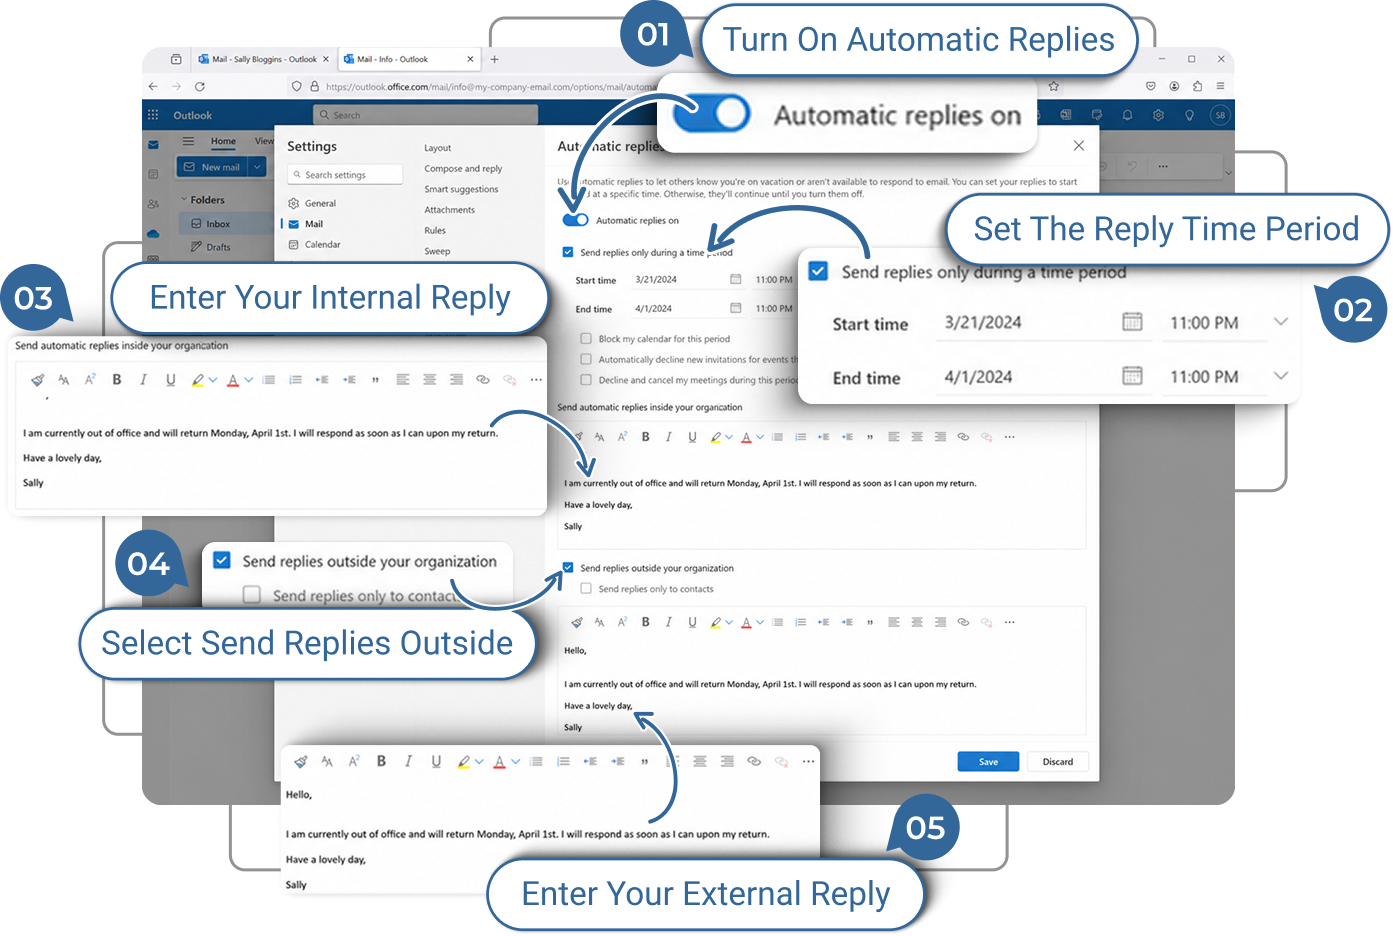
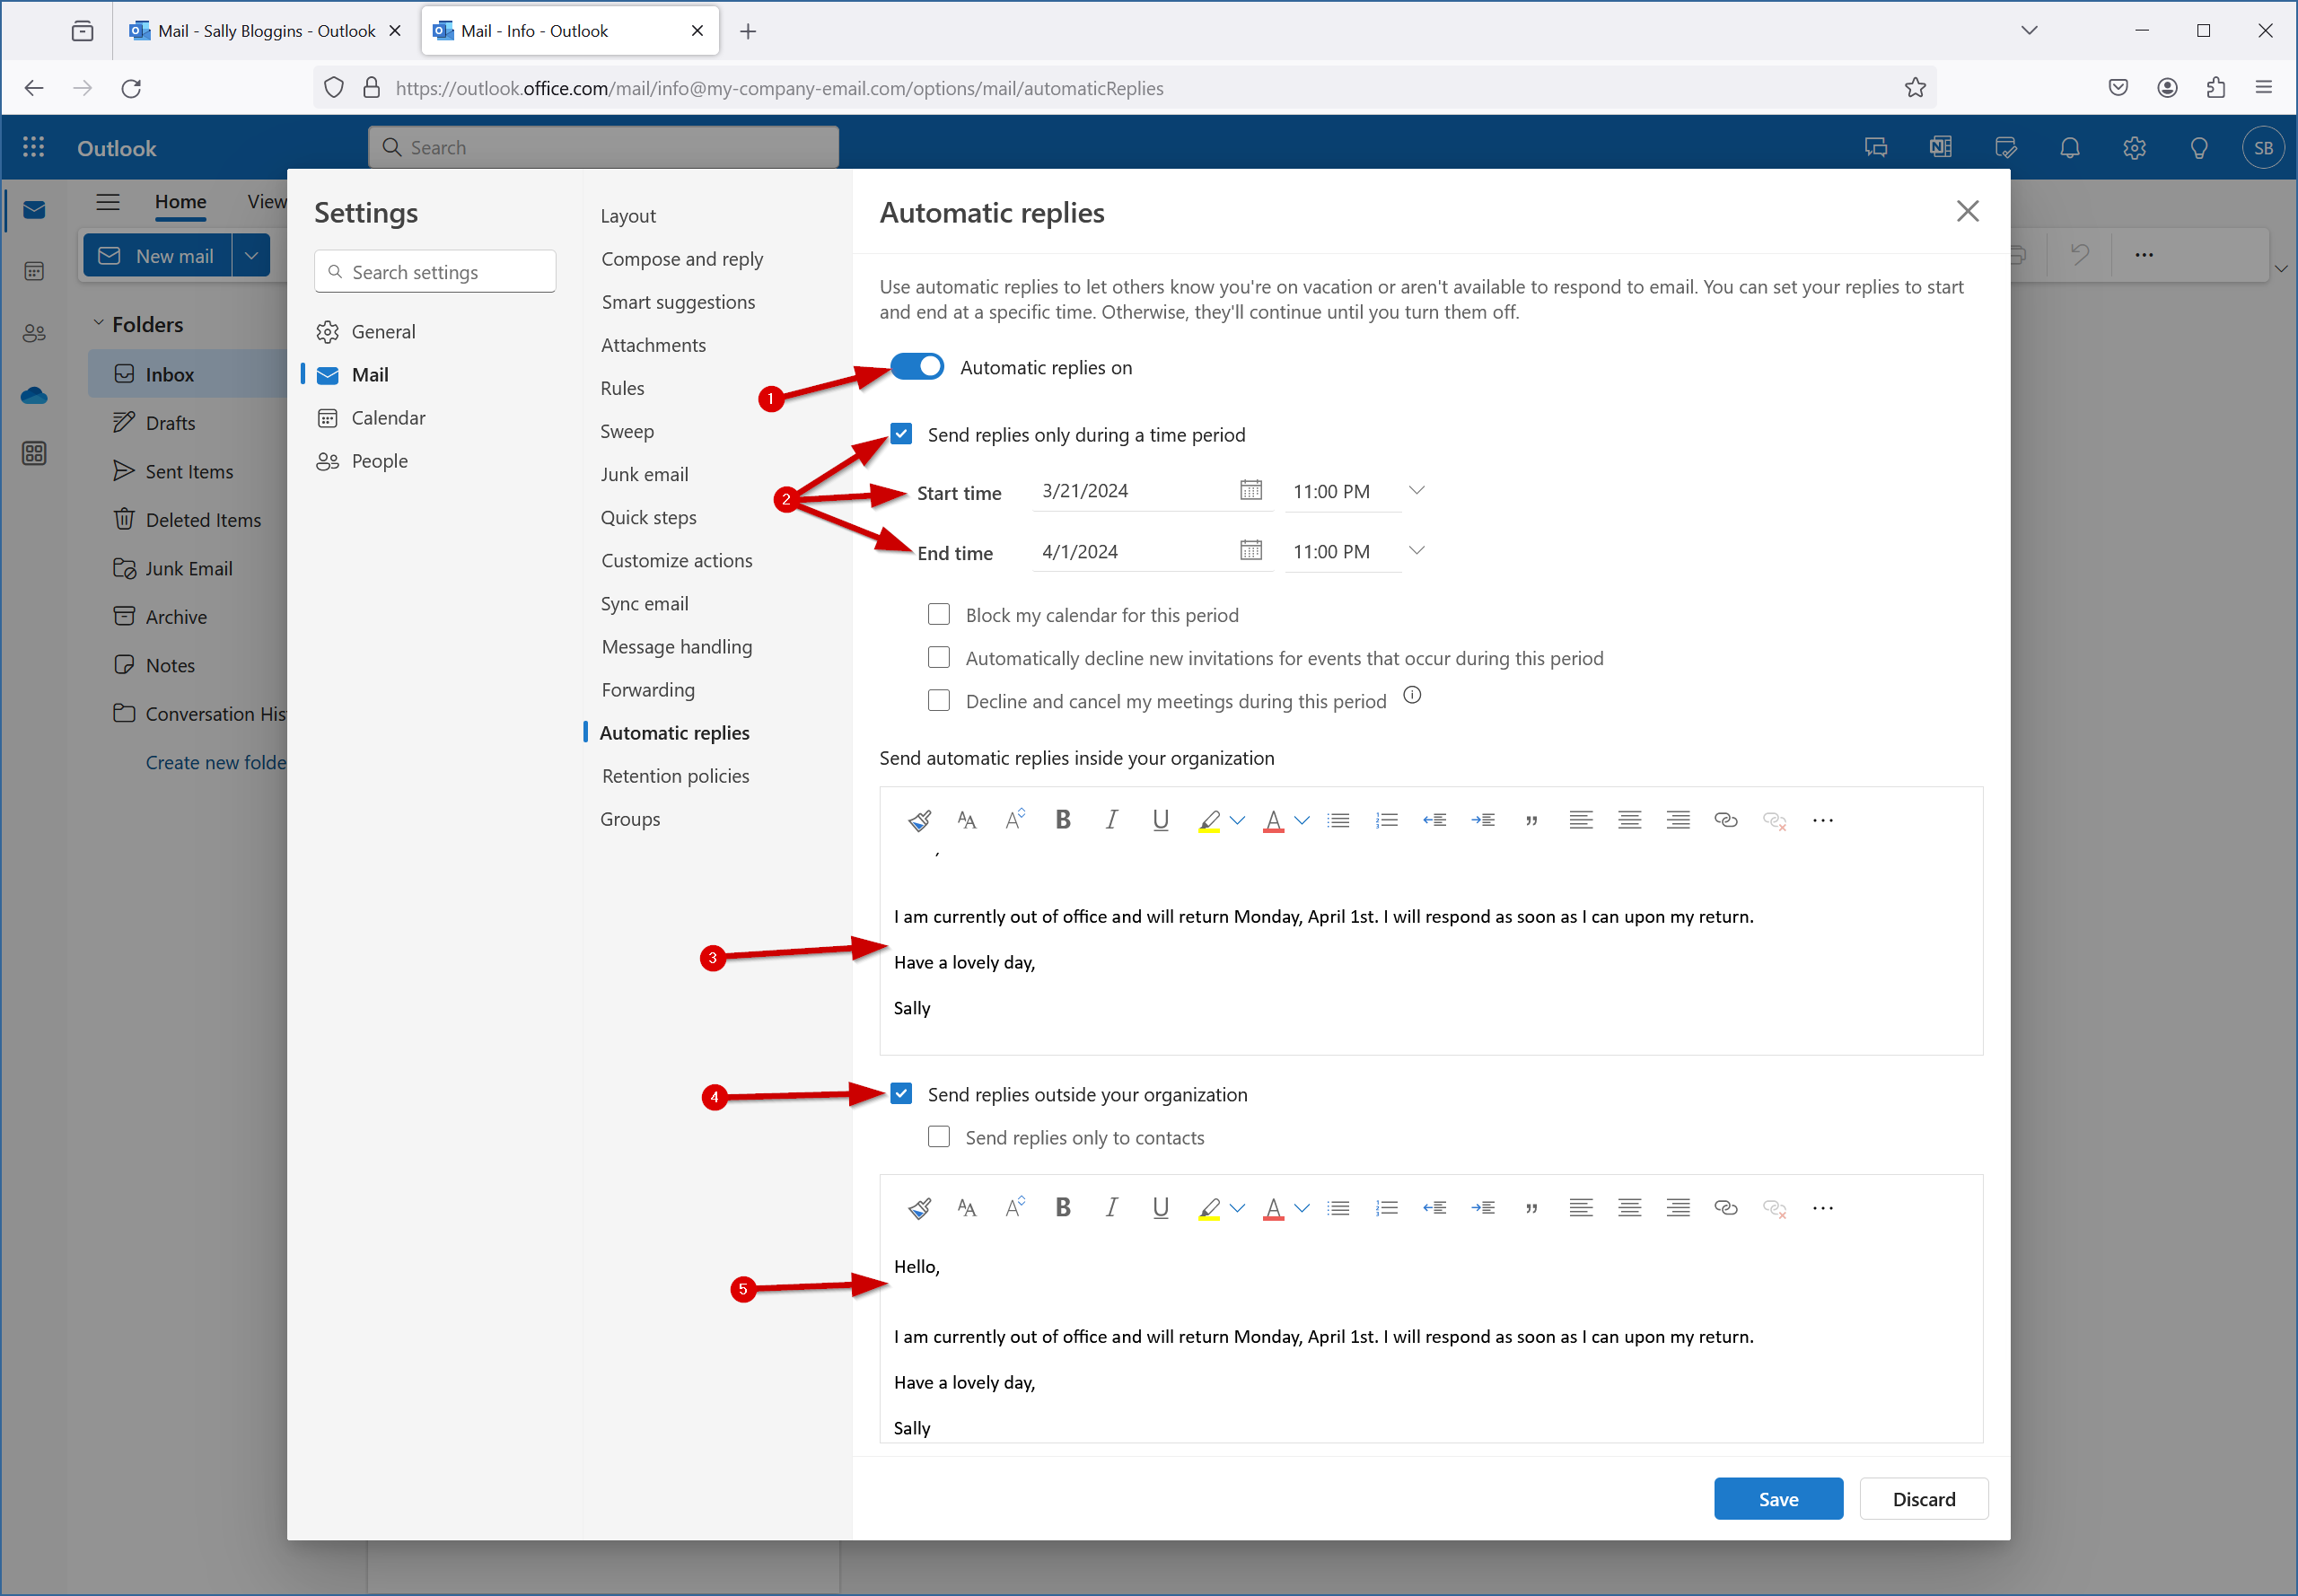
Turn Automatic Replies on by clicking the toggle.
2.
Set the start and end times if desired.
3.
Enter the message that people inside your organization will receive when they email this mailbox.
4.
Decide whether you want to send emails to people outside your organization as well. If you do, then check the box.
5.
Enter the message that people outside your organization will receive when they email this mailbox.


Save your settings

1.
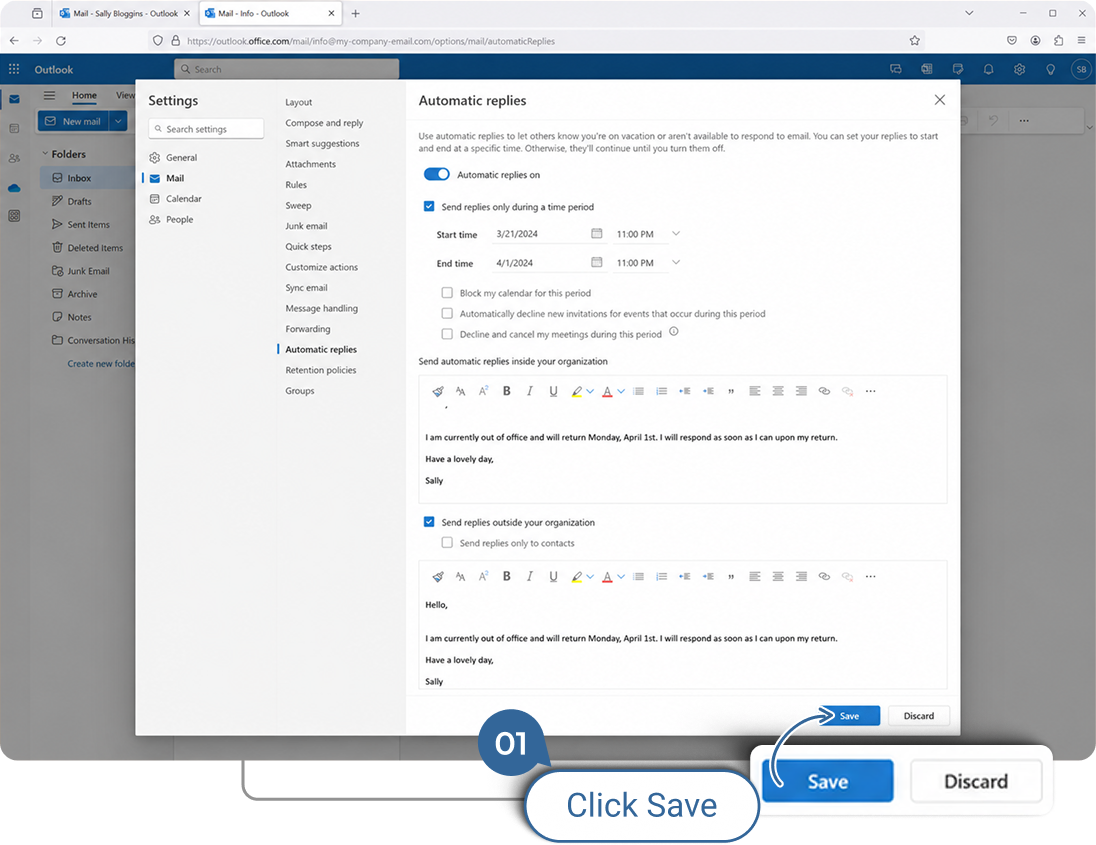
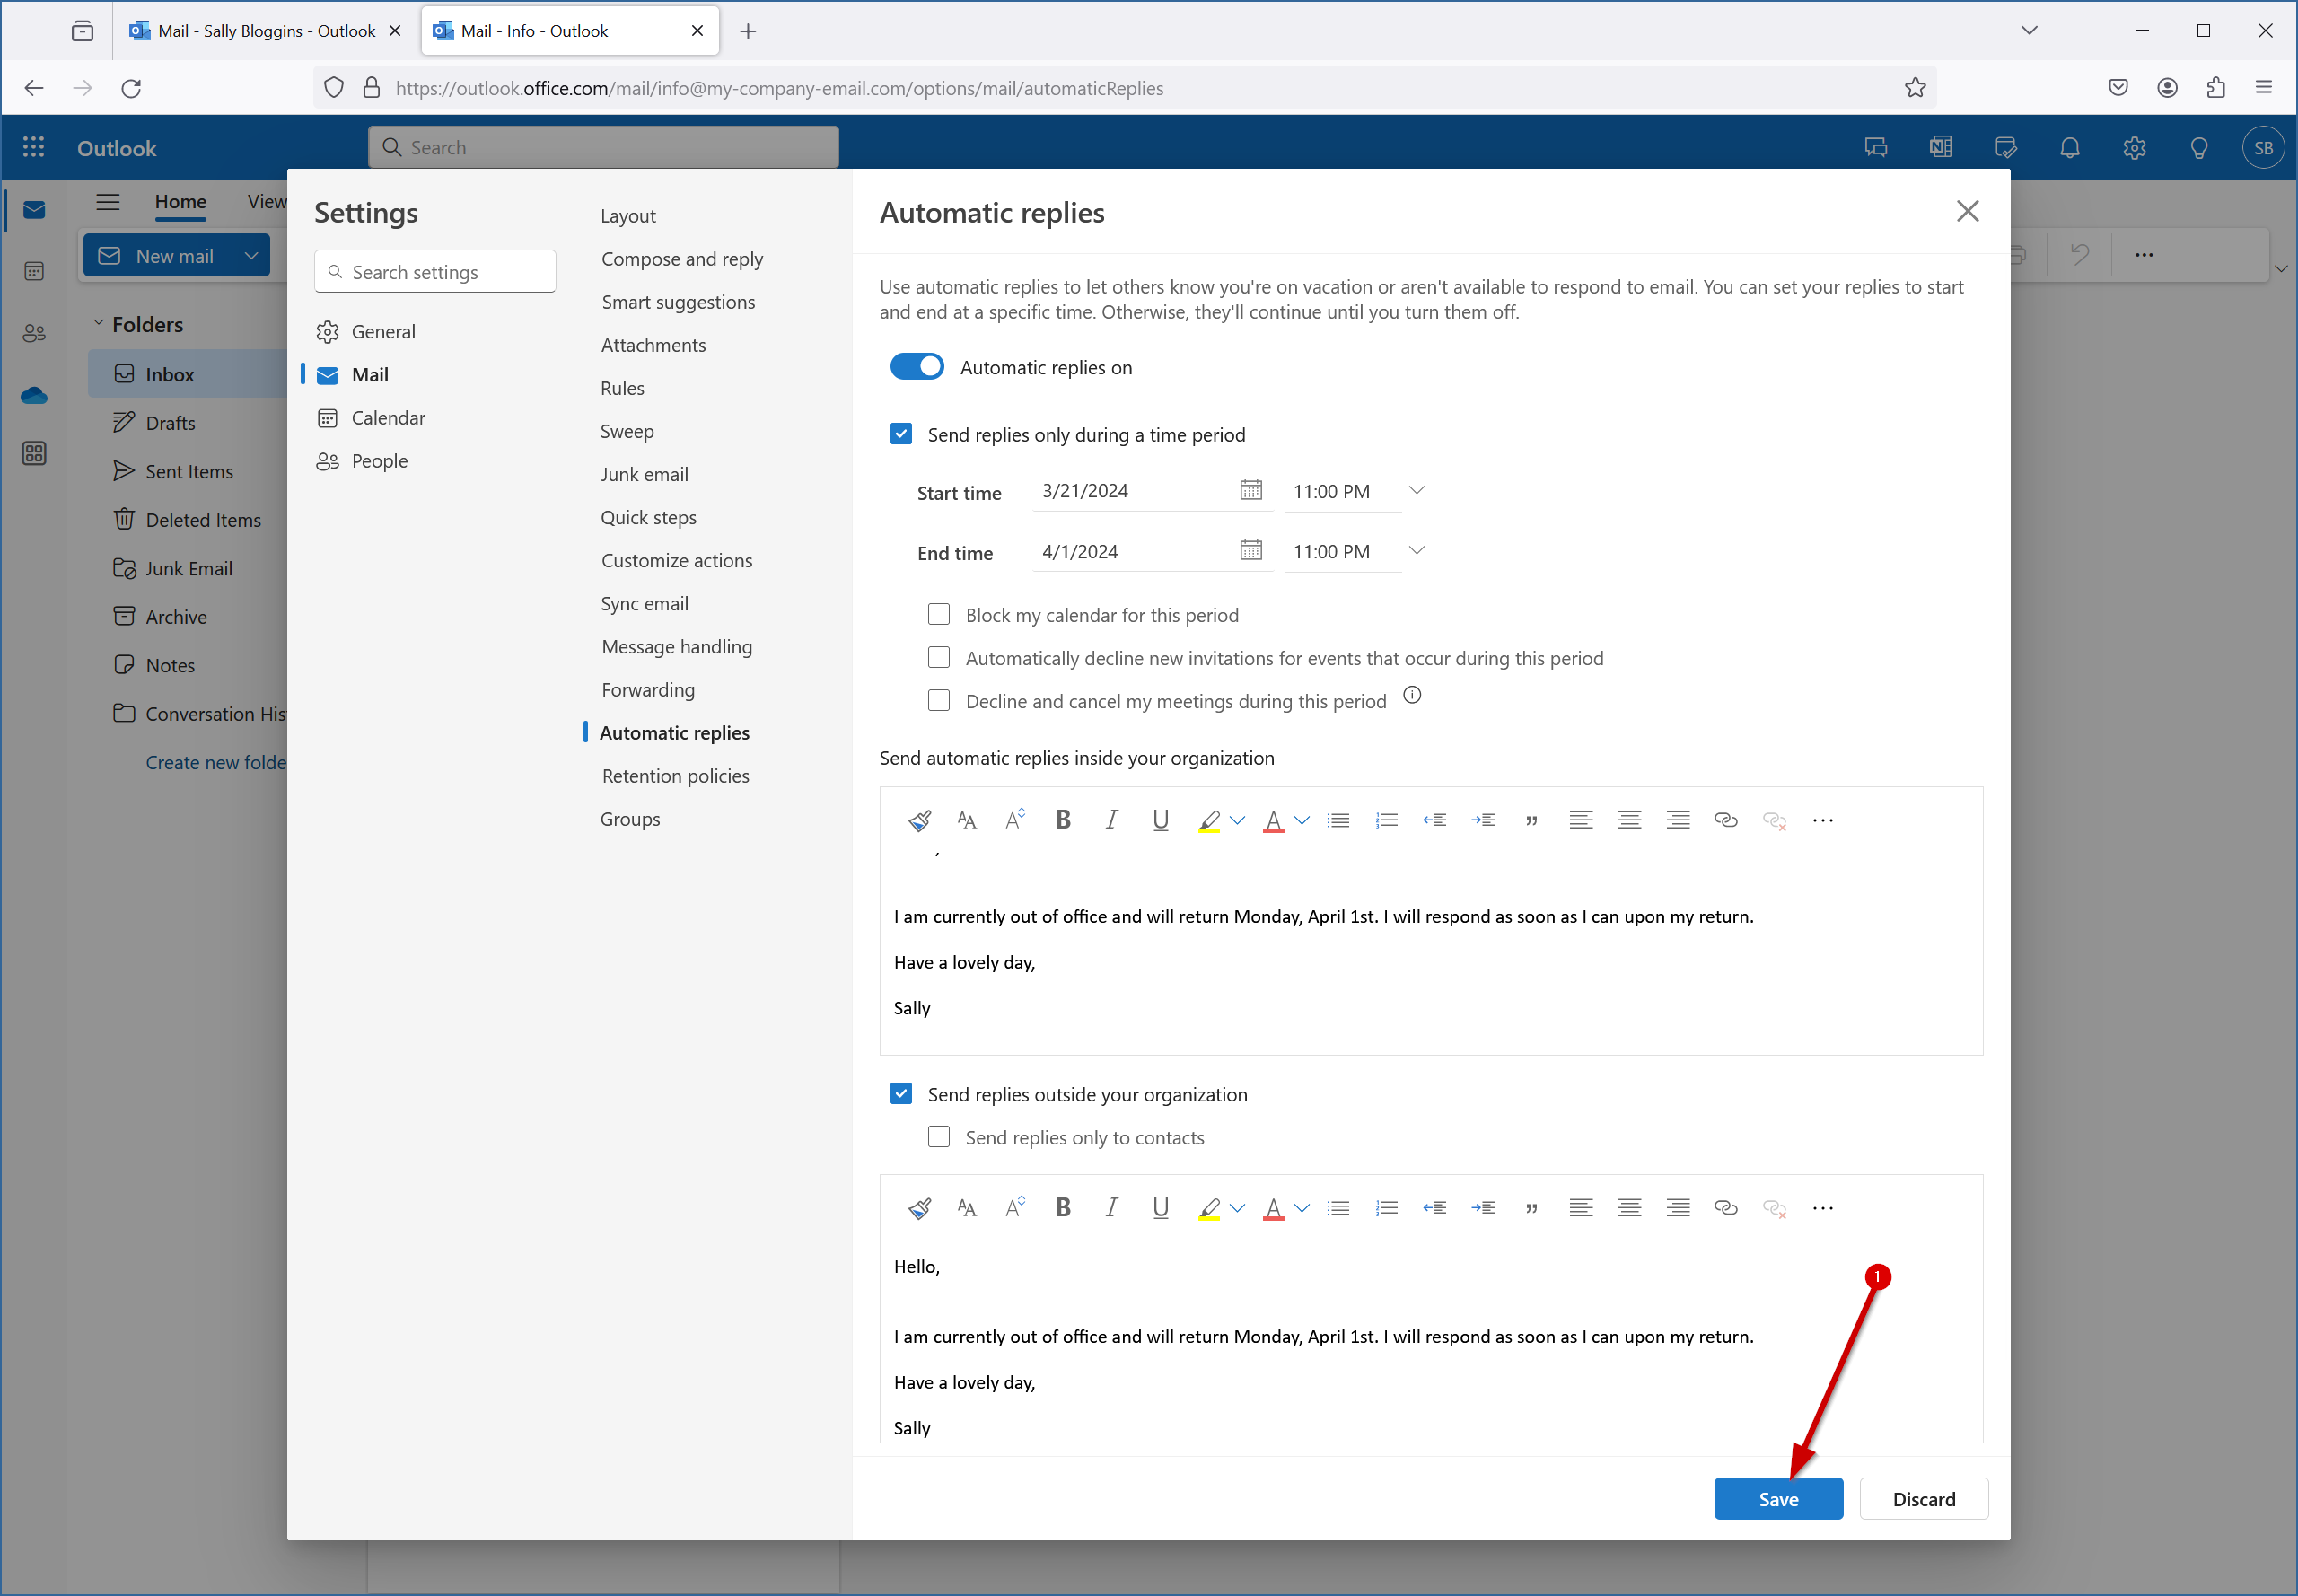
Don’t forget to click the “Save” button to save your new settings!
2.
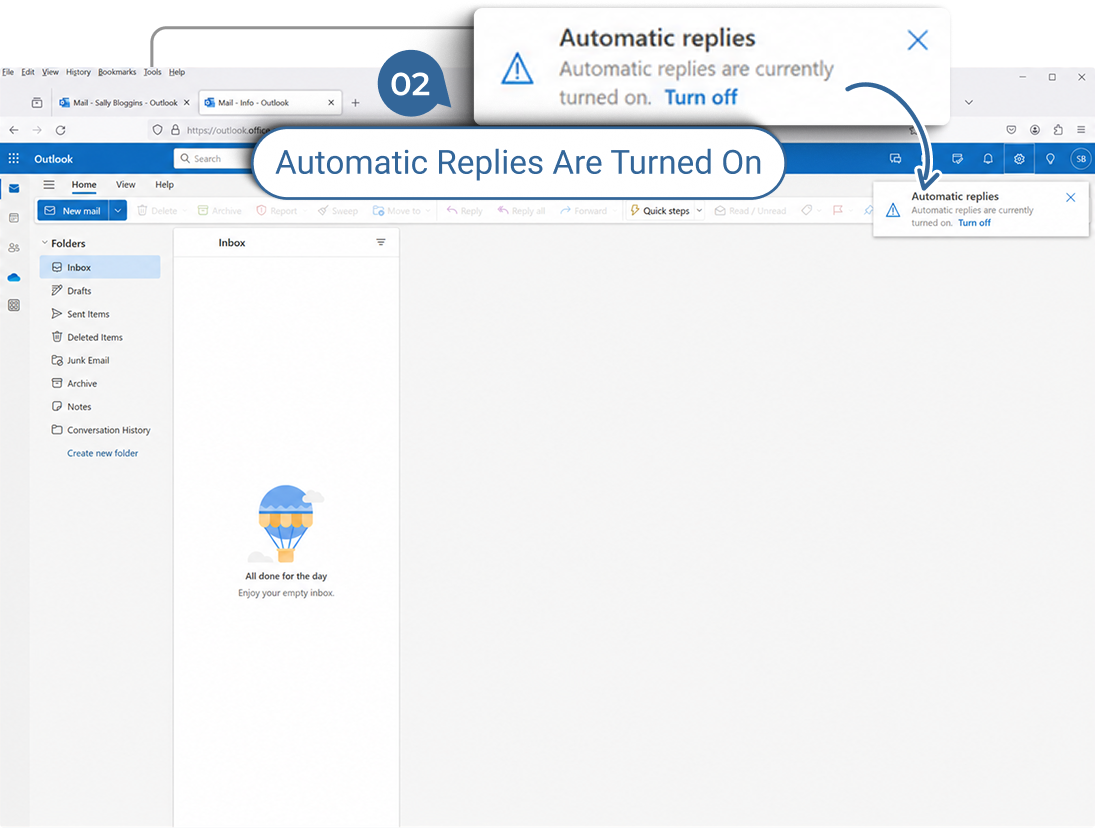
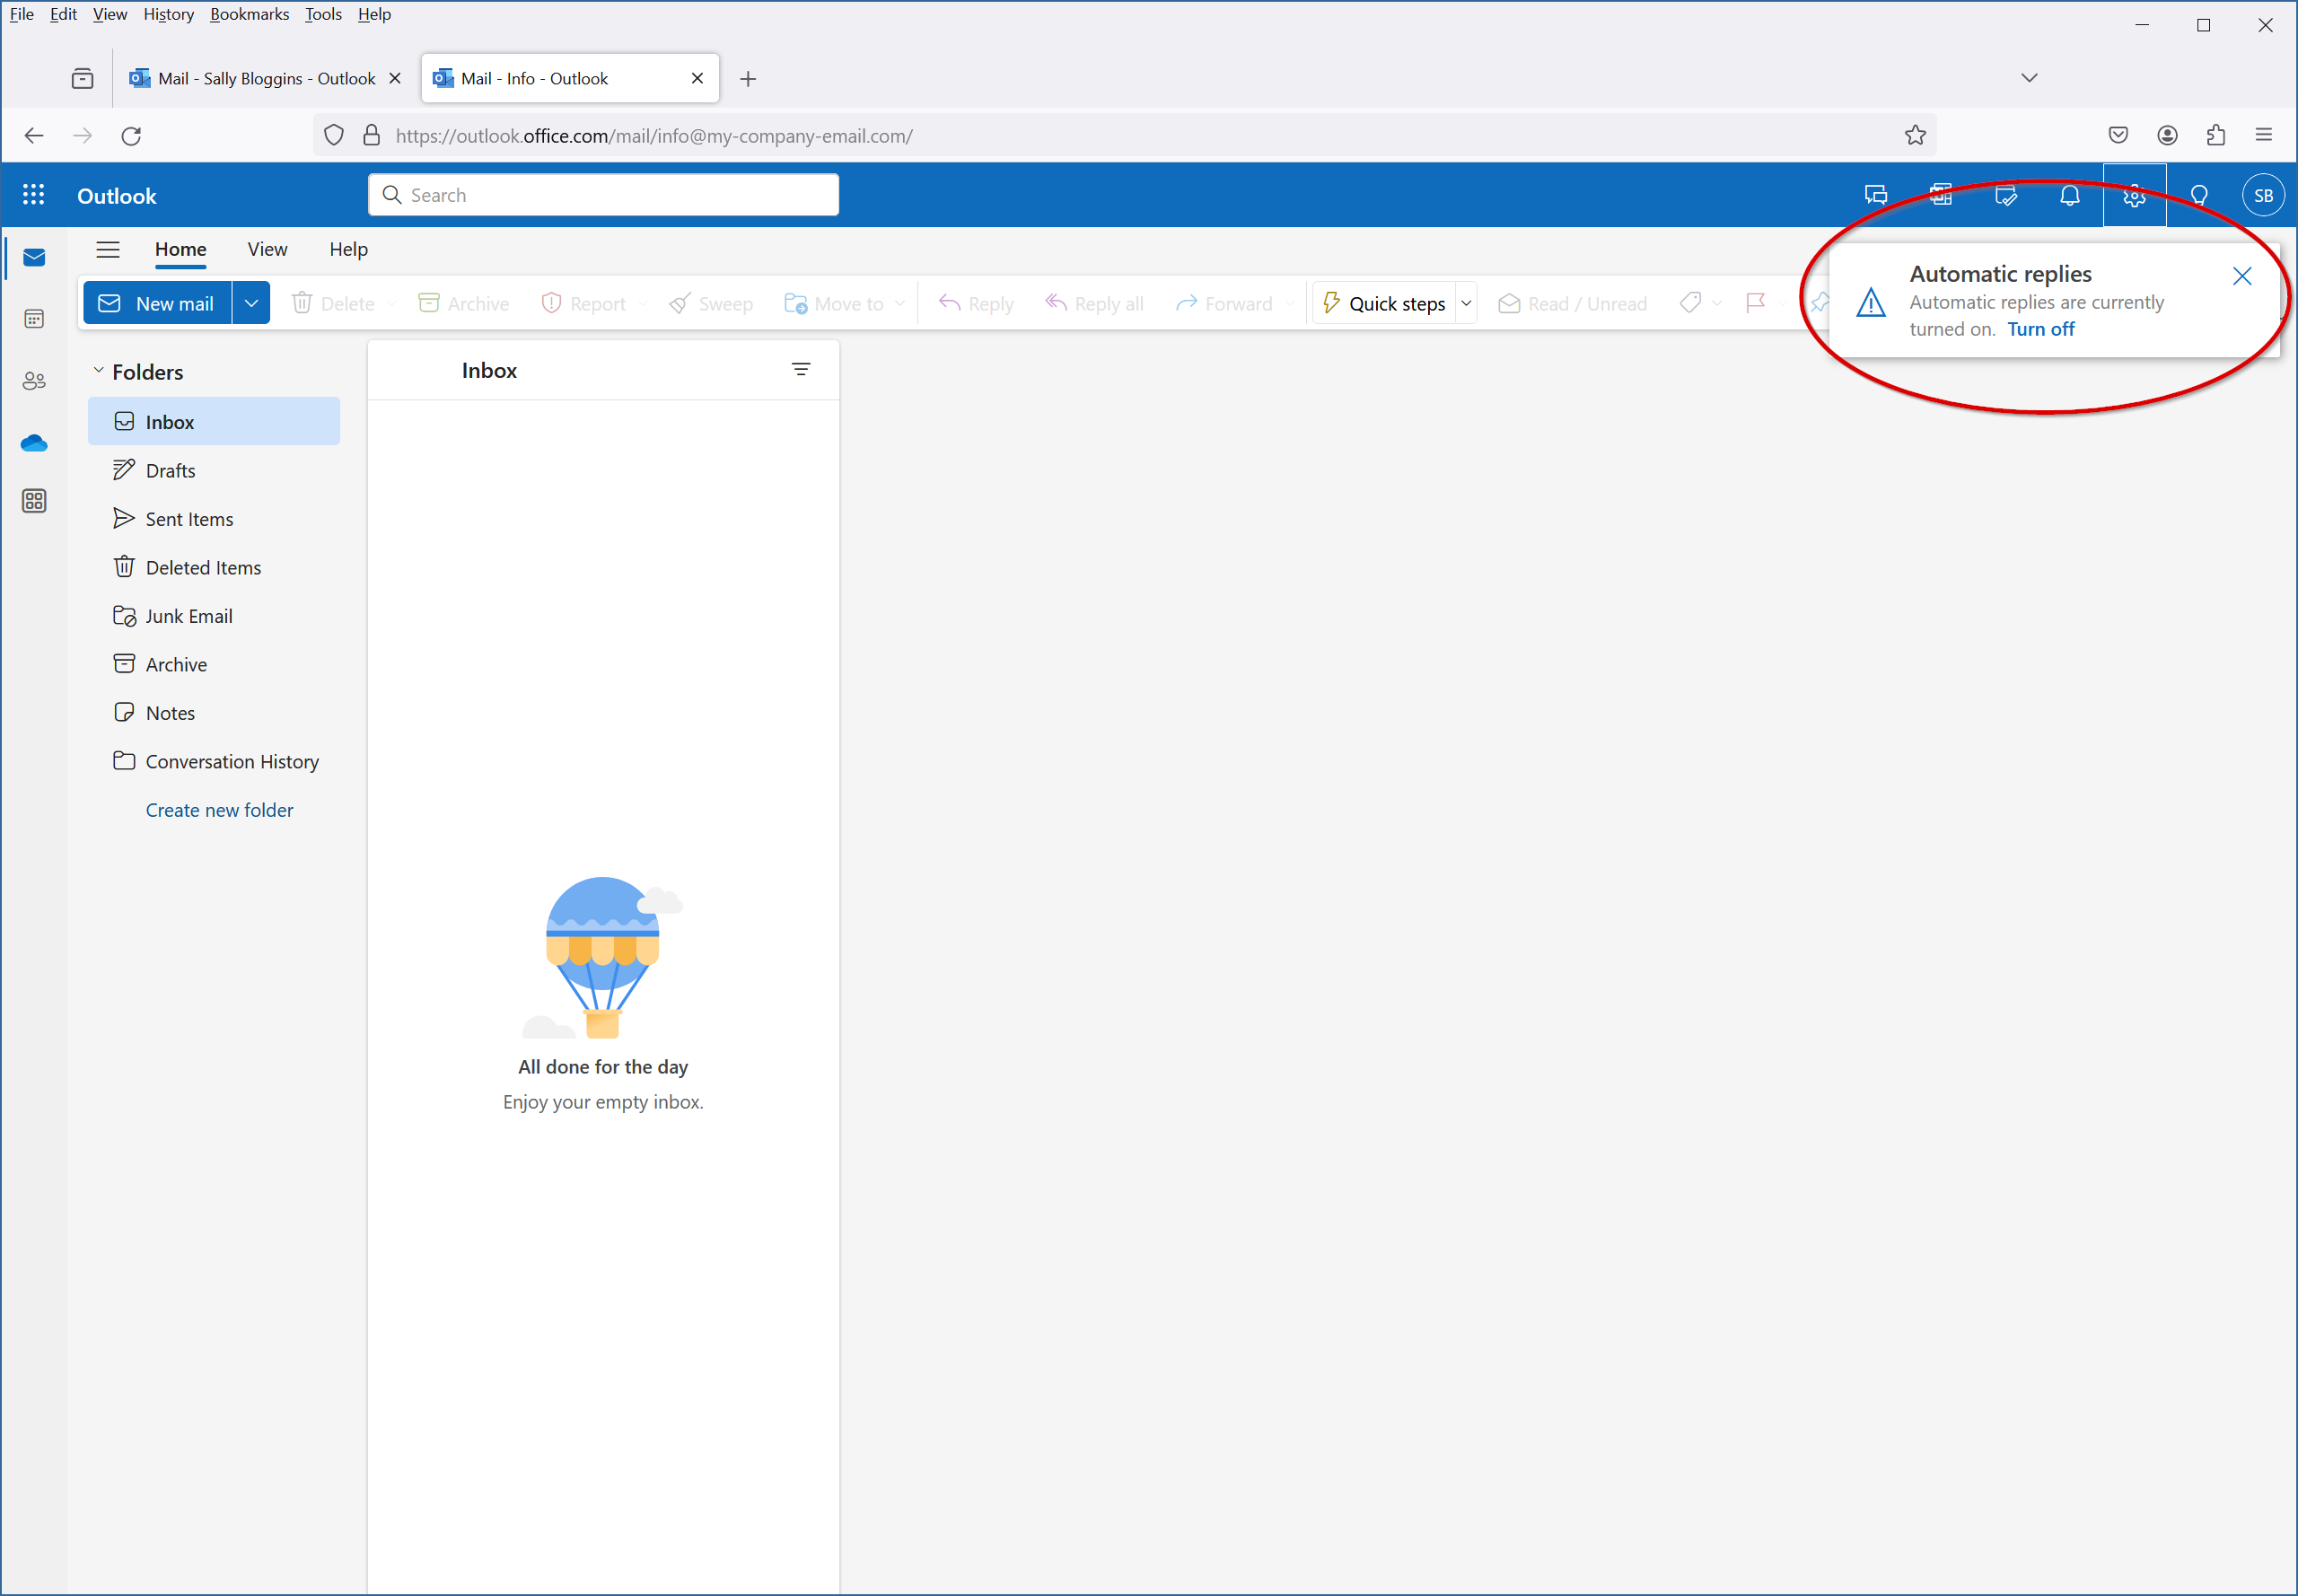
Observe the notification that Automatic Replies are now enabled.

How to set Automatic Replies on a Shared Mailbox

Next Step

2 / 2

1.

Log in to the online version of Outlook

  1. Log in to the web version of Outlook using your own account to begin.

    You cannot perform this task using the desktop version of Outlook.

    https://outlook.office.com

2 / 2

Next Step

2.

Open the Shared Mailbox

  1. Click on your profile image or initials at the top-right.
  2. Click on the “Open another mailbox” link.
  3. Enter the email address or name of the shared mailbox and click on it to select it from the list.
  4. Click the “Open” button and the shared mailbox will open in a new browser tab.

2 / 2

Next Step

3.

Edit Shared Mailbox Settings

  1. Click the settings cog near the top-right of your browser window to open the Settings panel.
  2. Click “Automatic replies” in the list on the left.

2 / 2

Next Step

4.

Configure Automatic Replies

  1. Turn Automatic Replies on by clicking the toggle.
  2. Set the start and end times if desired.
  3. Enter the message that people inside your organization will receive when they email this mailbox.
  4. Decide whether you want to send emails to people outside your organization as well. If you do, then check the box.
  5. Enter the message that people outside your organization will receive when they email this mailbox.
2 / 2

Next Step

5.

Save your settings

  1. Don’t forget to click the “Save” button to save your new settings!
  2. Observe the notification that Automatic Replies are now enabled.

2 / 2

Next Step

Next Step

2 / 2

Get Started

Ready to Make Your IT Easier to Manage?

Talk to Cole Systems about your current technology challenges, security concerns, backup needs, or infrastructure goals. We’ll help you understand what needs attention and recommend practical next steps for your business.