Cole Systems Inc.

How to Manage

Open the Groups Management Page

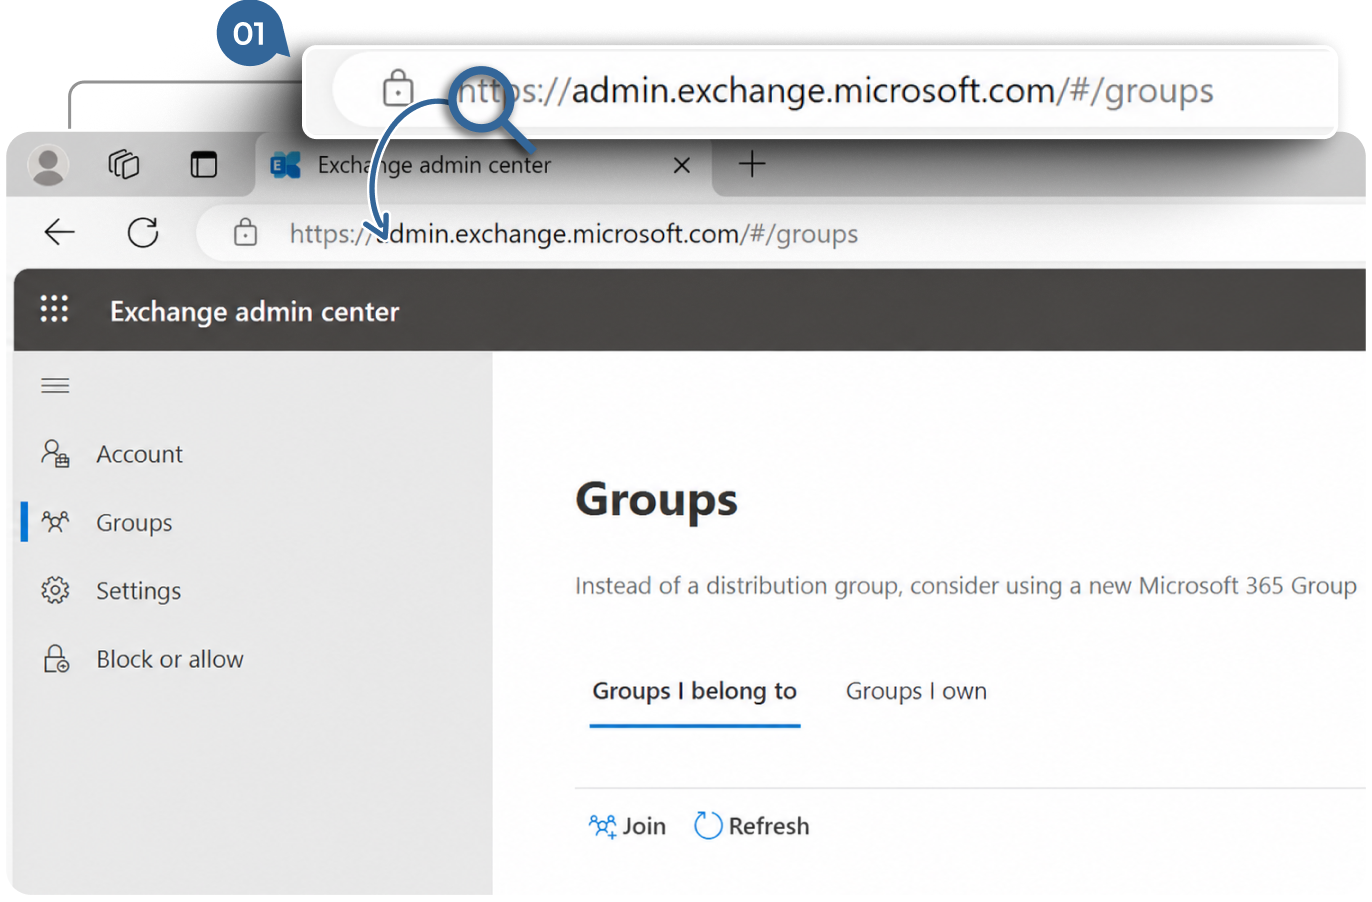
Access the Microsoft 365 Admin Center.
1.
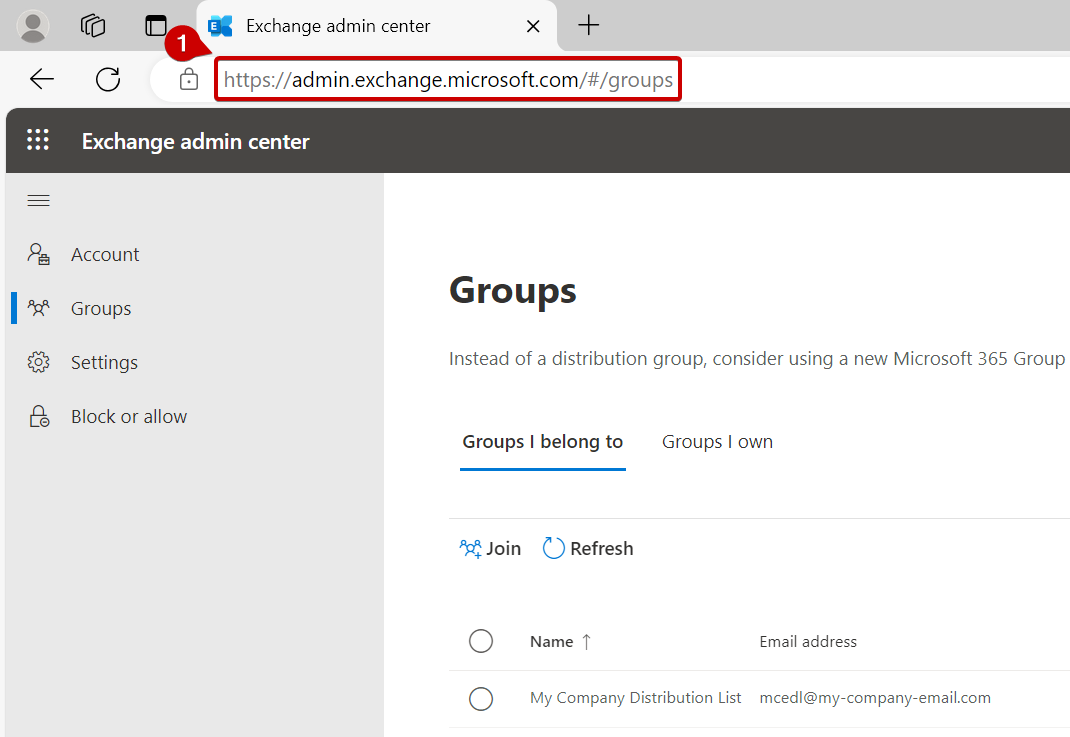
MS365 Groups URL: Go to https://admin.exchange.microsoft.com/#/groups and sign in with your Office 365 credentials.
Outlook will launch and your mailbox appears.

Locate the Distribution List

Locate the Distribution List you would like to update.
2.
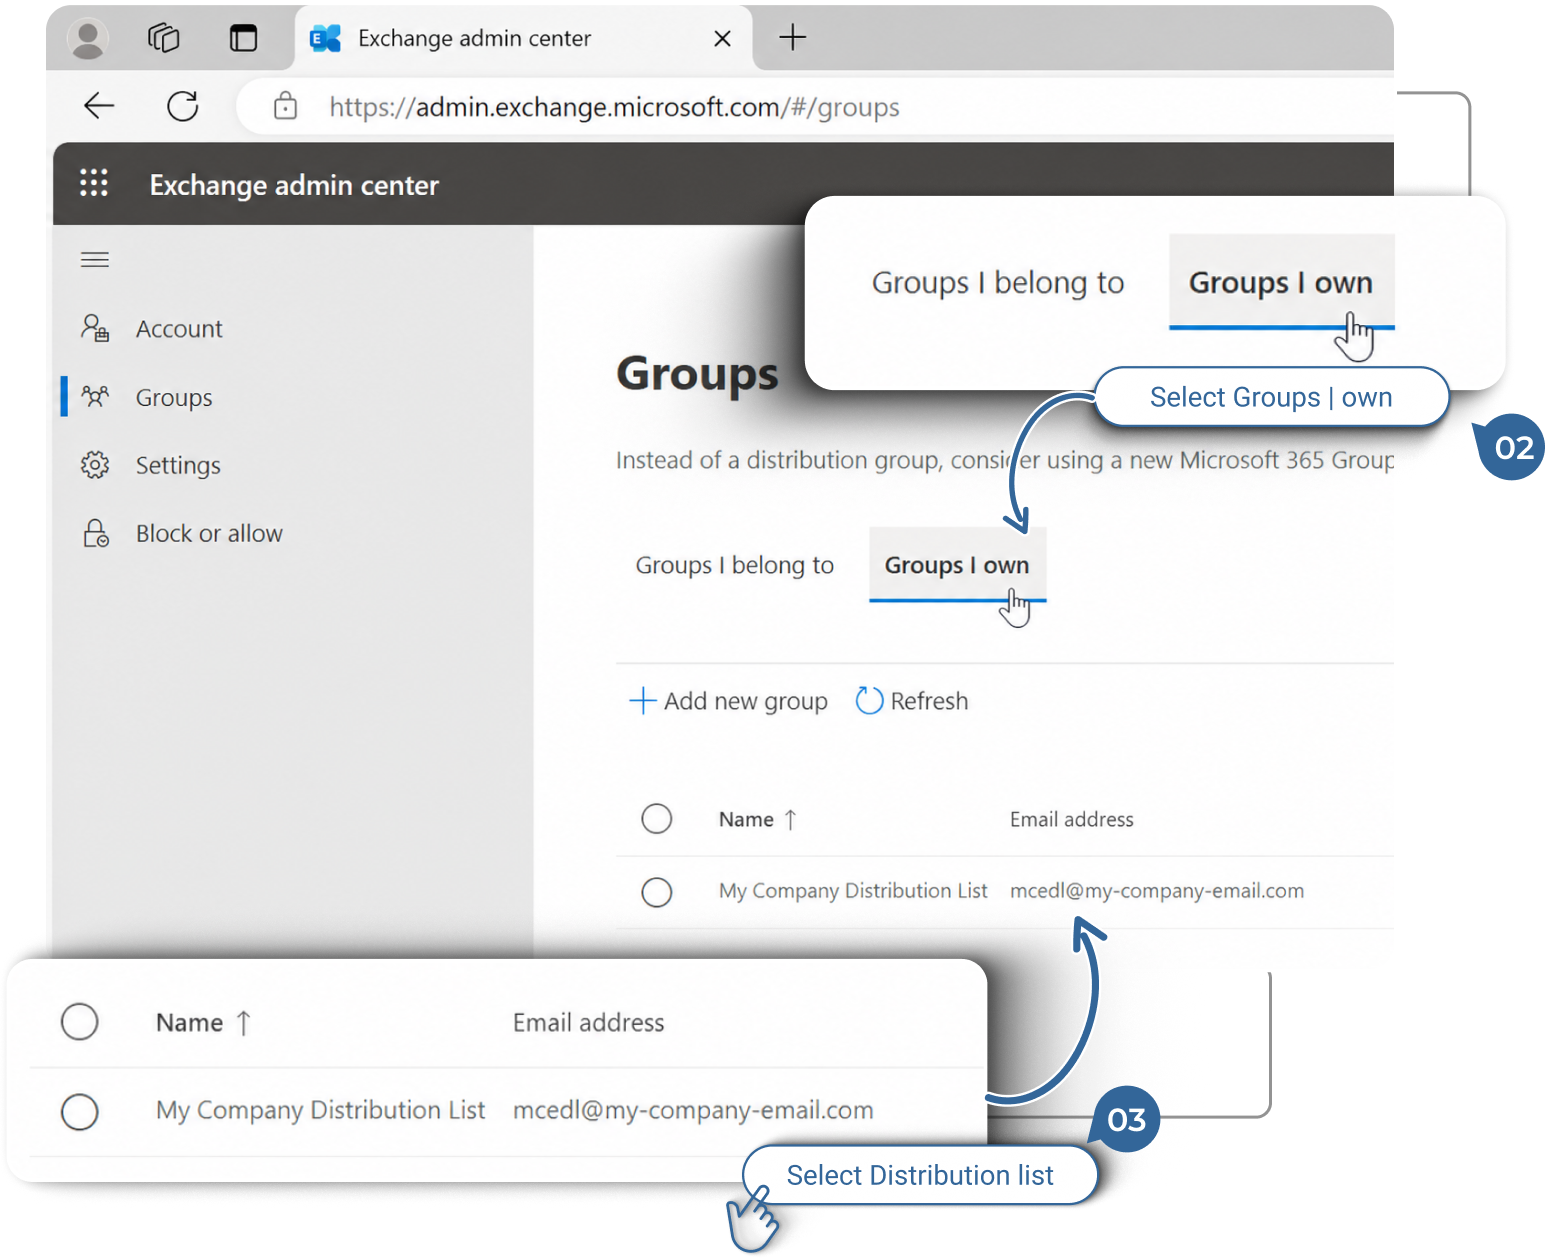
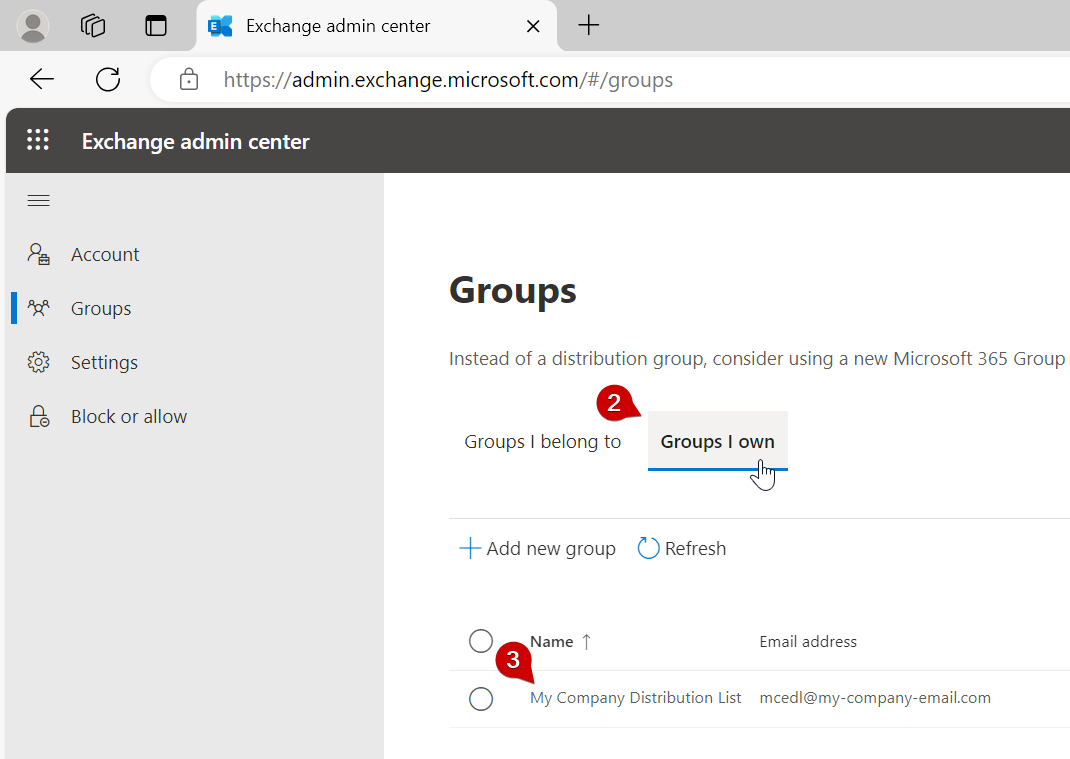
Group Tabs: You will see two tabs: “Groups I belong to” and “Groups I own”. Click on “Groups I own” to view the distribution lists that you manage.
3.
Locate Distribution List: Find the distribution list you would like to update and click on its name to open the details page.

Add Members to the Distribution List

Add Members to the Distribution List.
4.
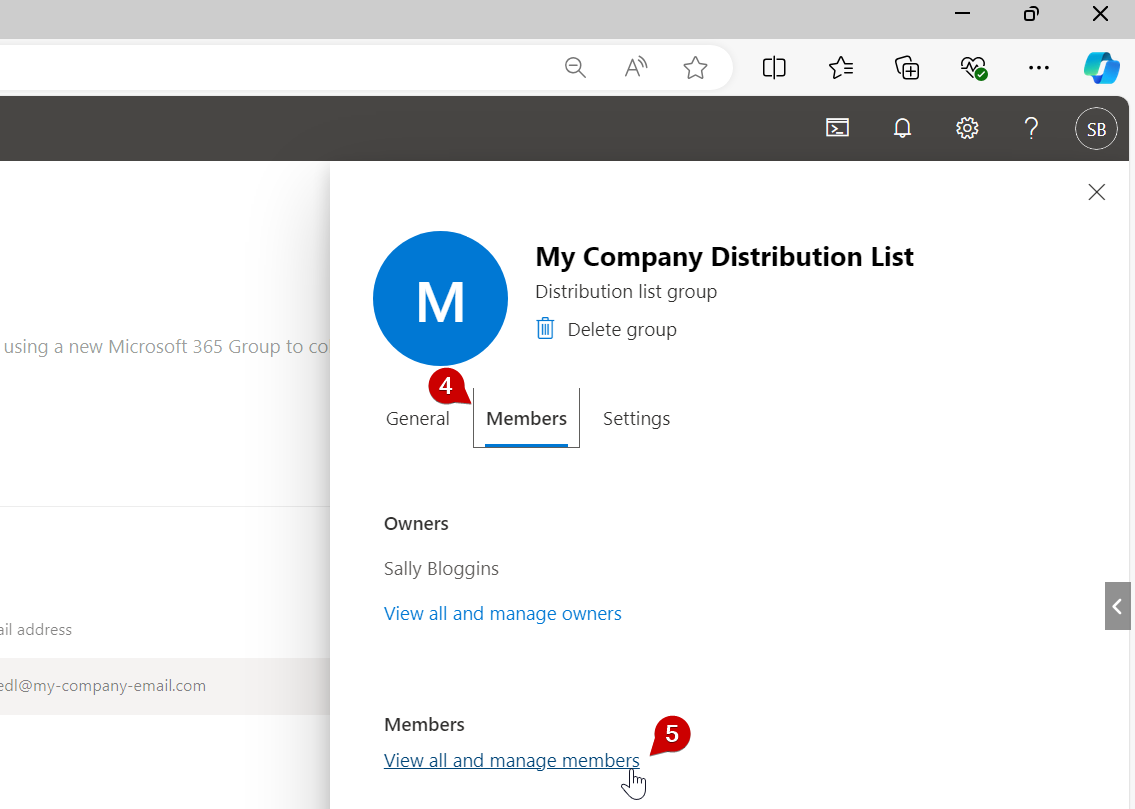
Members Menu: In the distribution list details page, click on “Members”.
5.
Manage Members: Click on “View all and manage members”.
6.
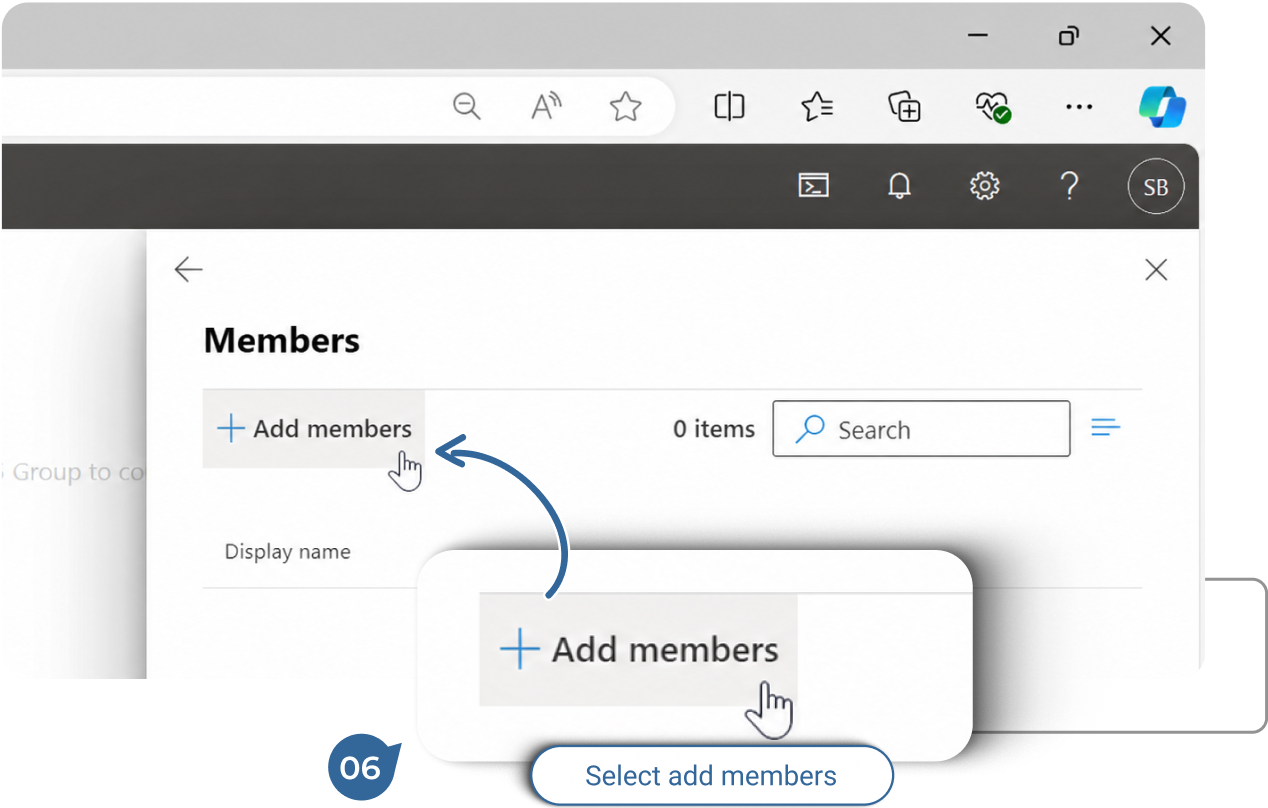
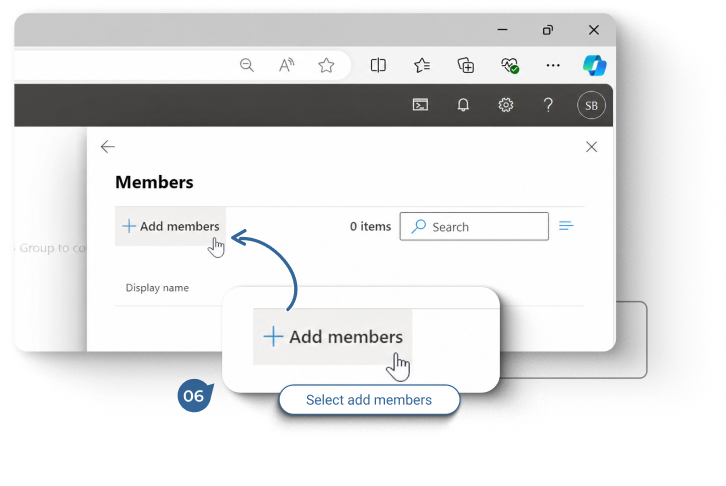
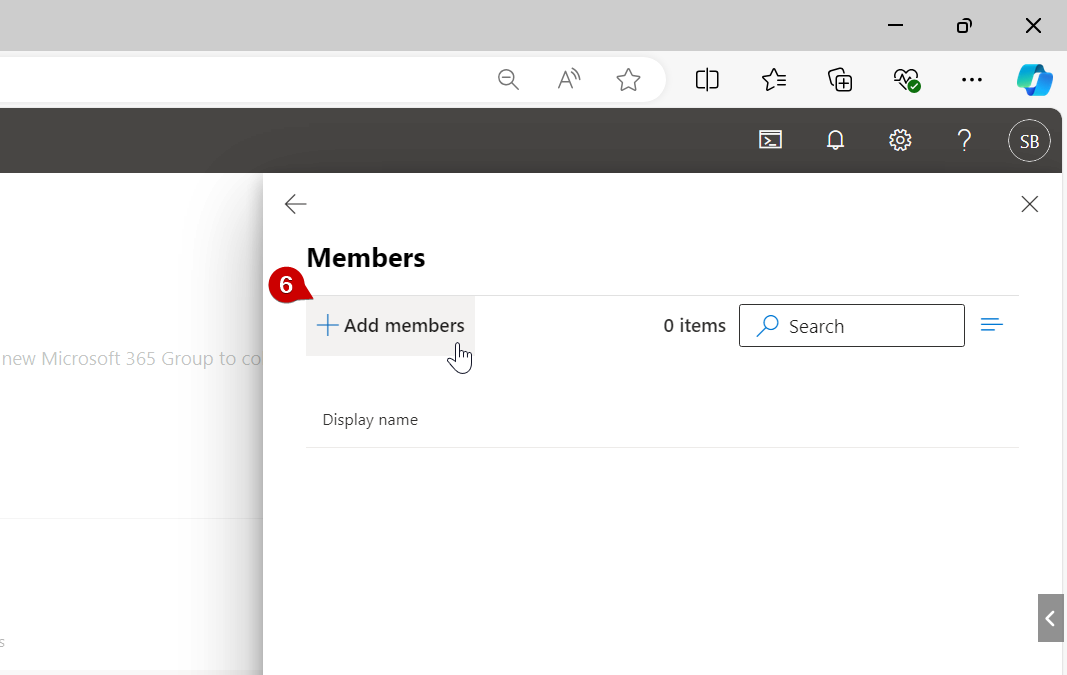
Add Members: Click “Add members”.
7.
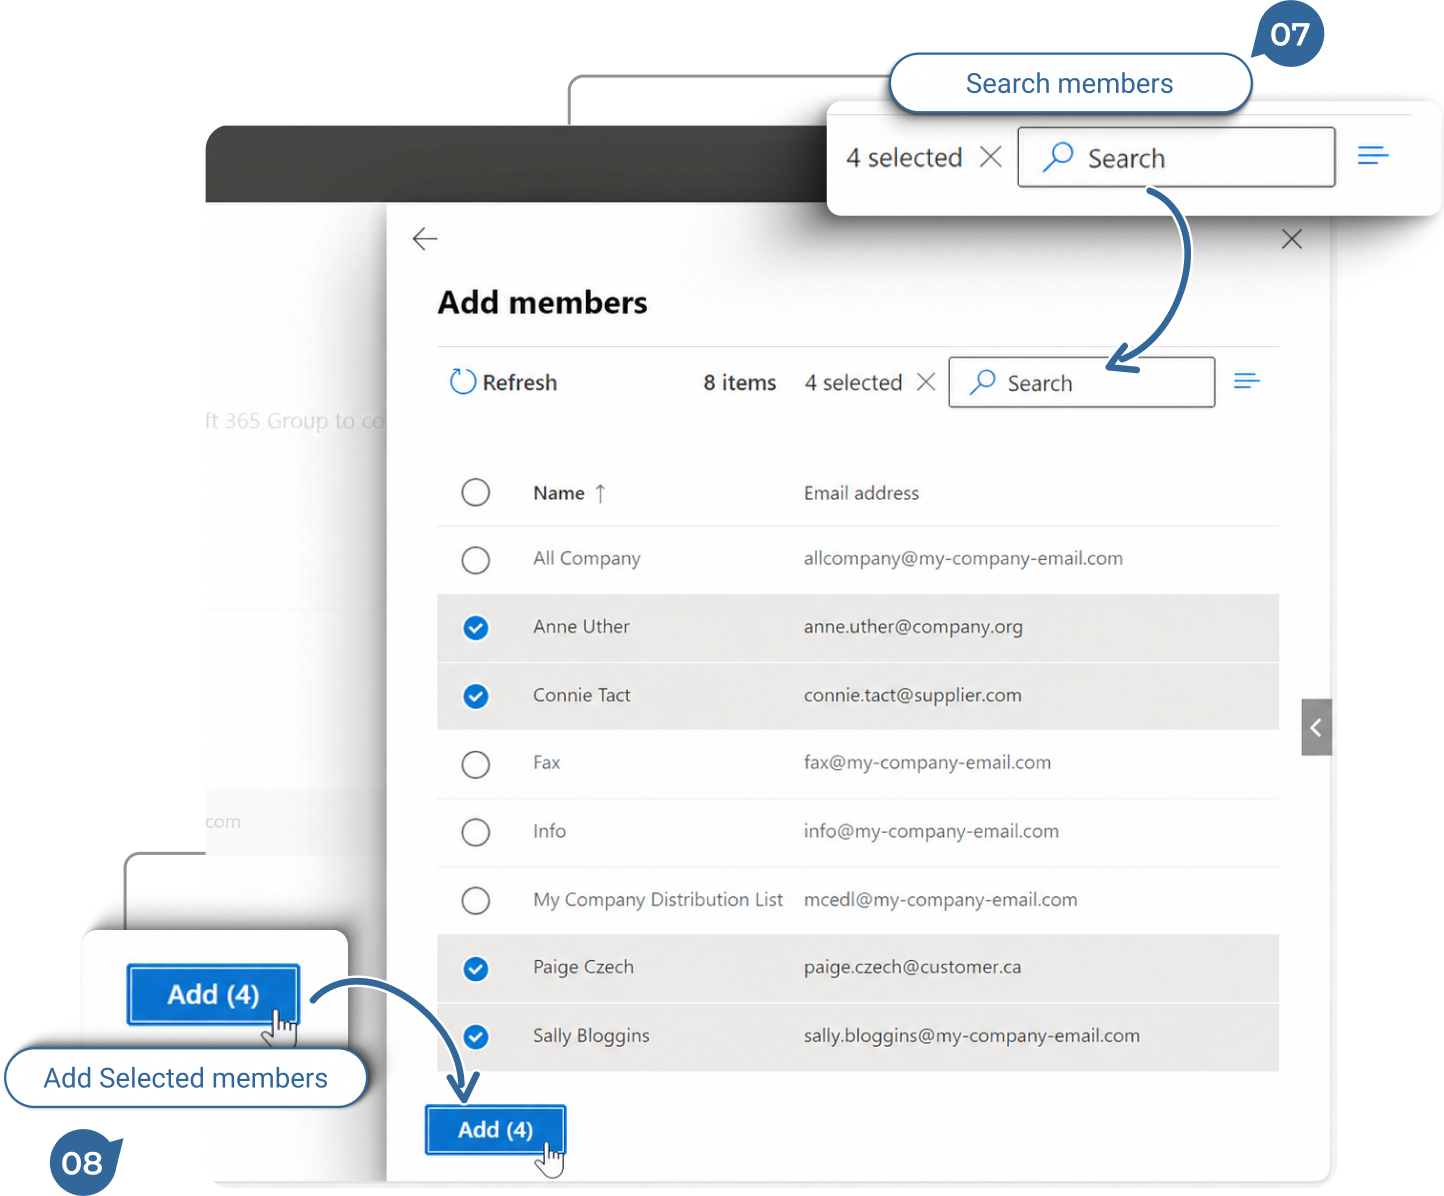
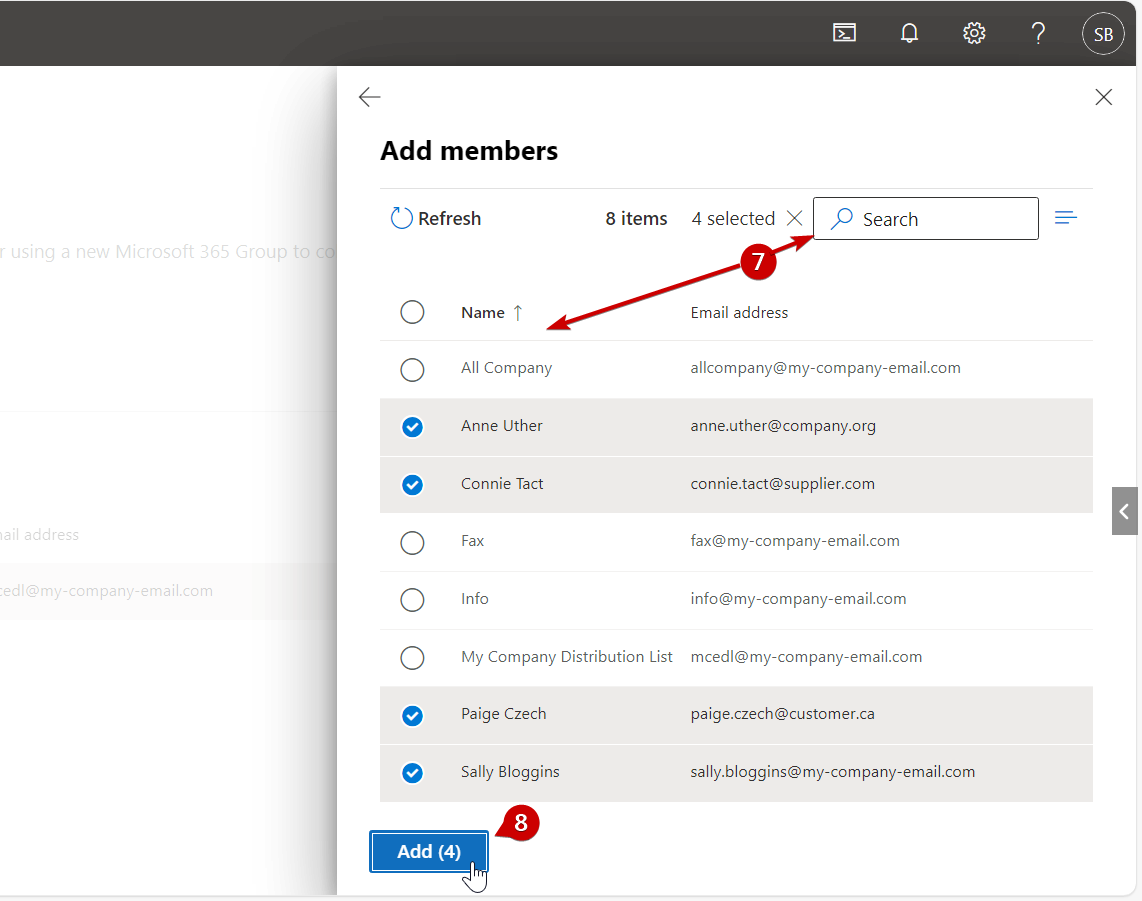
Locate Users: Search for the user you want to add by typing their name or email address, or if your address list is not too long you can simply select them from the list.
External users (people with email addresses outside of your organization) may not appear as available members.

In this case, please email helpdesk@cole.systems and we will update the Distribution List for you.

8.
Add Users: Once you find the user or users, click on their name/s and then click “Add”.
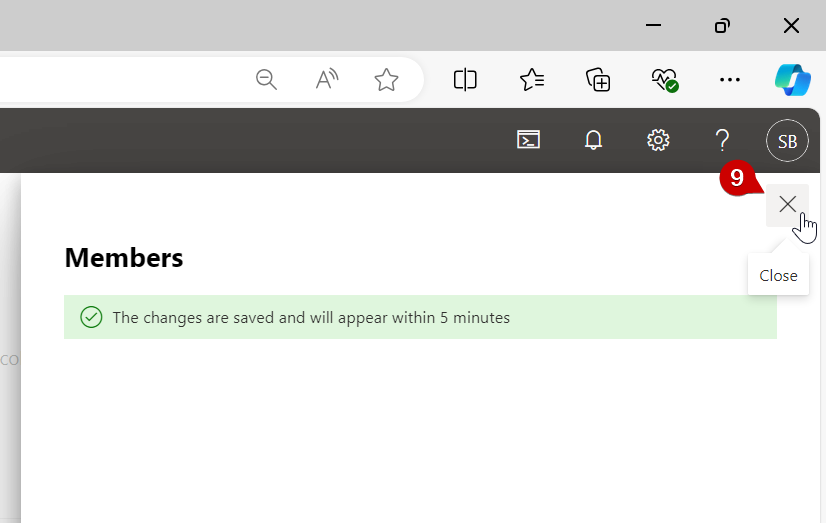
Your window will be replaced indicating the status of the changes that were made.
9.
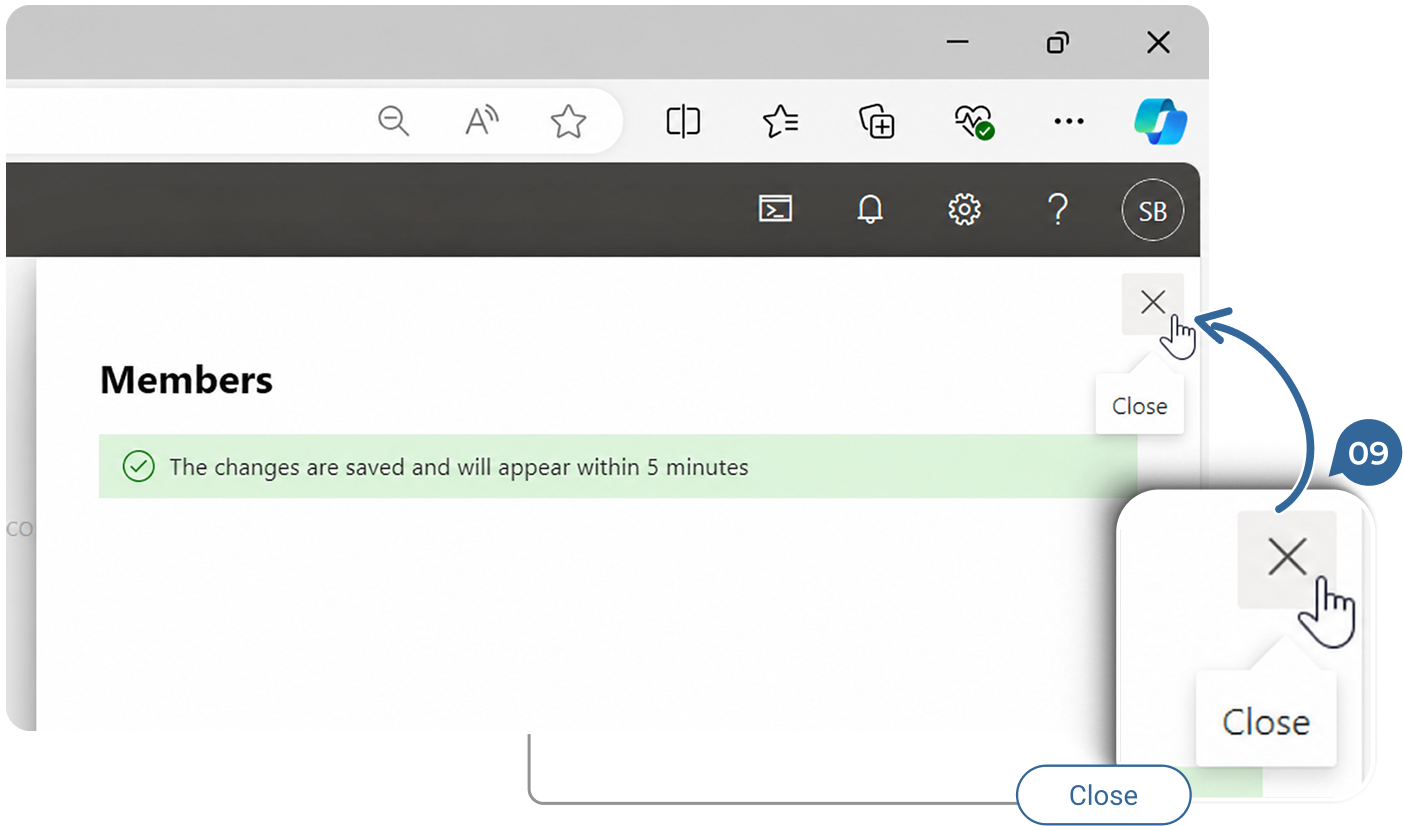
Close Member Window: Click on the X in the upper right-hand corner to close the Members menu.

Remove Members from the Distribution List

Remove the Members from the Distribution List that you no longer want to receive emails.
 
10.
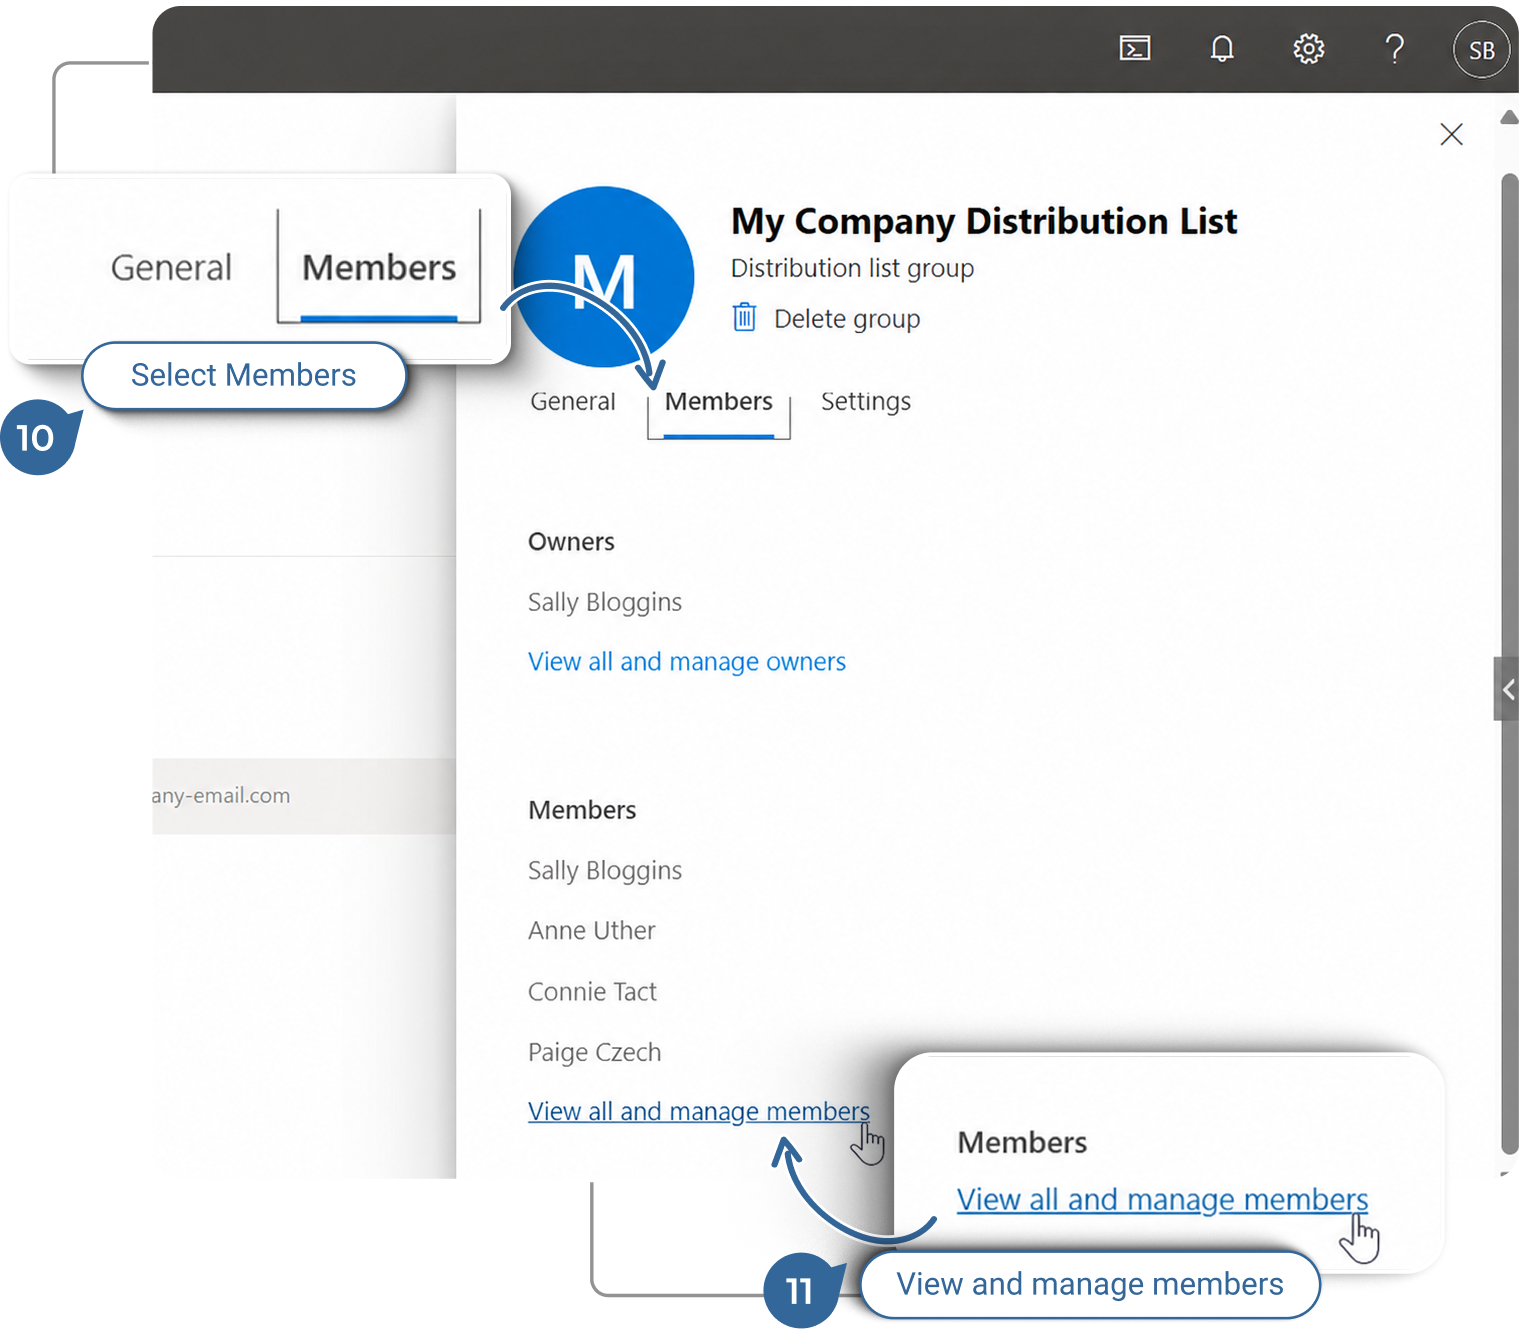
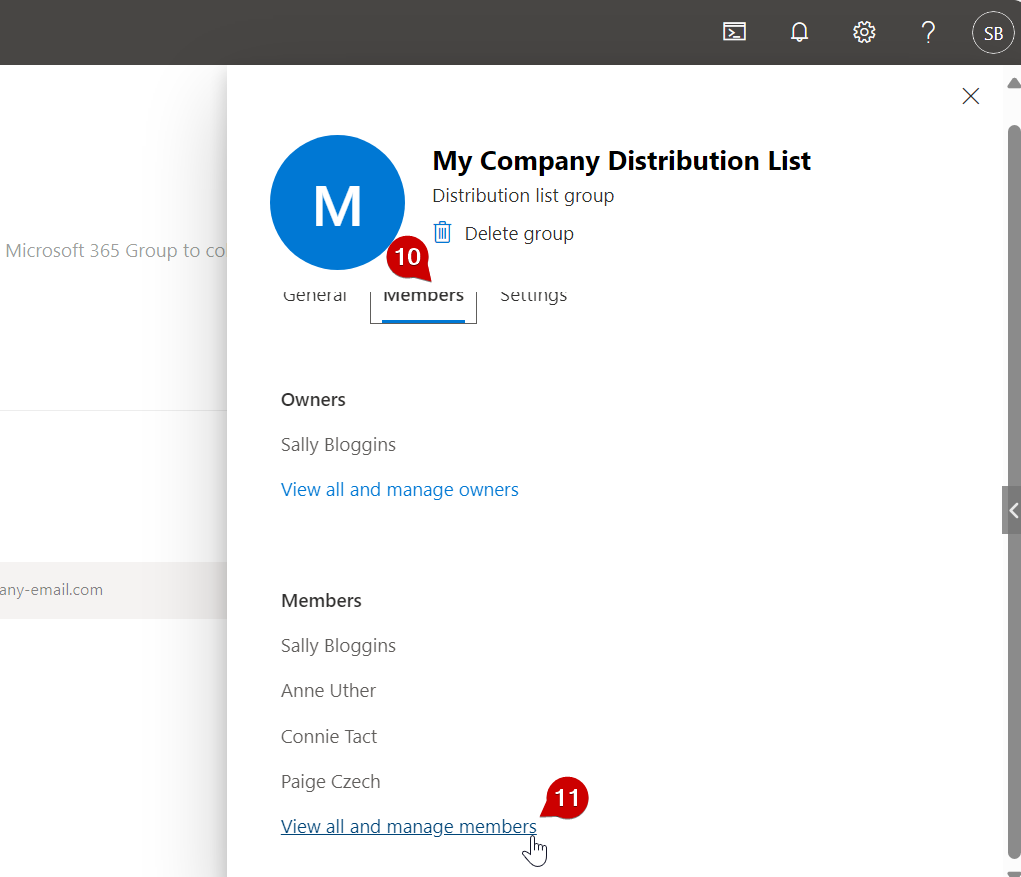
Members Menu: In the distribution list details page, click on “Members”.
11.
Manage Members: Click on “View all and manage members”.
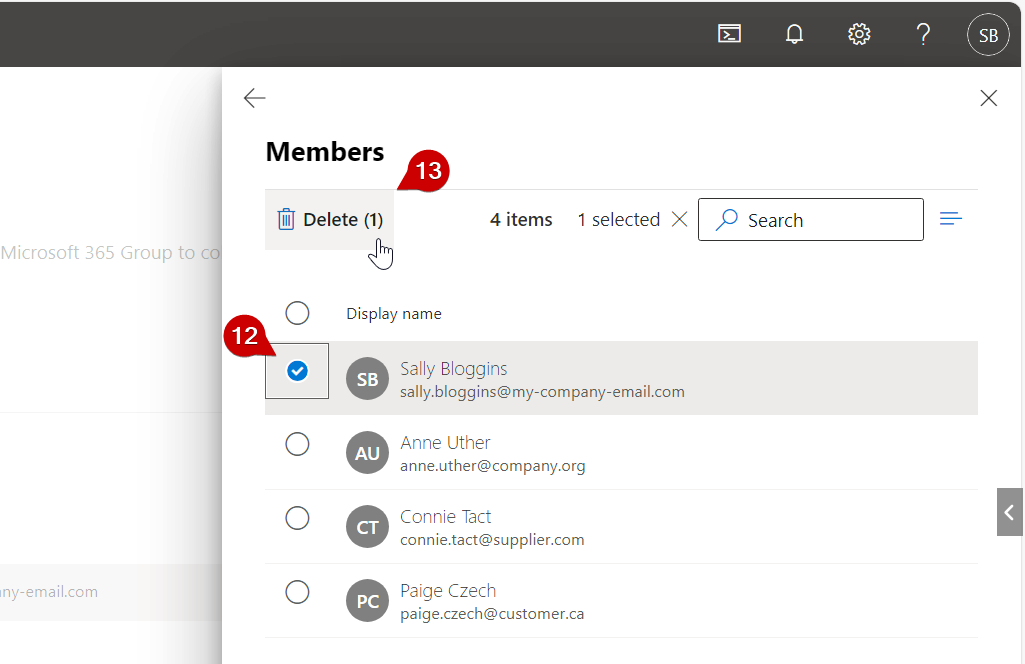
12.
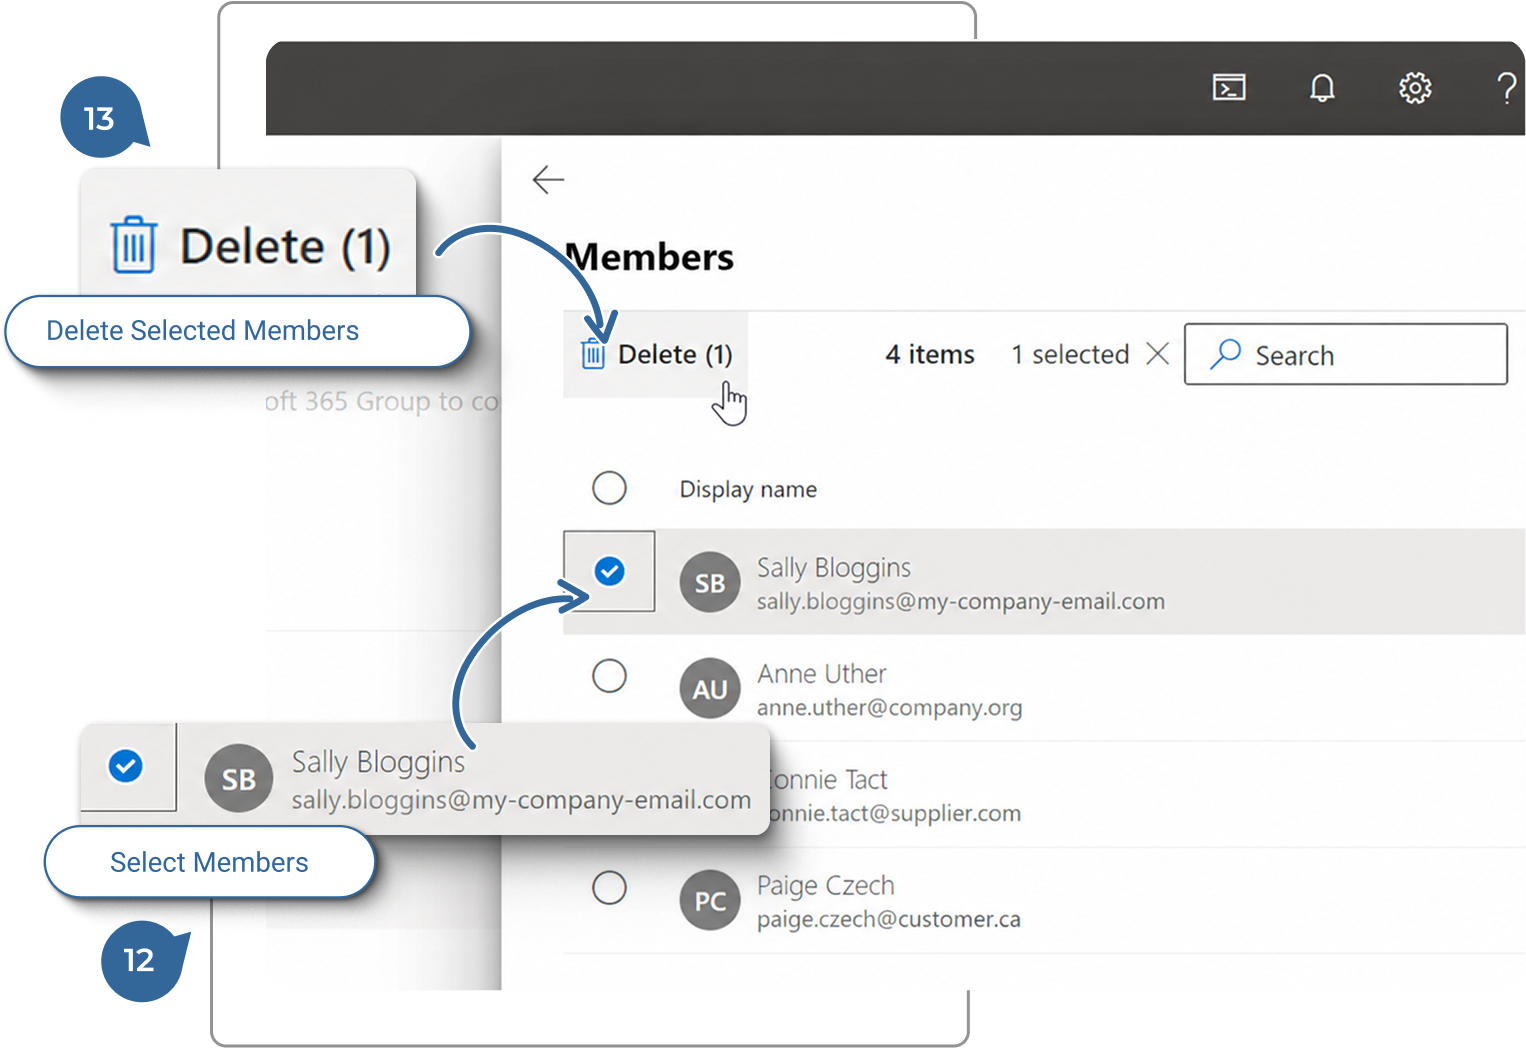
Remove Users: Find the user you want to remove from the list and click the “O” next to their name.

Hidden members will not appear on this list.
In this case, please email helpdesk@cole.systems and we will update the Distribution List for you.

13.
Delete Member: Click “Delete” after you have made your selection/s.
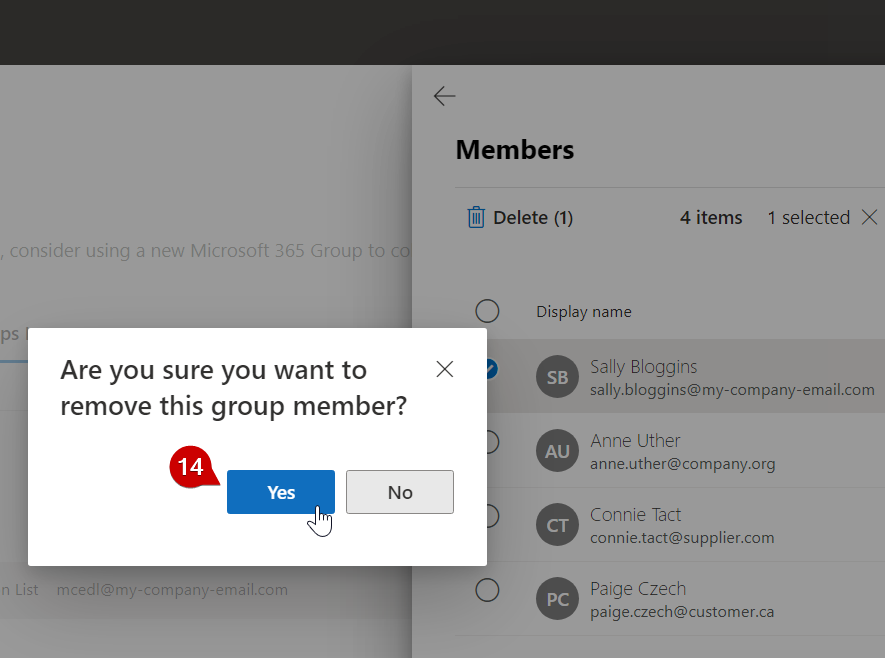
14.
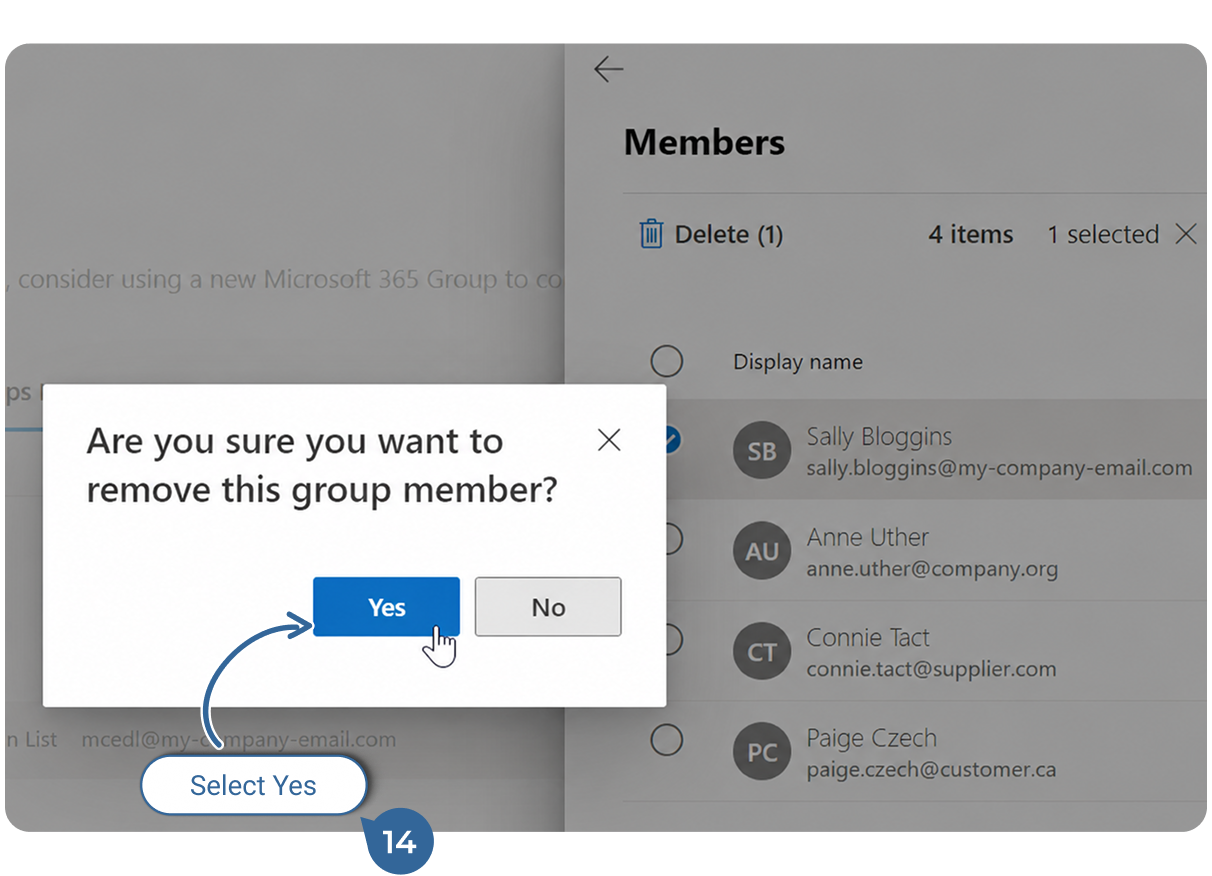
Confirmation: Confirm the removal by clicking “Yes” in the “Are you sure you want to remove this/these group member/s” popup.
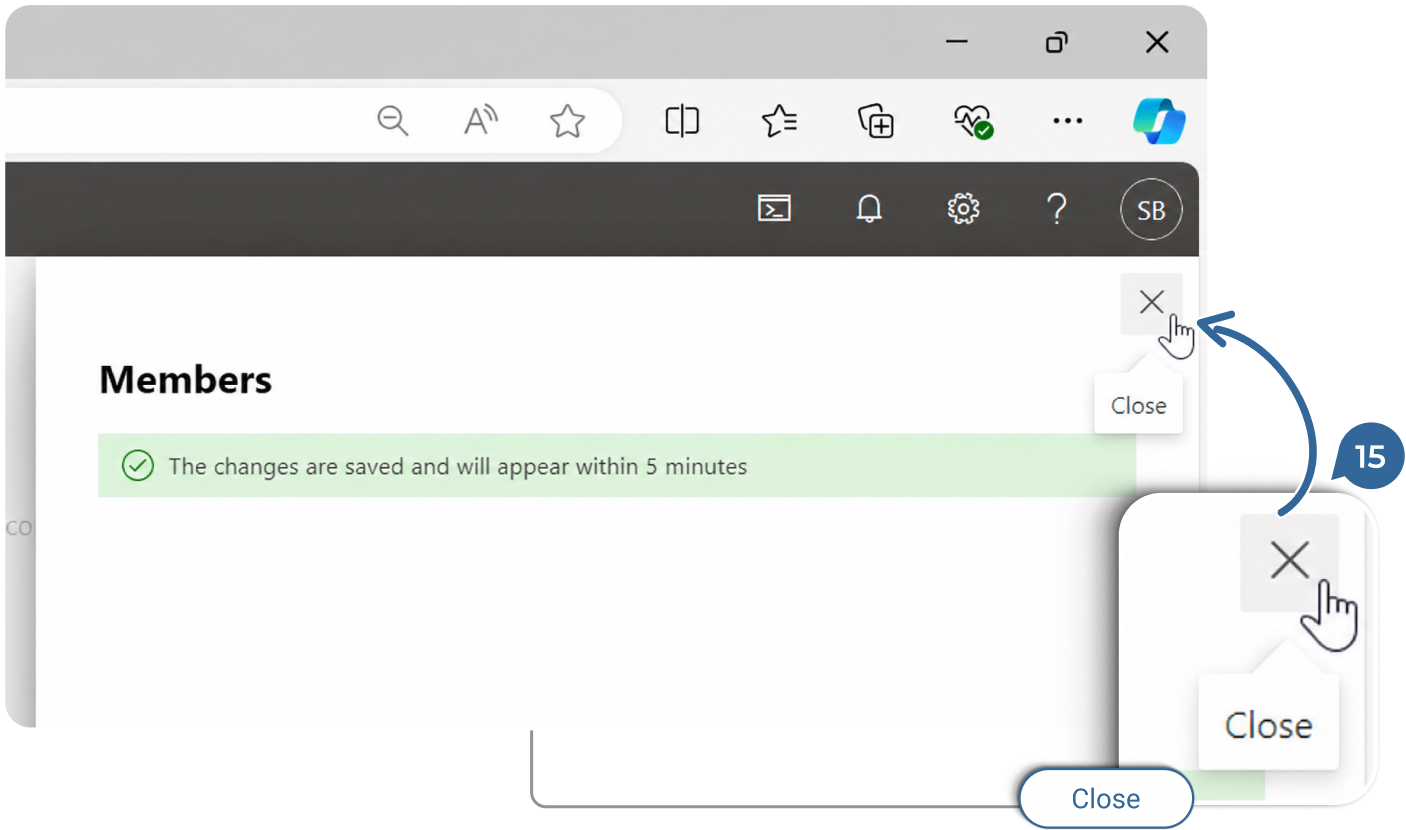
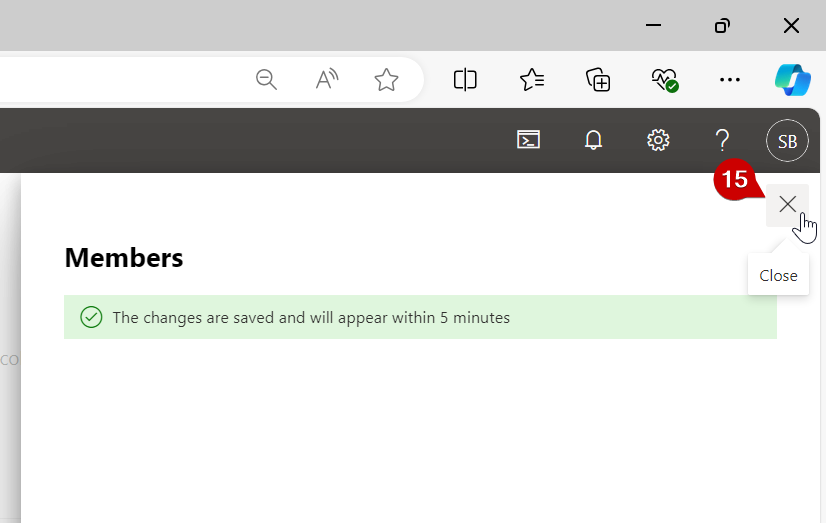
15.
Close Member Window: Click on the X in the upper right-hand corner to close the Members menu.
It is only necessary to enter the send from address once for Outlook to rember it, the address will remain in the dropdown allowing you to simply select it in the future.


How to Manag Distribution Lists

Next Step

2 / 2

1.

Open the Groups Management Page

Access the Microsoft 365 Admin Center.
  1. MS365 Groups URL: Go to https://admin.exchange.microsoft.com/#/groups and sign in with your Office 365 credentials.
Outlook will launch and your mailbox appears.

2 / 2

Next Step

2.

Locate the Distribution List

Locate the Distribution List you would like to update.
  1. Group Tabs: You will see two tabs: “Groups I belong to” and “Groups I own”. Click on “Groups I own” to view the distribution lists that you manage.
  2. Locate Distribution List: Find the distribution list you would like to update and click on its name to open the details page.

2 / 2

Next Step

3.

Add Members to the Distribution List

Add Members to the Distribution List.
  1. Members Menu: In the distribution list details page, click on “Members”.
  2. Manage Members: Click on “View all and manage members”.
  3. Add Members: Click “Add members”.
  4. Locate Users: Search for the user you want to add by typing their name or email address, or if your address list is not too long you can simply select them from the list.

    External users (people with email addresses outside of your organization) may not appear as available members.
    In this case, please email helpdesk@cole.systems and we will update the Distribution List for you.
  5. Add Users: Once you find the user or users, click on their name/s and then click “Add”.

    Your window will be replaced indicating the status of the changes that were made.
  6. Close Member Window: Click on the X in the upper right-hand corner to close the Members menu.

2 / 2

Next Step

4.

Remove Members from the Distribution List

Remove the Members from the Distribution List that you no longer want to receive emails.
  1. Members Menu: In the distribution list details page, click on “Members”.
  2. Manage Members: Click on “View all and manage members”.
  3. Remove Users: Find the user you want to remove from the list and click the “O” next to their name.

    Hidden members will not appear on this list.
    In this case, please email helpdesk@cole.systems and we will update the Distribution List for you.
  4. Delete Member: Click “Delete” after you have made your selection/s.
  5. Confirmation: Confirm the removal by clicking “Yes” in the “Are you sure you want to remove this/these group member/s” popup.
  6. Close Member Window: Click on the X in the upper right-hand corner to close the Members menu.

It is only necessary to enter the send from address once for Outlook to rember it, the address will remain in the dropdown allowing you to simply select it in the future.
 

2 / 2

Next Step

Next Step

2 / 2

Get Started

Ready to Make Your IT Easier to Manage?

Talk to Cole Systems about your current technology challenges, security concerns, backup needs, or infrastructure goals. We’ll help you understand what needs attention and recommend practical next steps for your business.