1.
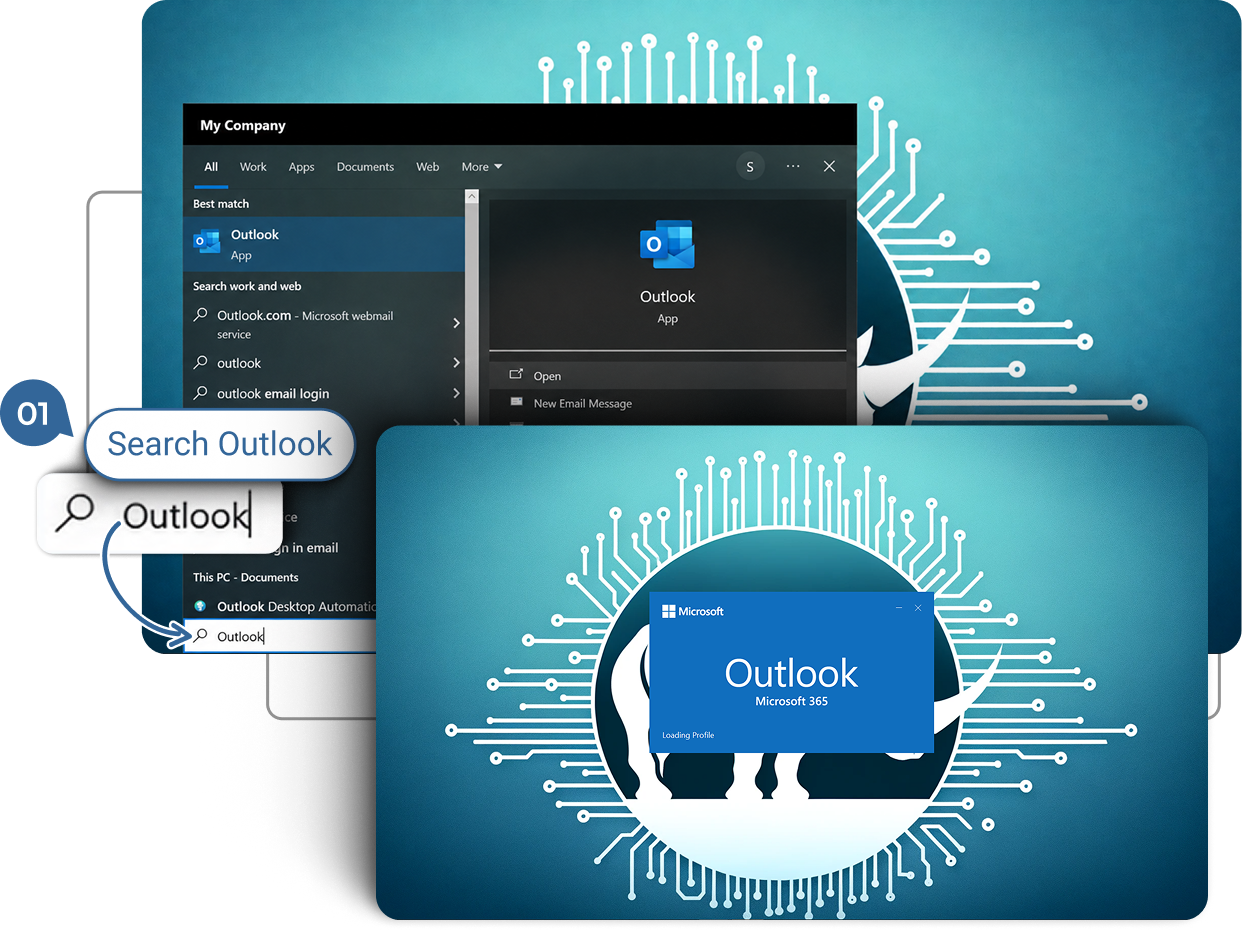
Open the Outlook Desktop application on your computer
Open Outlook using the shortcut on your desktop or task bar. If you can’t find it, you can click on the “Start” button or press the Windows Key on your keyboard.
-
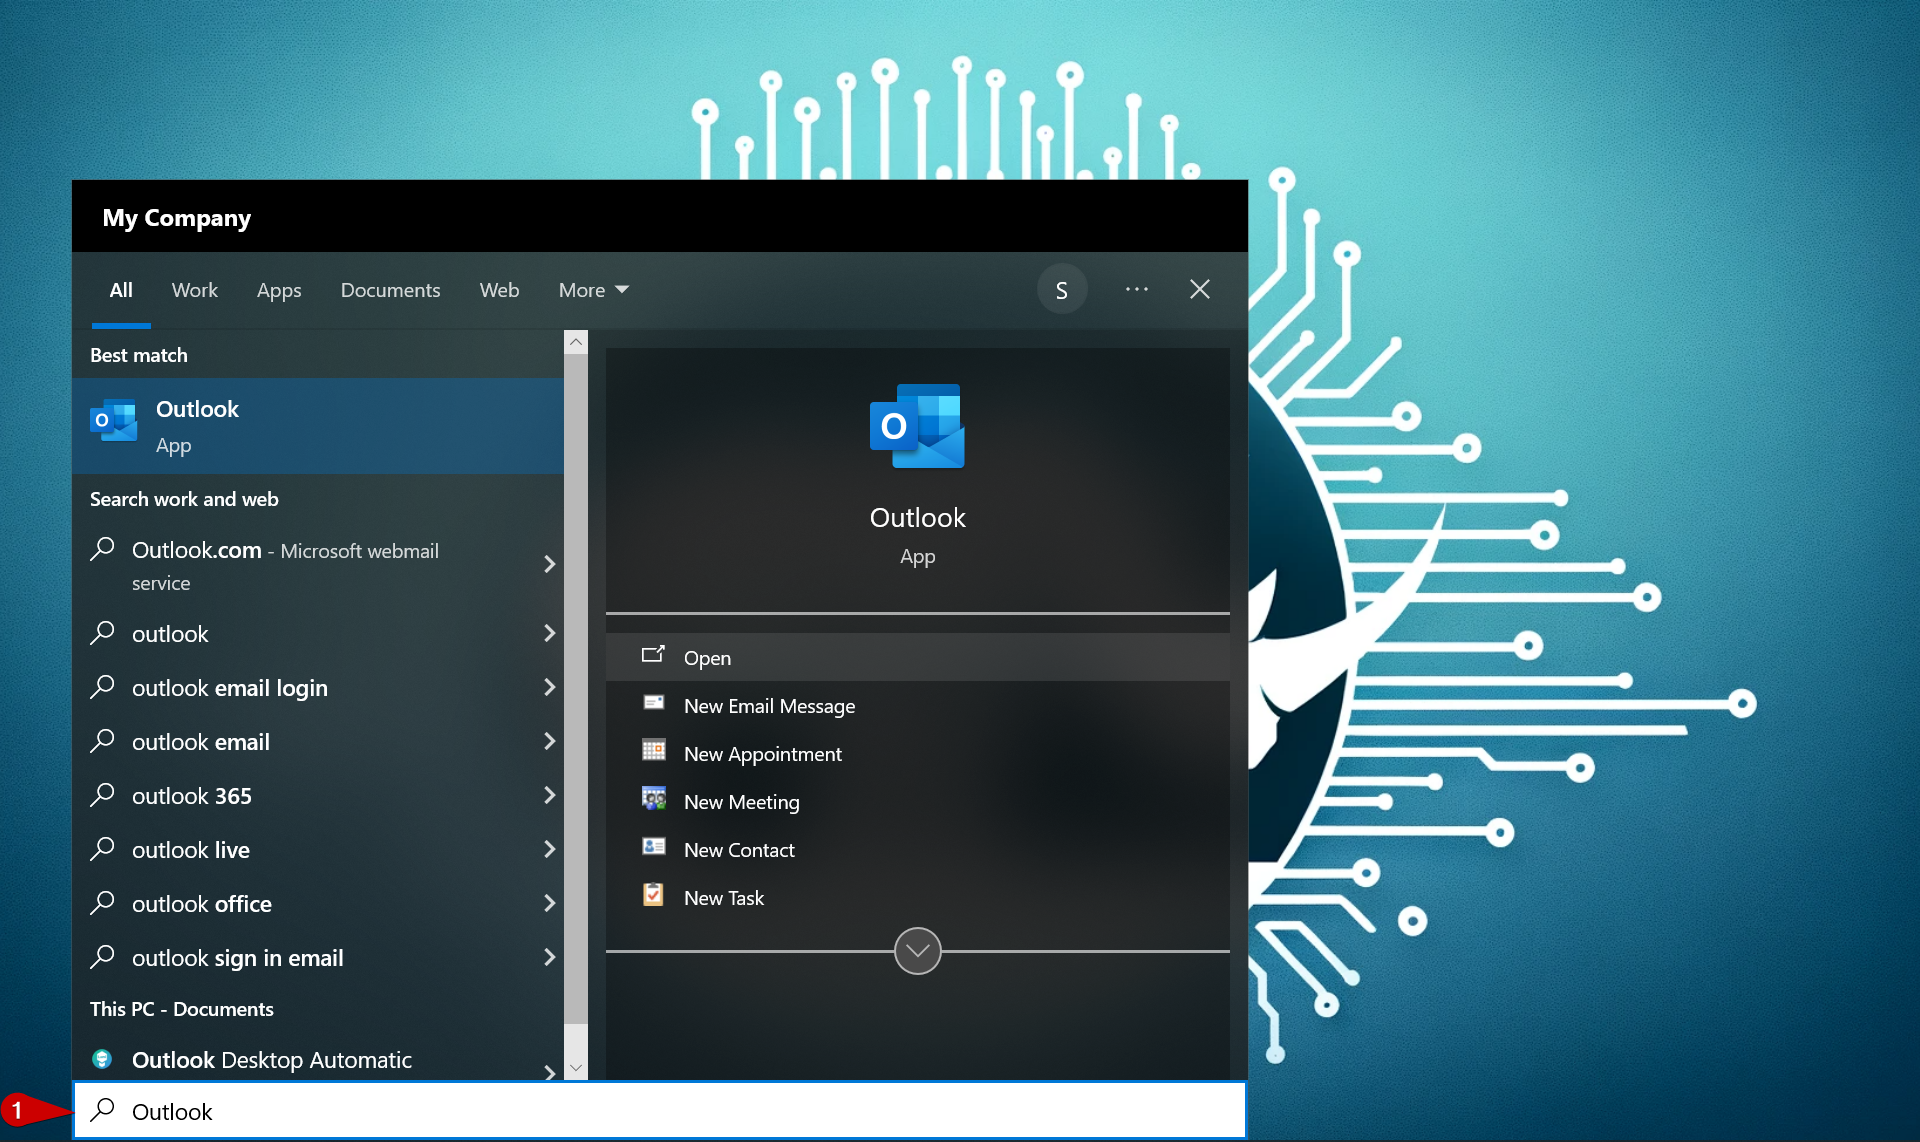
Type “Outlook” into the search box at the bottom of the Start Menu and click on the “Outlook” icon that will appear in the search results.
Outlook will launch and your mailbox appears.
2.
Open Automatic Replies (Out of Office) settings
Open Outlook using the shortcut on your desktop or task bar. If you can’t find it, you can click on the “Start” button or press the Windows Key on your keyboard.
-
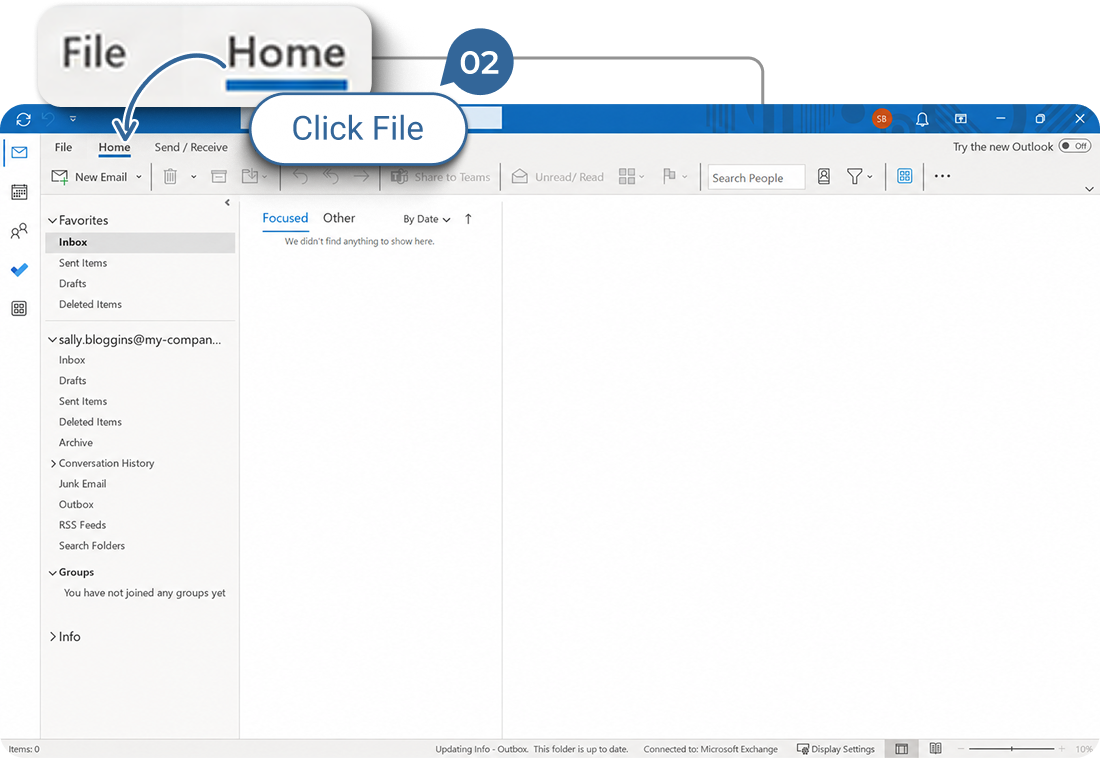
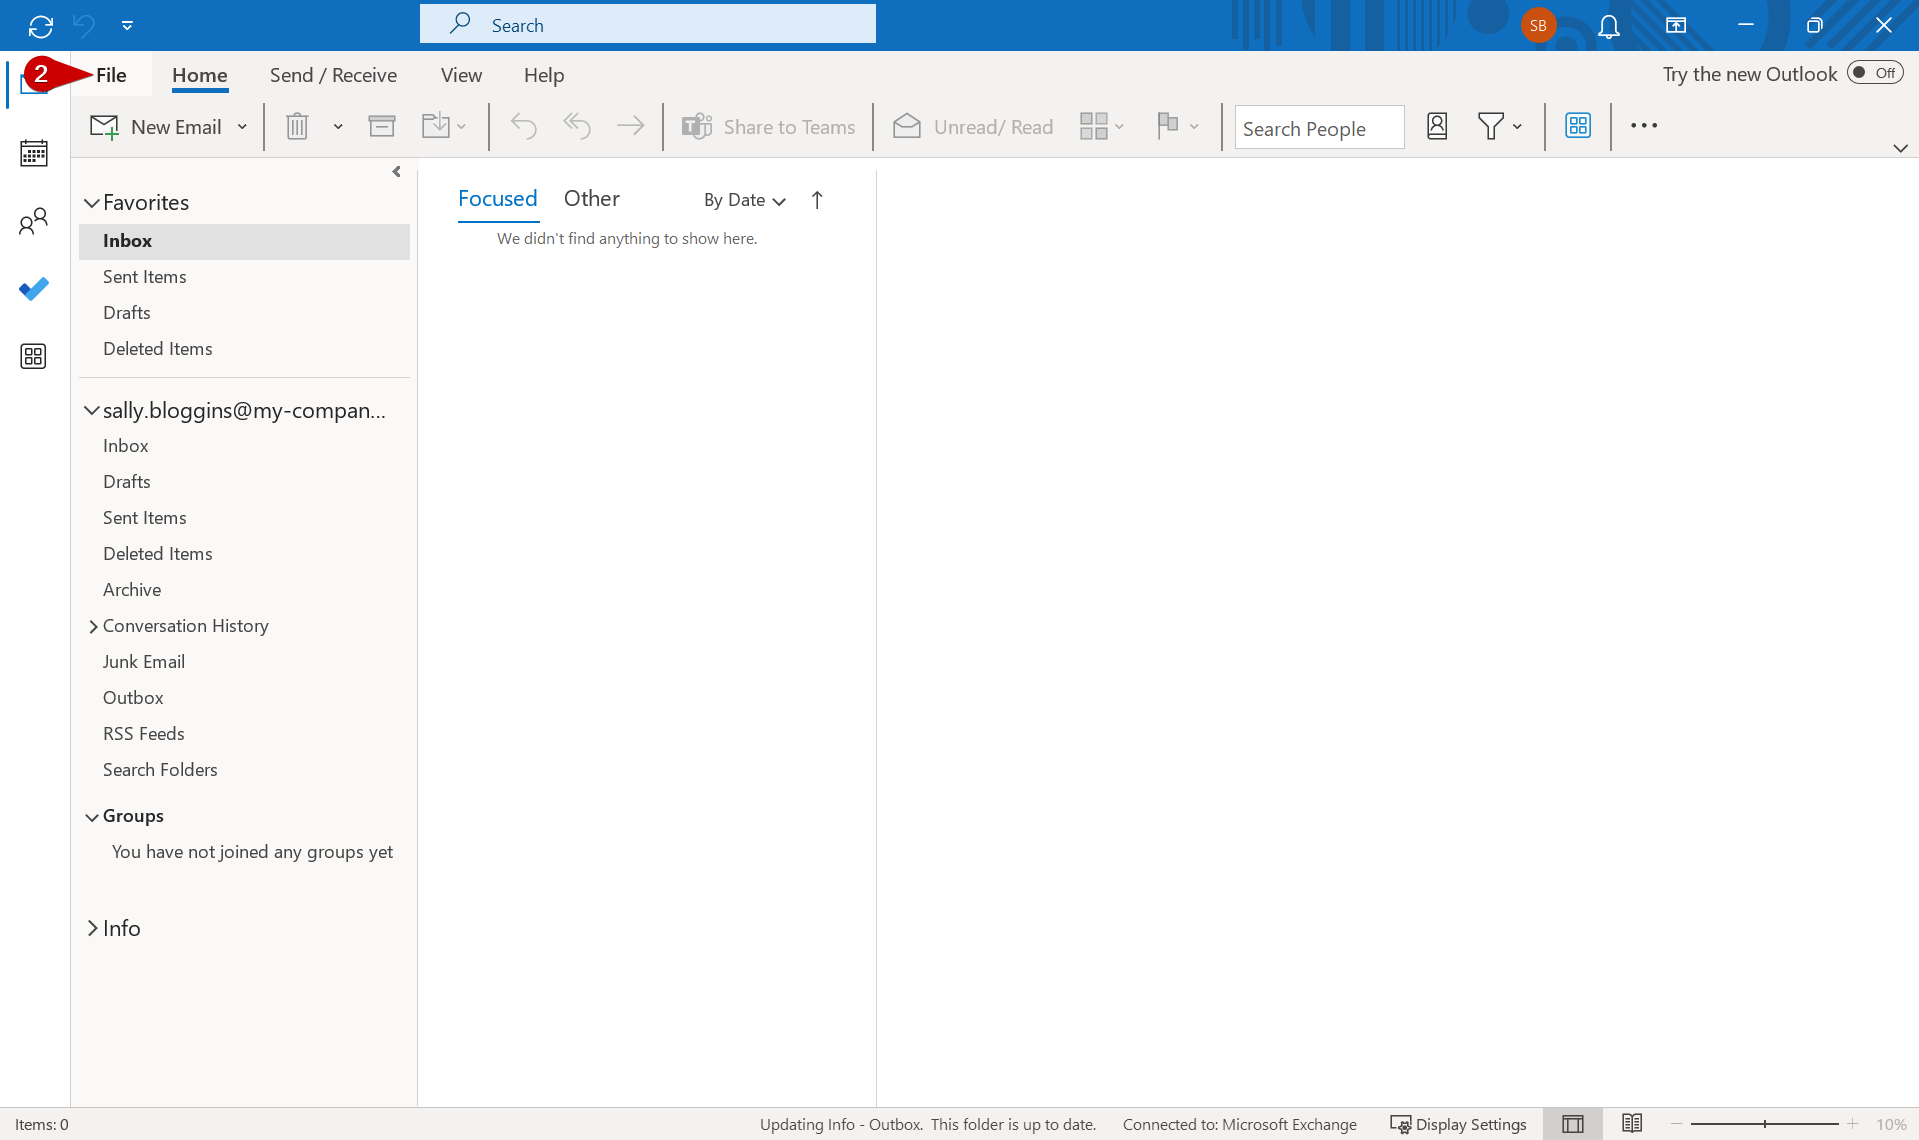
Click on the “File” tab near the top left of the Outlook window.
-
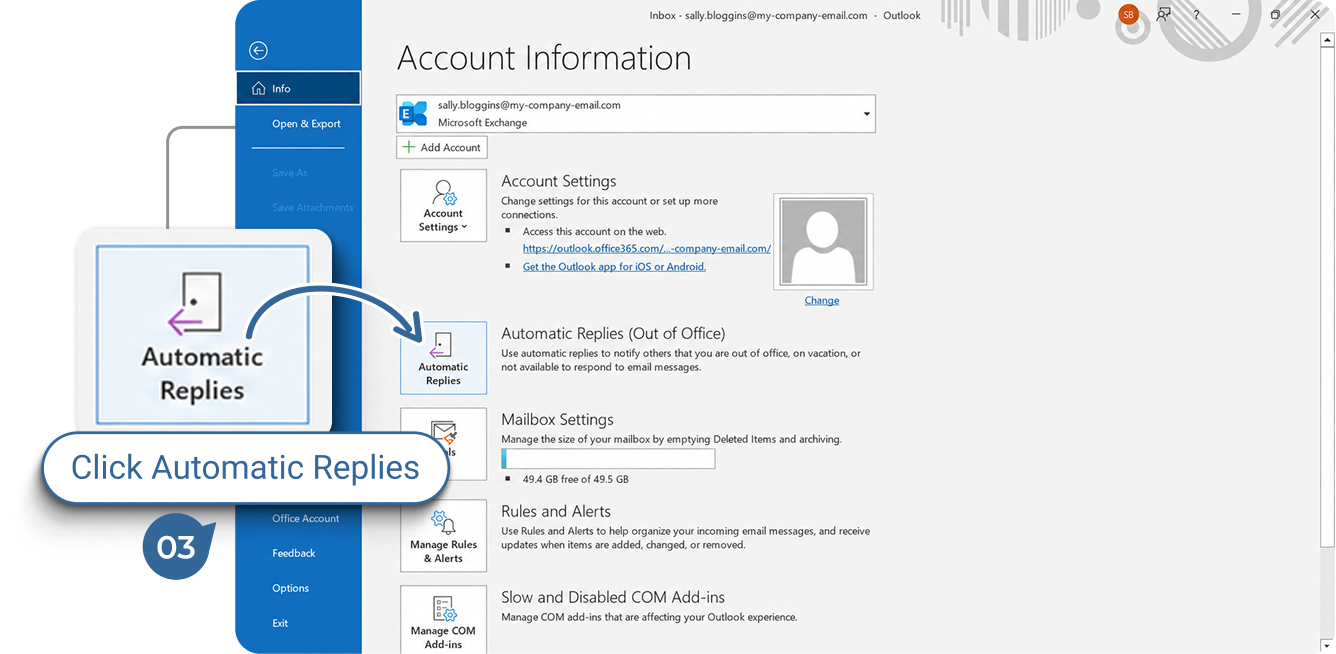
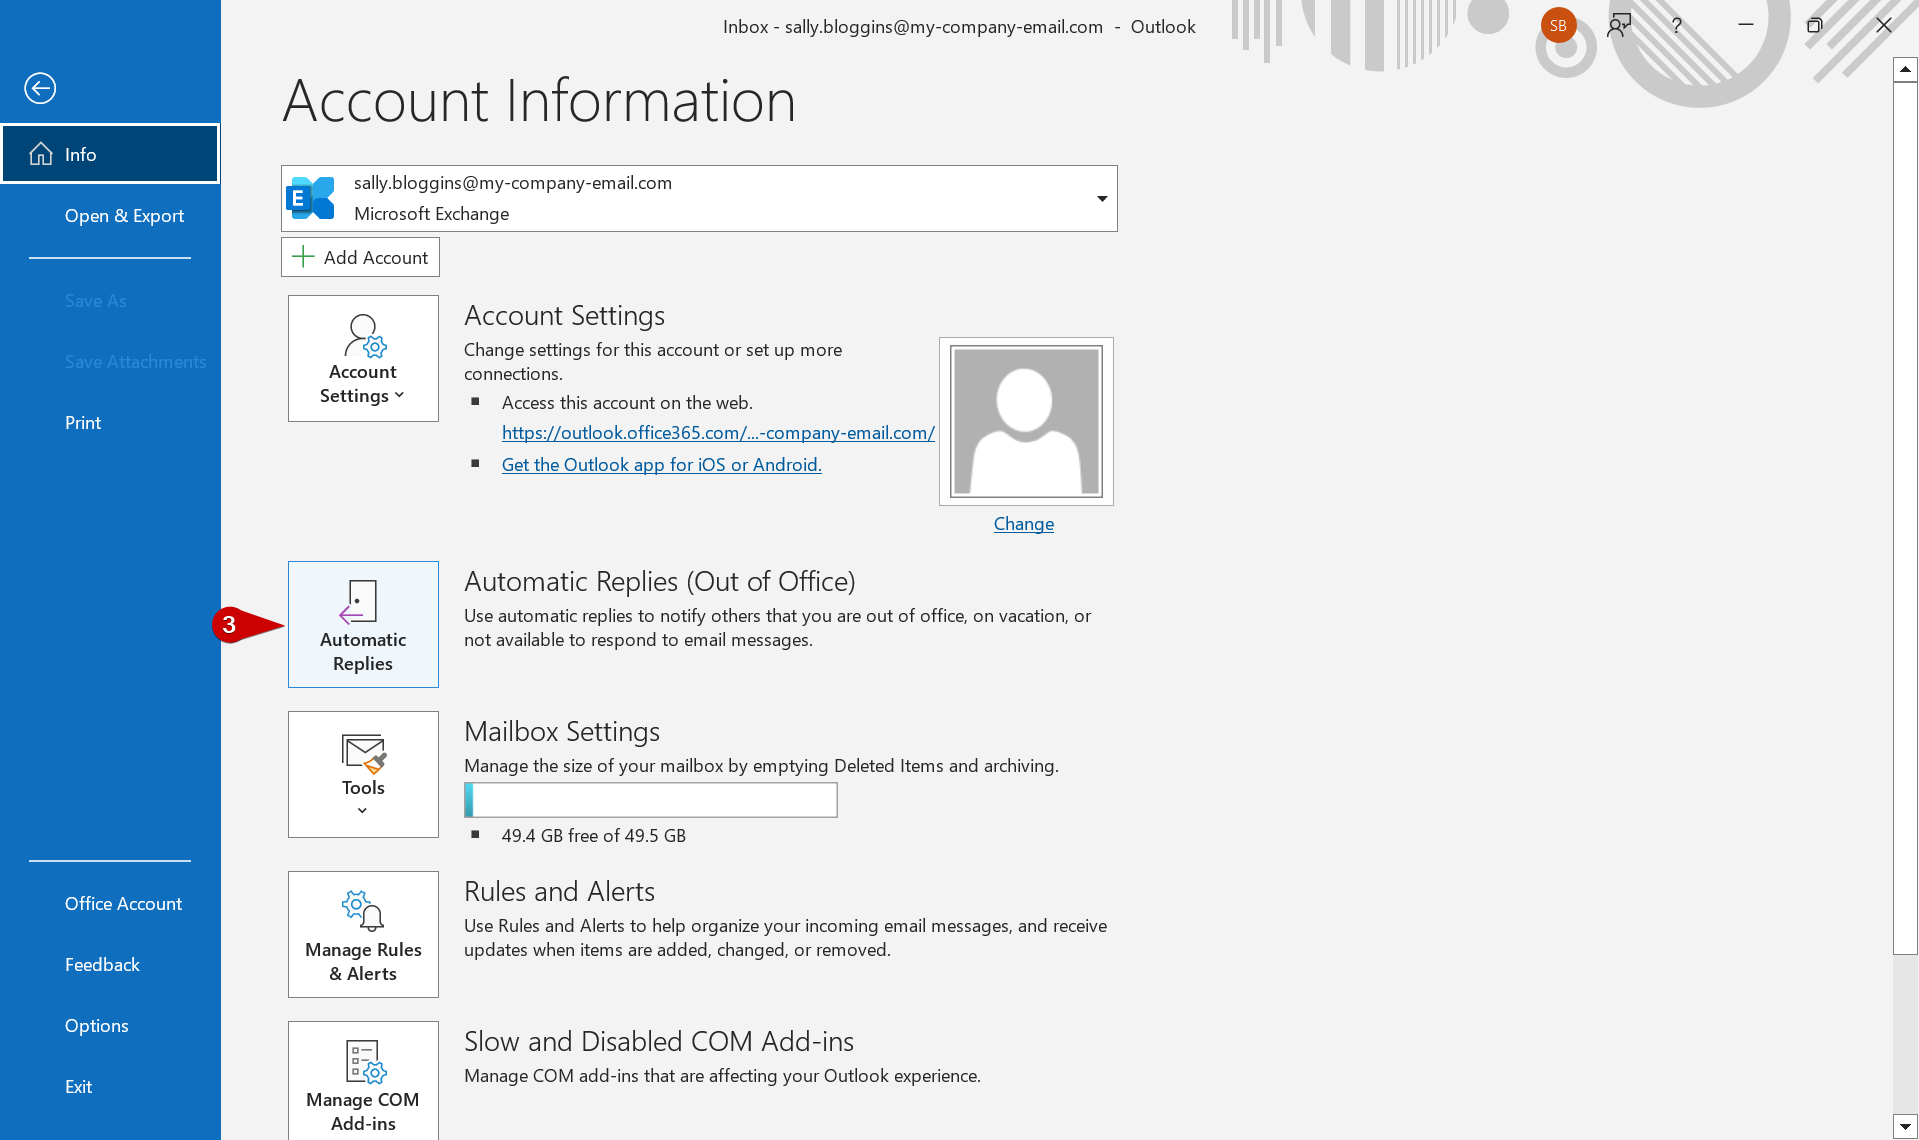
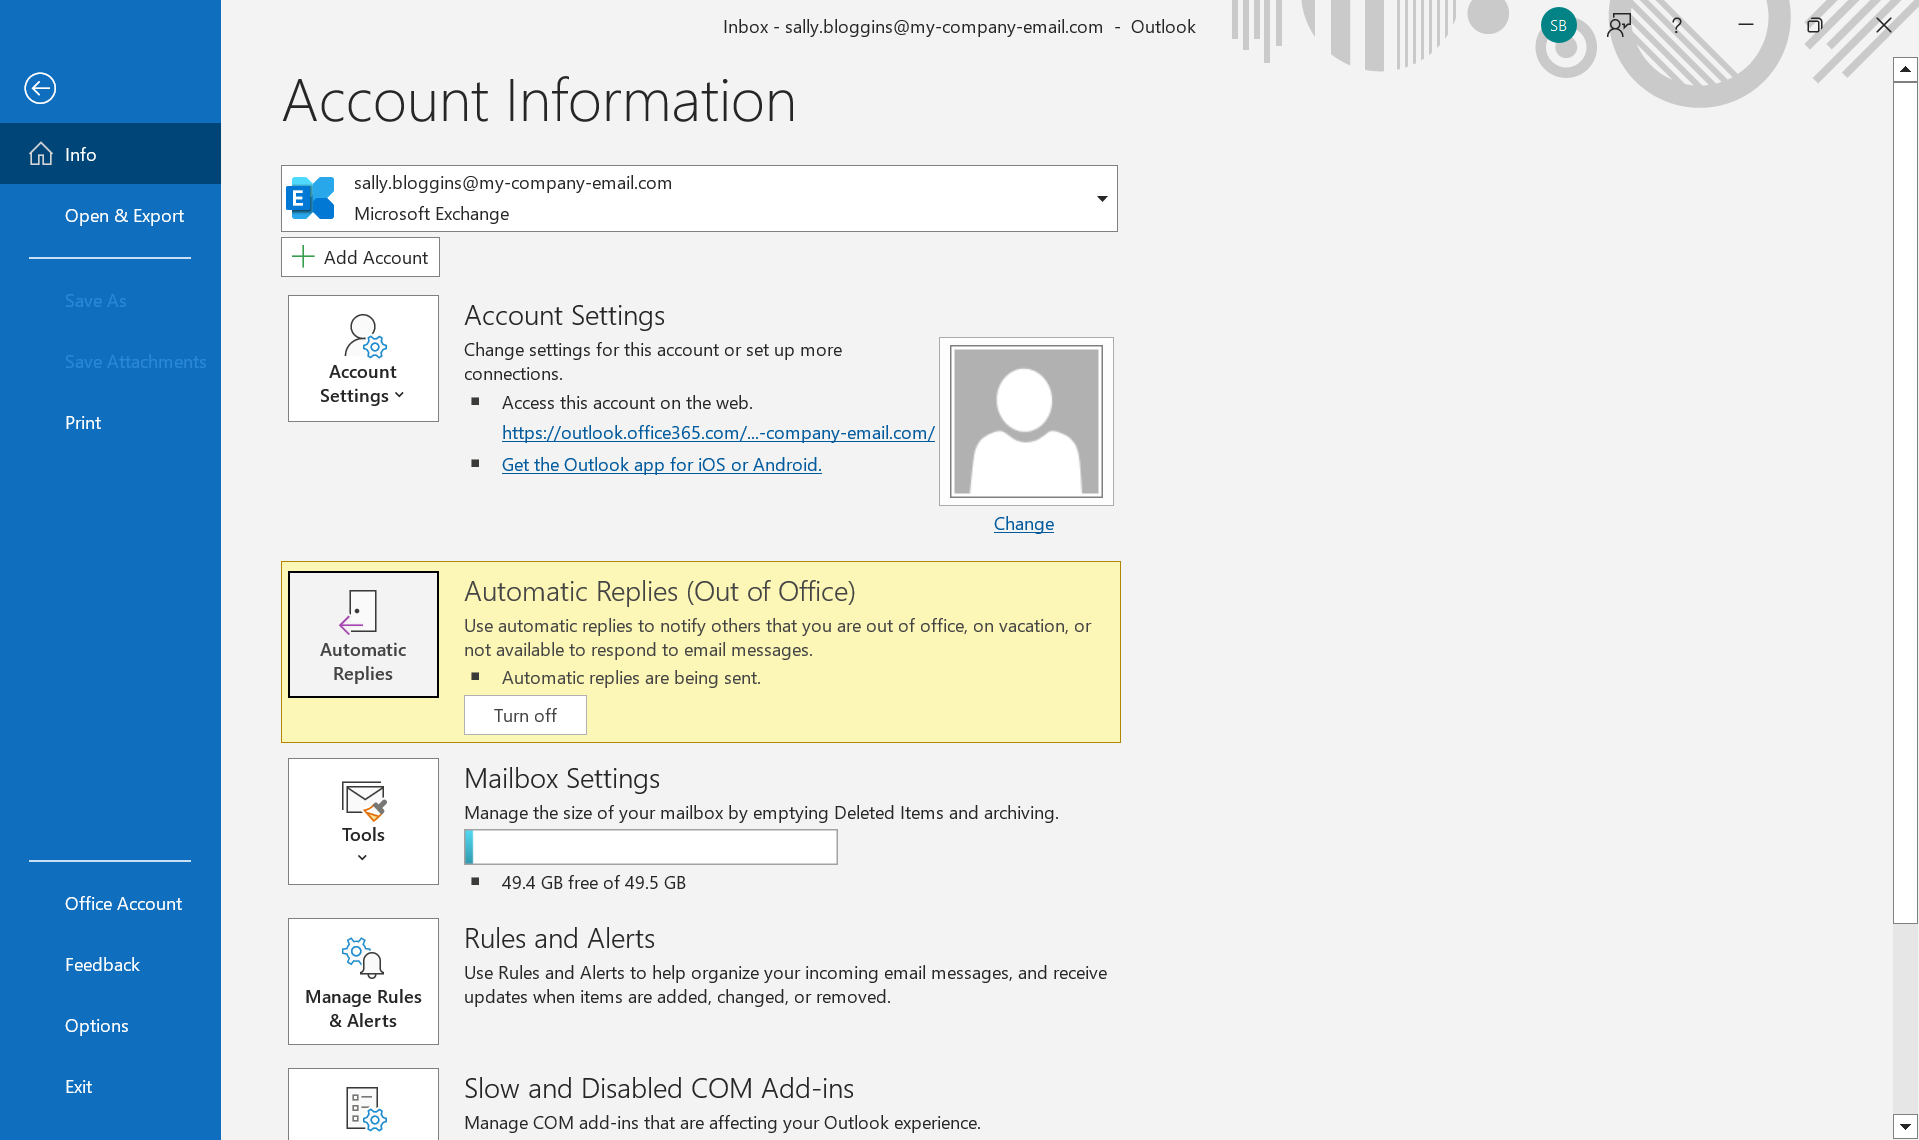
Click on the “Automatic Replies” button to access the settings.
Outlook will launch and your mailbox appears.
3.
Configure Automatic Replies
-
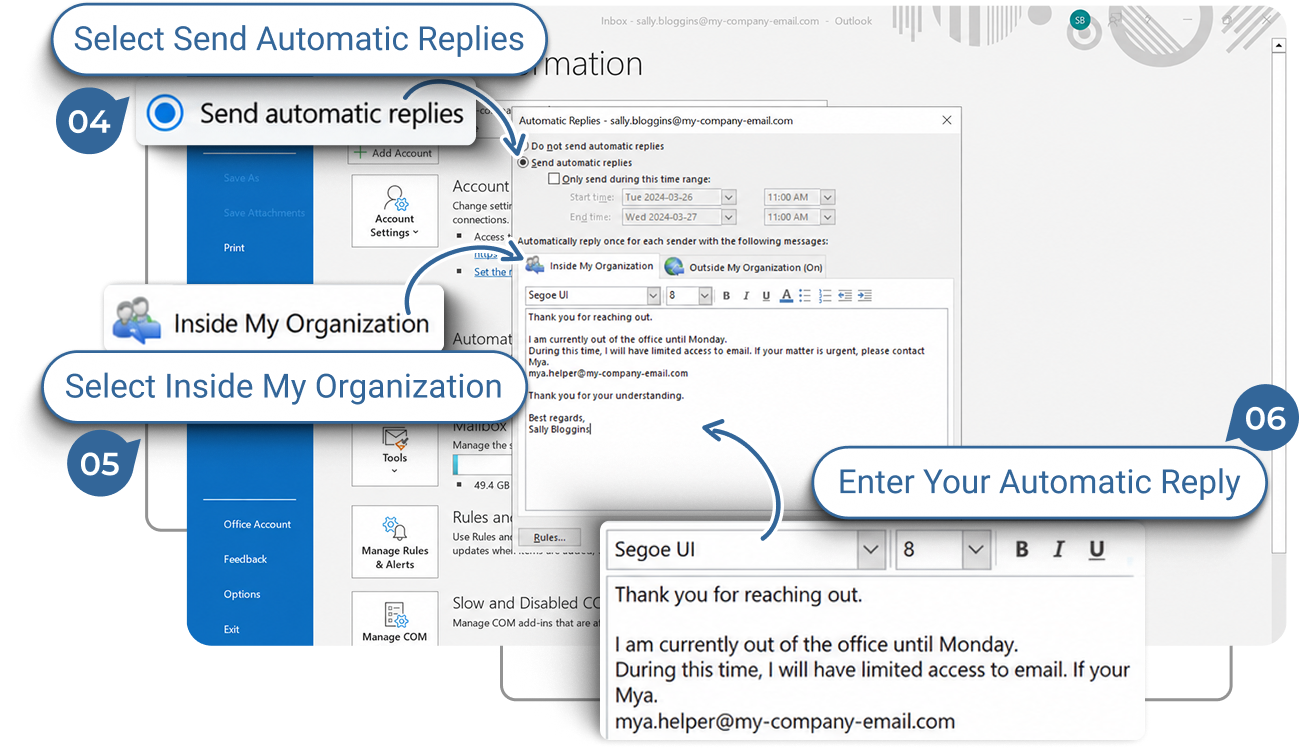
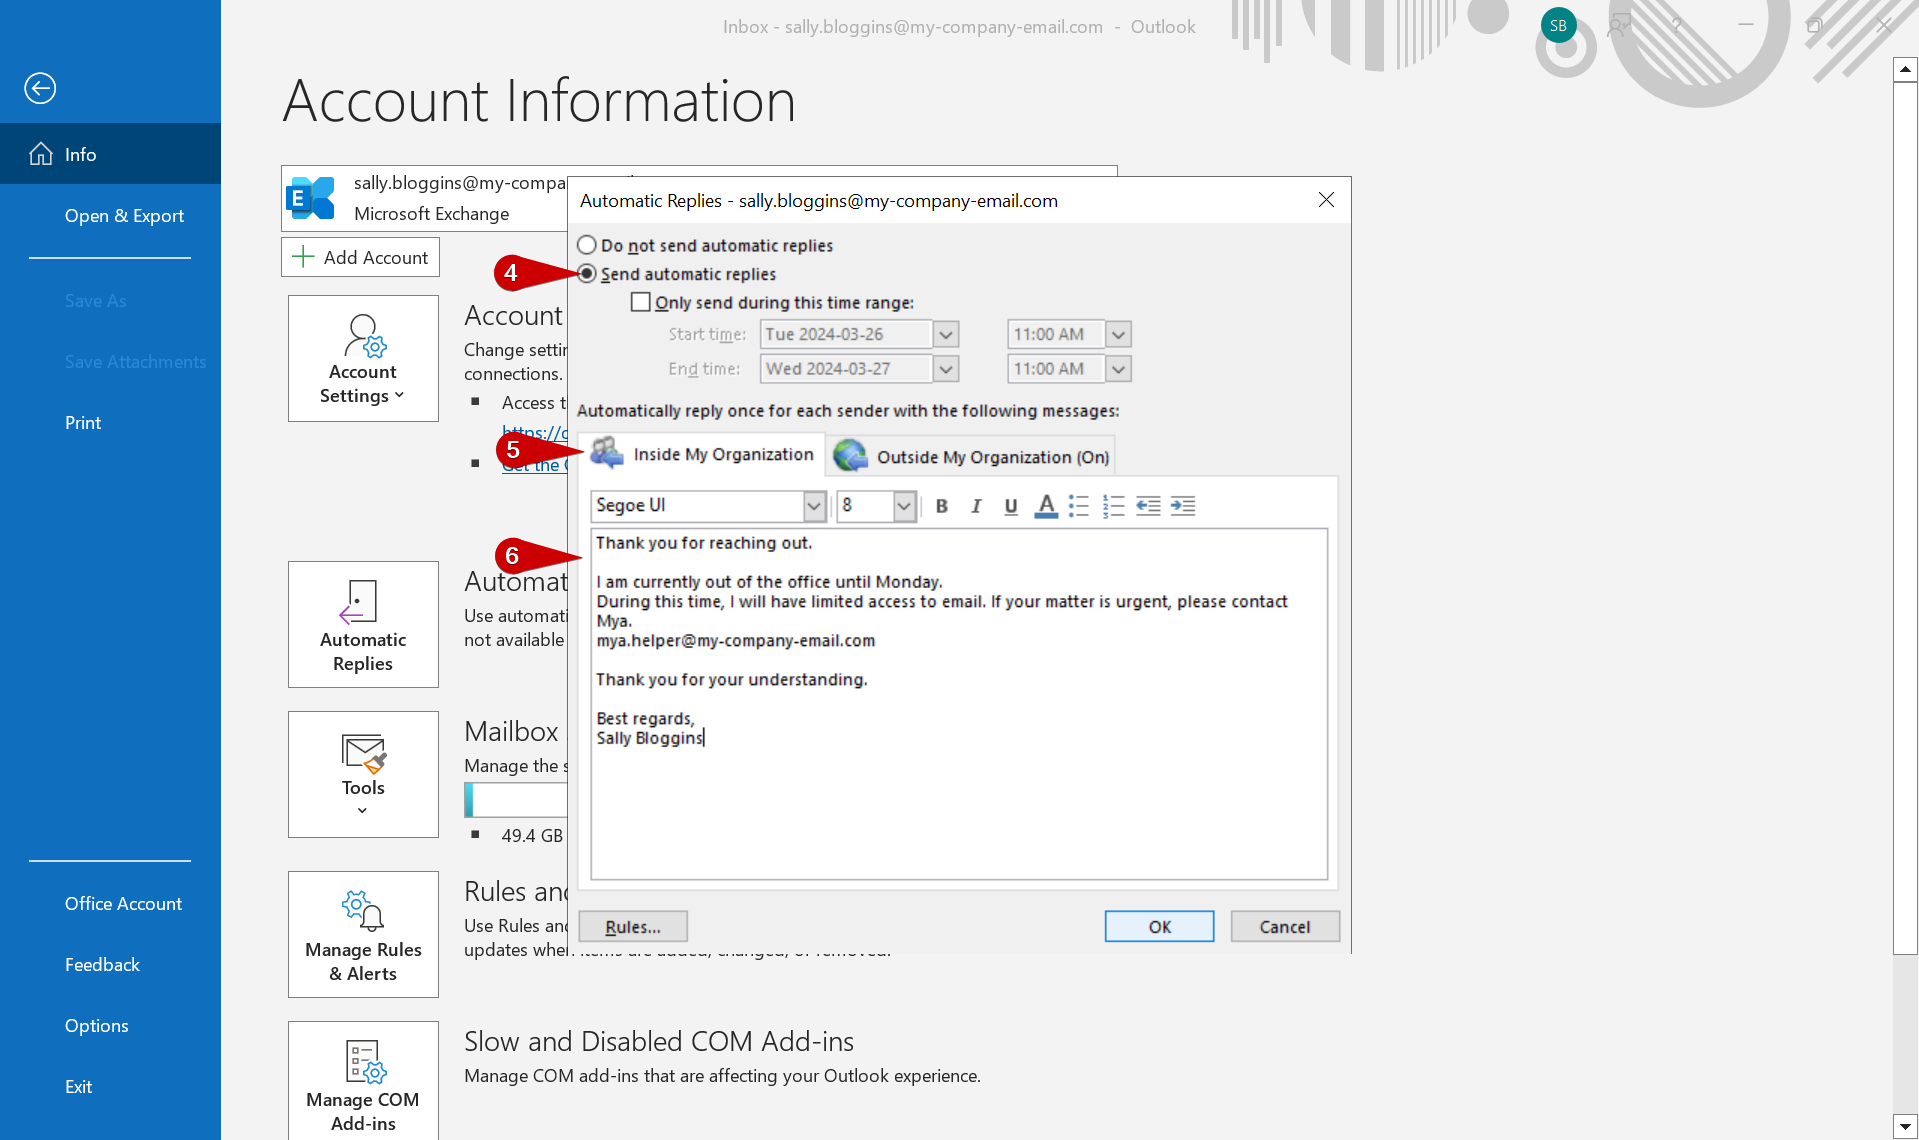
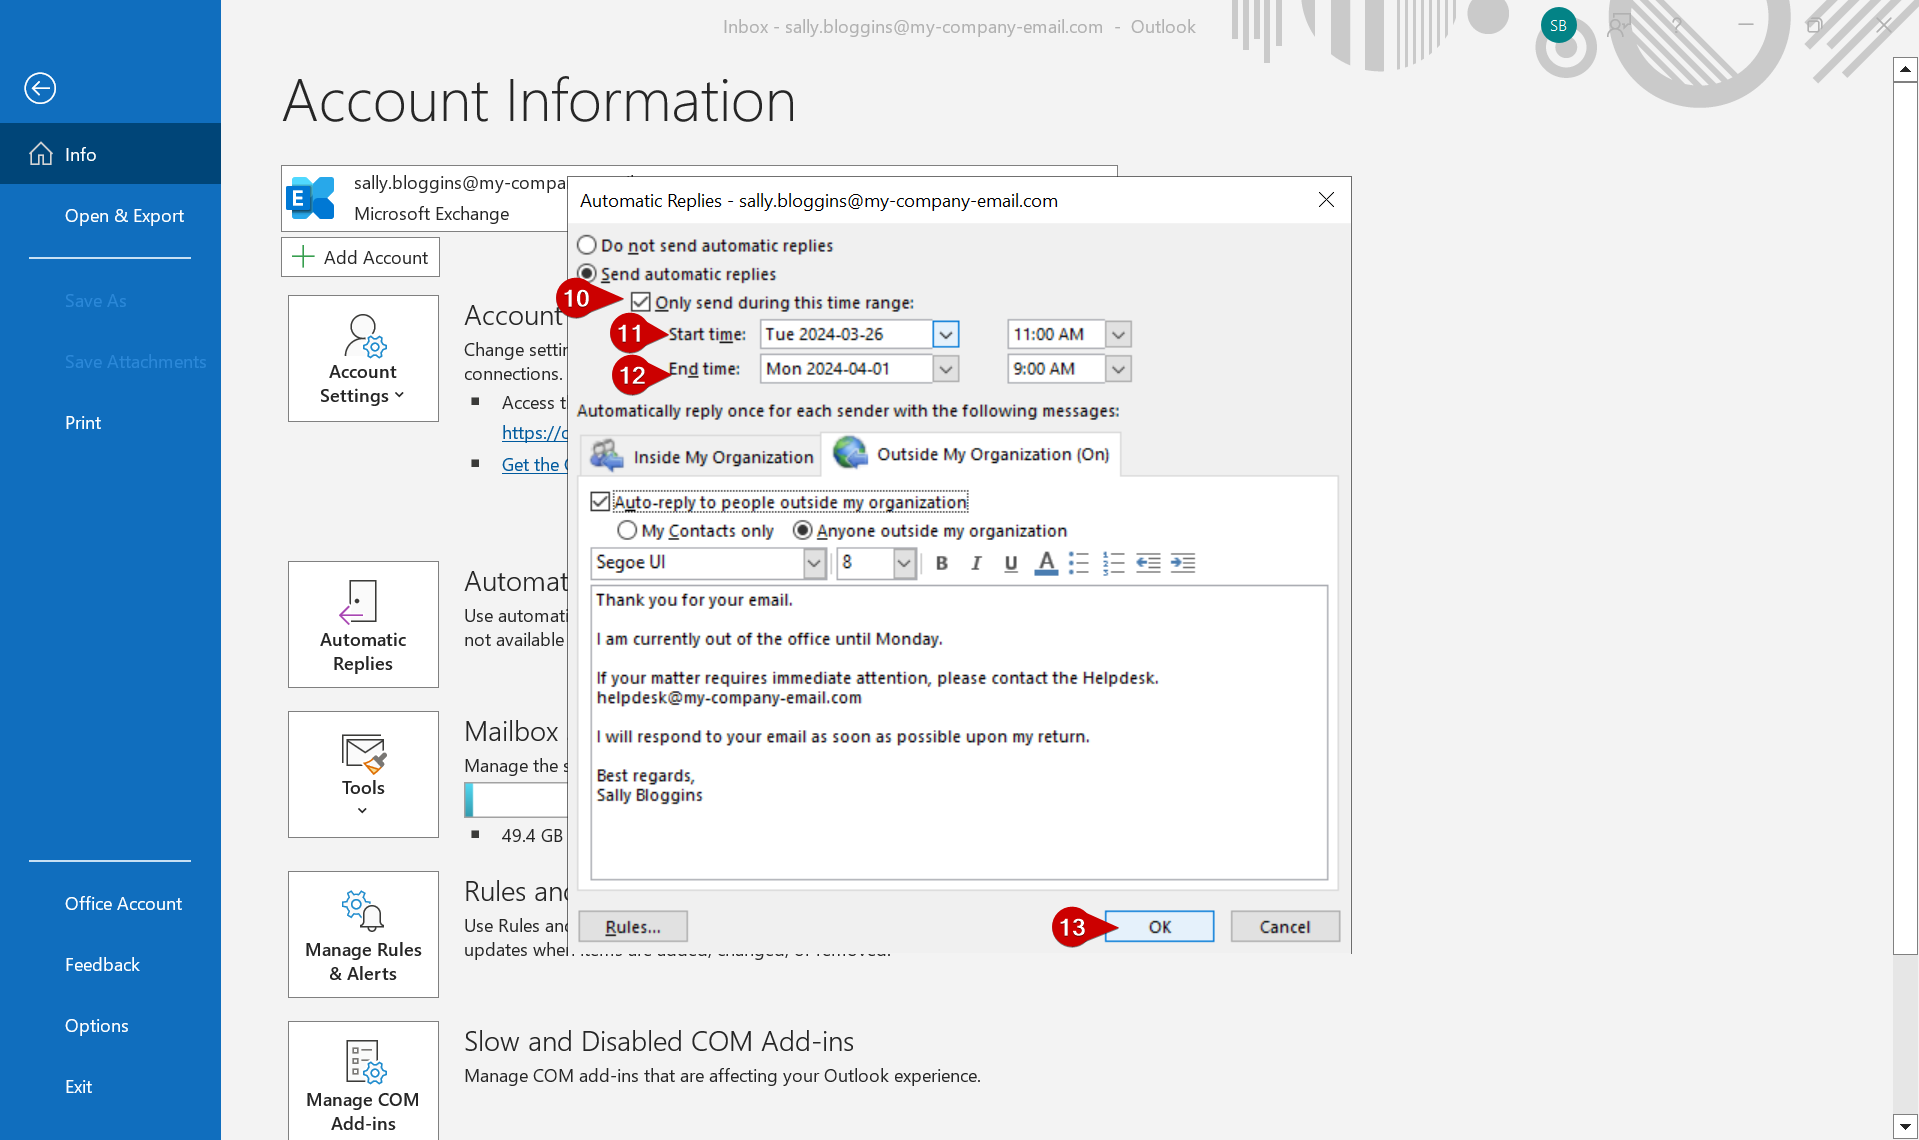
Click the radio button to select “Send automatic replies”.
-
Click on the “Inside My Organization” tab.
-
Enter the message that people inside your organization will receive when they email this mailbox.
-
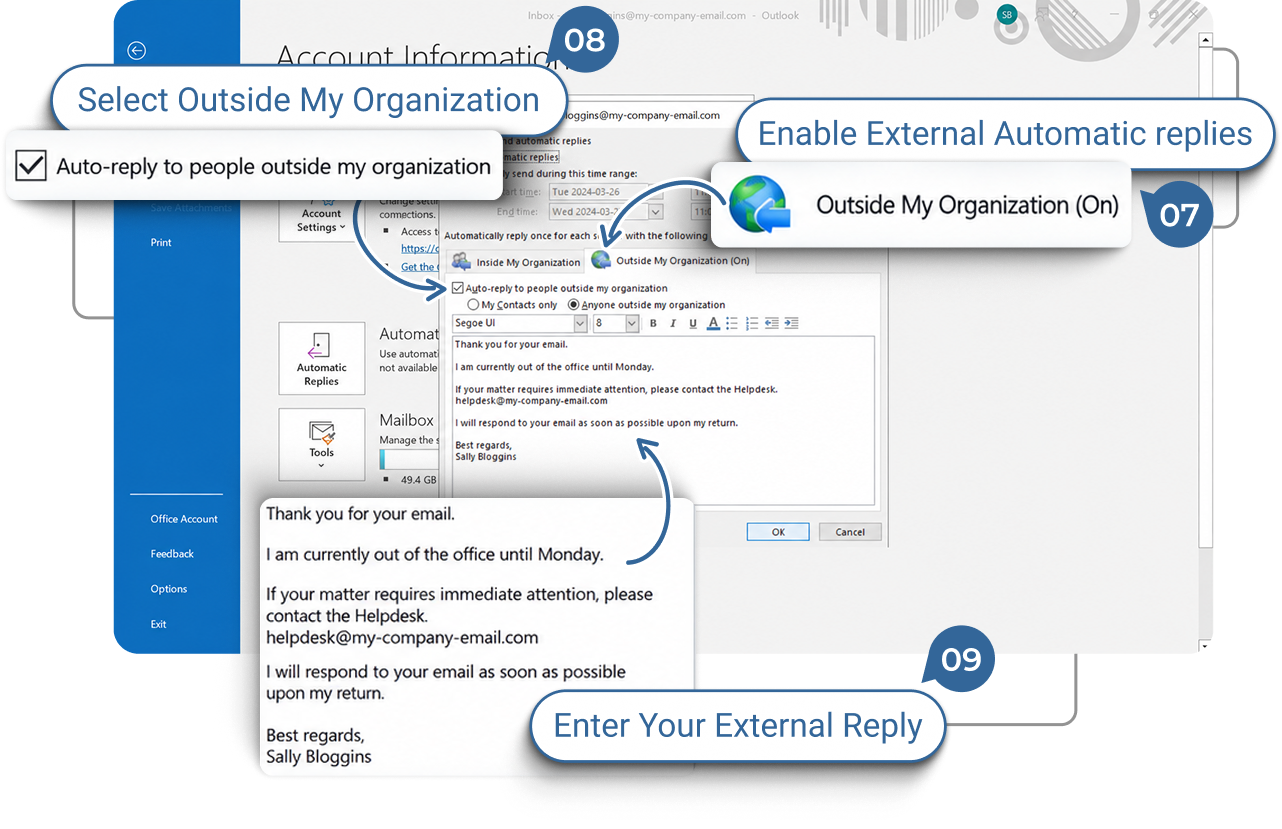
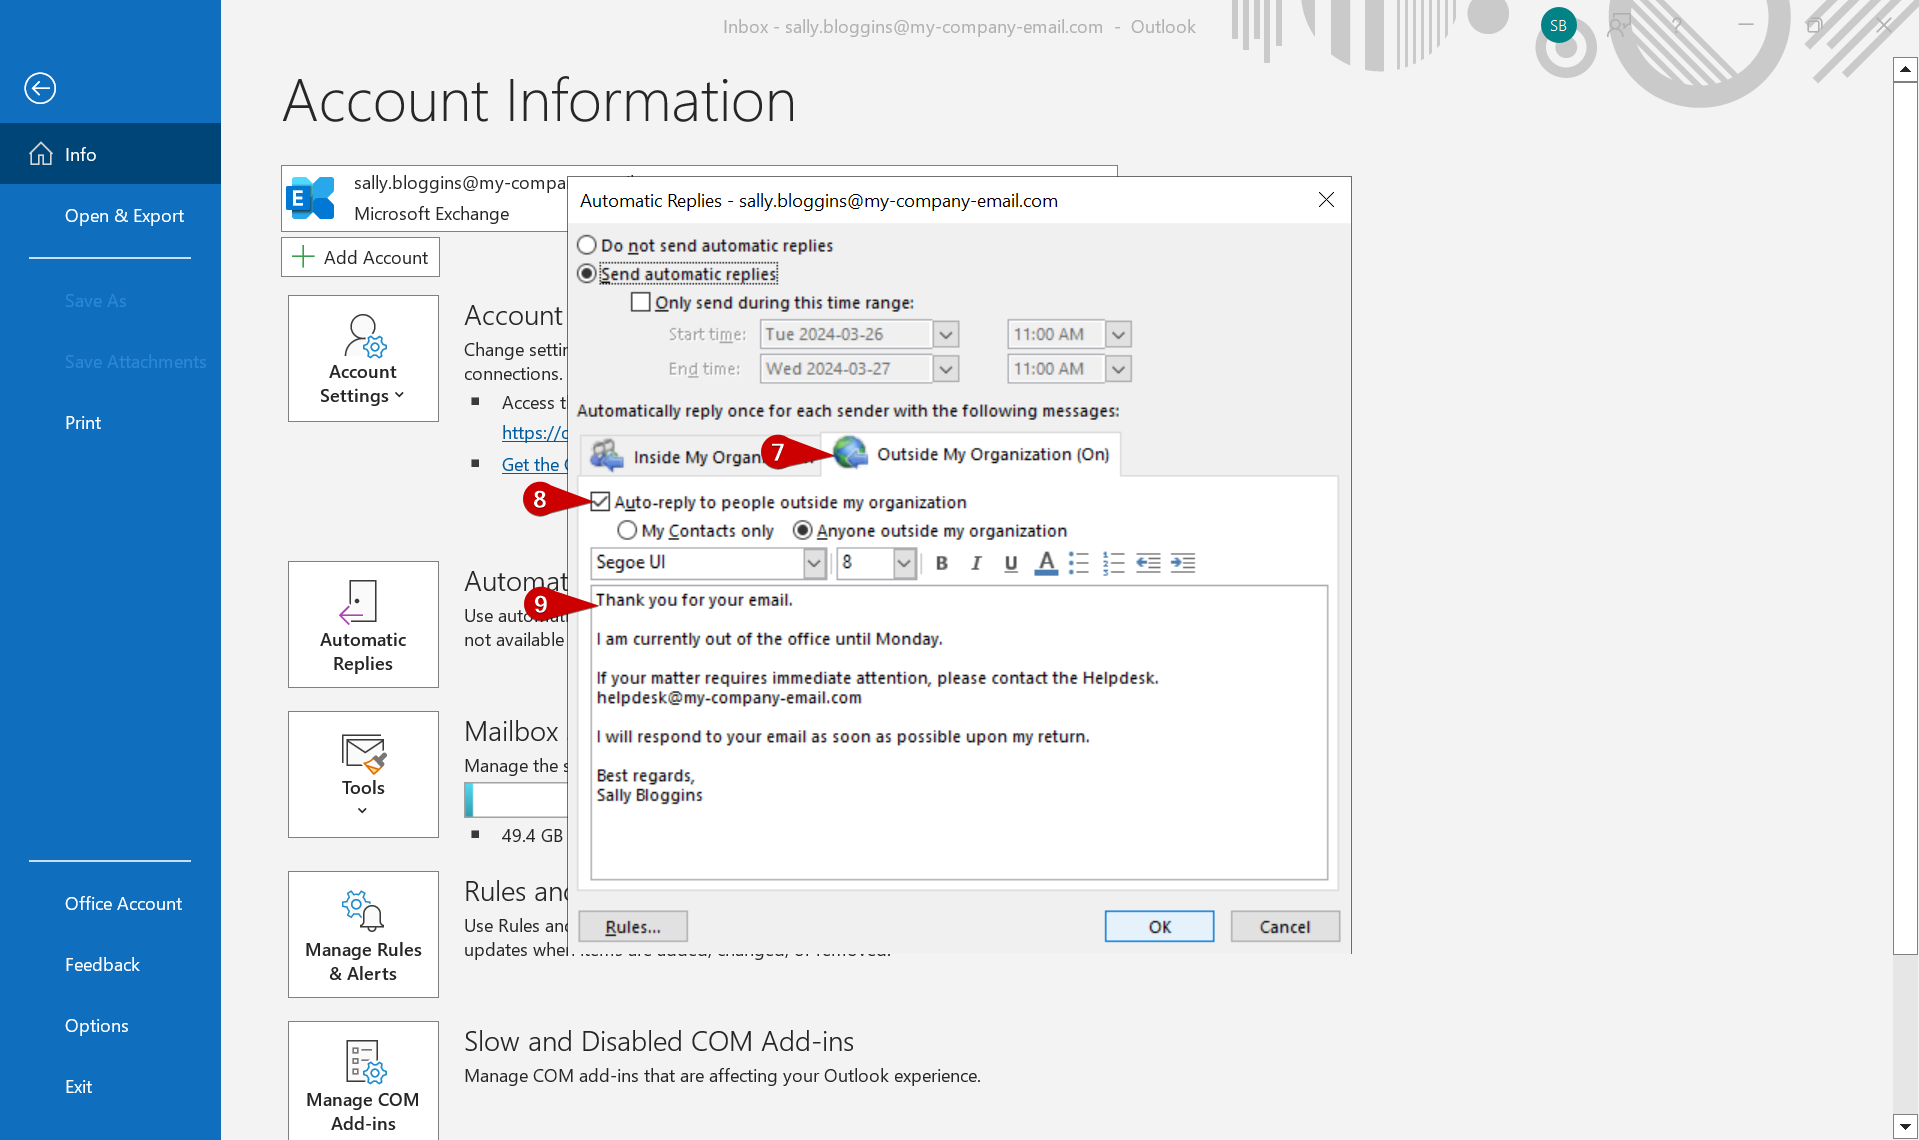
Click on the “Outside My Organization” tab.
-
Decide whether you want to send emails to people outside your organization as well. If you do, then check the “Auto-reply to people outside my organization” box.
-
Enter the message that people outside your organization will receive when they email this mailbox.
4.
Schedule Automatic Replies
If you would like the Automatic Replies to start and stop automatically, you can schedule it as follows:
-
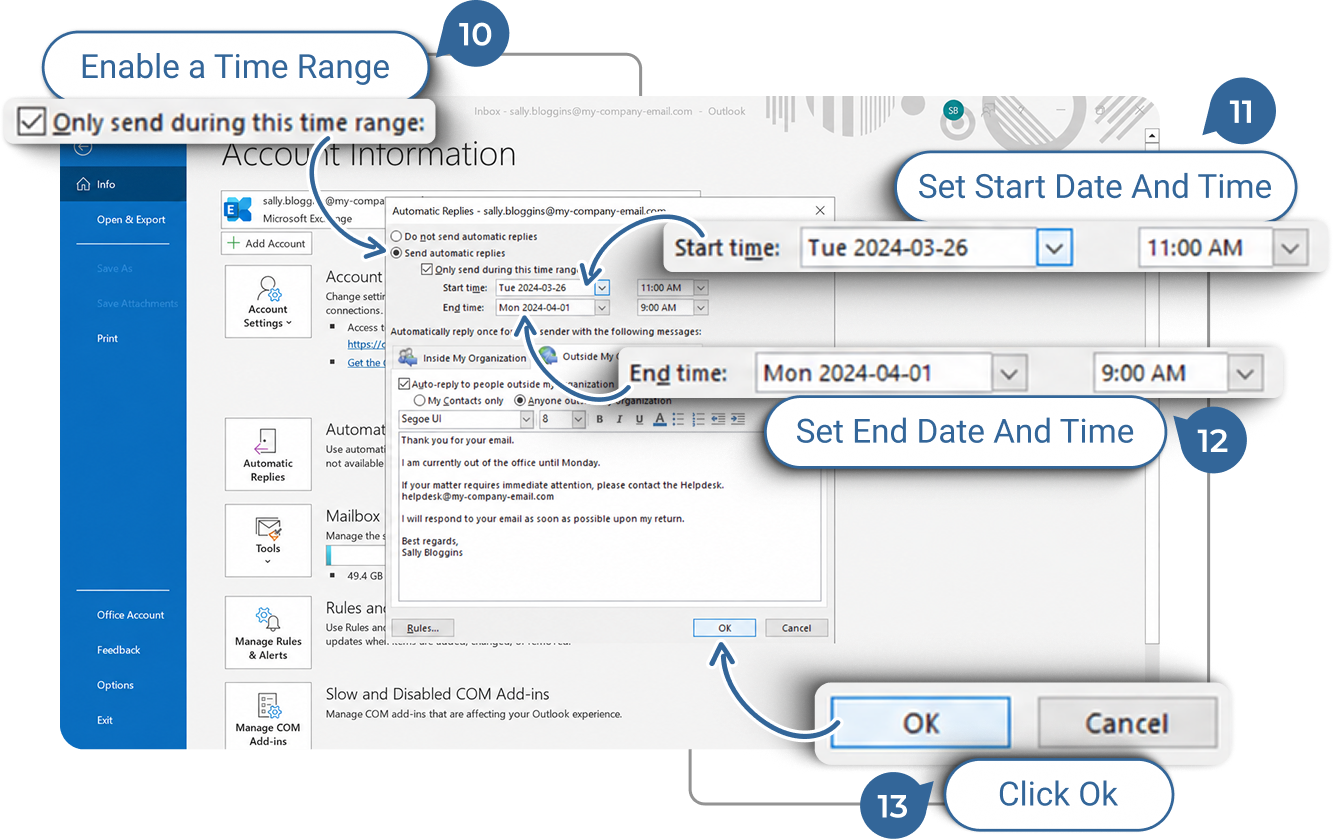
Check the “Only send during this time range” checkbox.
-
Enter the Start Date and Time.
-
Enter the End Date and Time.
-
Finally, click on the “OK” button to save your Automatic Reply settings.
Your Account Information page will show the Automatic Replies section highlighted in yellow when Automatic Replies are active.